Tuesday 31 July 2012

Happy Corner Bookmark

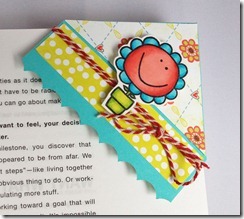
Happy Tuesday!  It’s Ruby here to share a little corner bookmark with you.  I’ve seen these bookmarks for a while and wanted to have a play seeing as I have too many books on the go right now.   It was great fun to make and quite quick too.
310712_thumb[1]
I created the corner bookmark using a tutorial over at Splitcoaststampers that I’d printed ages ago (but never quite got around to it!) and then stamped my happy little flower from the Paper Smooches Perky Plants set.  I thought the flower would match my bright and cheery papers.

This is what it looks like on a book happily marking my page..
310712 (2)
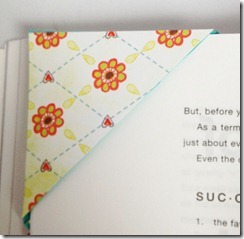
and this is what the back looks like..
310712 (3)
These would make fun little gifts for people.  I love that the Paper Smooches’ stamps work so well with them, adding a bit of fun and colour to the day!

I’m off to read now, have a great week!

Saturday 28 July 2012

The Coolest Bear!!

Happy Weekend everyone.... I hope you've all enjoyed a warm week of sunshine :0)

Yes summer arrived this week so what do I decide put on a card in these high temperatures.... the coolest bear around, yep a Polar bear!!!


I've used the bear from Happy Camper and carefully inked him so as not to include the line around his muzzle because I wanted him to be a polar bear. The mountain range is from Get Outta Town which I also selectively inked and cut out to add to the scene. I wanted the bear to stand out a bit from the scenery so I made the backdrop a narrow panel and then stamped a shadow on the card base for my polar bear to stand on.
The sentiments are from two different sets called Sentiment Sampler and Swanky Snowdudes.

It's quite a simple scene but then that's what the Arctic looks like!!!

Hope you have a great weekend and thanks for looking :0)

Jenny x


Friday 27 July 2012

Dreams, Make Em Happen

I've fallen in love with this butterfly from Lawn Fawn's Flutterby Set - and although the sentiments that come in the set are perfect - I wanted to mix it up a little. I went digging through some of the older sets in my stash (reminding myself of the little treasures I've collected from Make The Day Special) and triumphantly pulled out My Cute Stamp's Elegant Birds* and Itty Bitty's Dreams, Make Em Happen. Perfection!


* This particular set is no longer available - but all of the My Cute Stamp Sets are currently on sale and there are plenty of similarly, delicious flourishes to be had.

Wednesday 25 July 2012

World go round


Hello.
I went  for lawn fawn for today's card,
Something bright and cheery.
 And have used the merry go round image from Admit one.
I used Copics to colour the image.
Thanks for looking.

Tuesday 24 July 2012

A Retro Notepad

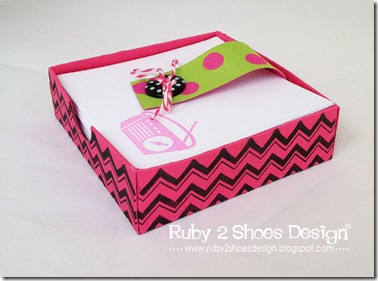
Hiya, it’s Ruby here.  I have a little notepad to share with you today.  I saw this notepad tutorial over at Splitcoaststampers last week and instead of doing what I normally do (filing it away on my pc as another thing on my ‘to make’ list) I thought I’d actually make it straight away and this is what I came up with..
240712
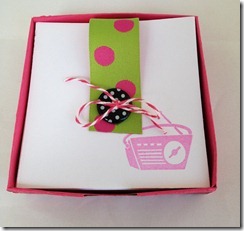
Below is a picture of the top of it, sorry about the piccie, it’s a bit distorted.  It is a perfect square, honestly!

240712(2)
So here’s what I did…. I followed the tutorial over at SCS and stamped the chevron pattern from Lawn Fawn Chevron Backdrops around each of the four sides in black ink.  I added the polka dot ribbon and then the little polka dot button with a bit of twine that I adhered with glossy accents.

The little pieces of note paper were then stamped with that adorable little radio from the Lawn Fawn Stay Tuned stamp set.  I just LOVE that radio, it’s sooo retro!

If you have time this week you have to try making one of these.  It’s a great one to try with the kids, my 12 year old loved making one for her friend and I’m lovin’ having a funky little notepad set in my kitchen!


Sunday 22 July 2012

Butterfly Postcard

I like to have a few postcards ready to send so used the Flourishes butterfly stamps to make this one.

I stamped the butterflies on to the postcard using Versamark ink and then heat embossed them with clear embossing powder. I then used Ranger Distress inks to colour over the card before using an iron to remove the embossing and leave the butterflies.

Finally I stamped the sentiment using distress ink:


Thanks for visiting!!
Jo xx

Saturday 21 July 2012

A Brightside Jotter Pad!!

Good Morning ...

YAY..... it's the first weekend of the summer holidays which meant this week I have been making gifts for my lads teachers, being a special needs class he has three members of staff to make gifts for.

I had bought three of the shopping list jotter pads and wanted to give them a decorative cover so I used the Lawn Fawn Brightside Collection papers for one of them.....


I took some photos whilst I was making the cover...apologies for the quality of some of the shots, my craftroom doesn't have the best light for photography :0)

To make the cover rigid I used thick card board (the sort you find on the back of A4 refill pads)
The pads were 7x21cm so I made the front and back panels 9x21cm and the spine 14mmx21cm

I chose my patterned paper from the 12x12 Brightside pack and stuck the card down like so....the gap between the three pieces should be as wide as the thickness of the card you're using :0)
Trim around the piece leaving yourself at least a 12mm border.

This is how I trimmed the paper so as to fold in the edges neatly..... remember those days of covering your exercise books at school!!!

I used a contrasting paper to line the cover which I cut about 3mm smaller all round.
To glue it down only apply tape or glue around the four edges of the lining piece otherwise you will have trouble with buckling paper when it comes to closing your cover...... don't ask me how I know that *wink*

 When it comes to closing and bending your cover you need to ease the paper into the folds with a bone folder gently and help the lining paper crease.


I made two strips by folding a piece of the paper three times for strength. These held the back of the notepad in place whilst allowing it to be removed and replaced at a later date.
I also incorporated a loop of ribbon in the lower strip to hold a pen in place.


The front fastening is made with a button from my stash and Lawn Fawn twine which I attached through the front cover with a small knot.


Sorry for the long post but I hope the tutorial helped.... the fun, bright colours and patterns in the Brightside paper pack are just ideal for projects like this or the  6x6 pad would work for smaller projects too :0)

Thanks for looking today and have a great weekend :0)

Jenny x

Friday 20 July 2012

Thank You Kindly

It's no secret that, at the end of a scrapbooking, I like to use up all of the little leftovers lying around on my desk in a quick card making session. It's much more fun to use your scraps than to tidy them all away, but it can be difficult to make projects that look pretty and professional. 


I find that the combination of scraps, sewing and stamping always seems to work for me. Somehow the addition of some machine stitching and some quality sentiments make the use of scraps look purposeful. And I'm always left with cards that any of my friends would be happy to find in their mail.


I love the beautiful fonts from the Layers Of Color Sent With Love Set (which just happens to be on sale!) The gorgeous scrolling makes a simply stamped sentiment look fantastic, so I've used two of the main sentiments to finish off these simple, little cards. 

Thursday 19 July 2012

Really Inky!!!

that's what my fingers are.....

Hi there! I have a Tag to share with you today...it's ages since I've played with Tags and you really don't want to see the state of my fingers...Just hope it comes off in the shower later!!!
I started by colouring the base Tag, which is Gloss card. I used 'Inkabilities' inks just put onto my craft sheet, sprayed with water and then I swiped my tag around in it...It created the lovely drips!
I used my most favourite stamp set 'Imagine It' designed by Donna Downey.
I stamped the Scroll with a Red StazOn then over-stamped in Black. I then threw clear embossing powder over it all...Not everything was still wet, so it gave a nice uneven look to it. I do uneven really well....I couldn't even cut the Tag straight!!!! The sentiment was just stamped and embossed on a piece of card dipped after the main tag, so it's a bit lighter...
Thanks for looking and I'll see you soon...

She xx

Wednesday 18 July 2012

Out of this universe

Hello.
Its finally the end of the school year.
I have been busy making the last of my teacher thank you cards.


Something not school related but hopefully appreciated.
My daughter thinks a lot of her teacher so this seemed perfect.


This one is similar to an earlier card from Jenny.
I wanted something similar but to look like a chalkboard.
I bet many of our kids only have whiteboards now and wont have clue what this is about haha.
All images were coloured in using Copics.

Stamp sets used are.....

Paper smooches.

Lawn Fawn.

Thanks for looking.


Tuesday 17 July 2012

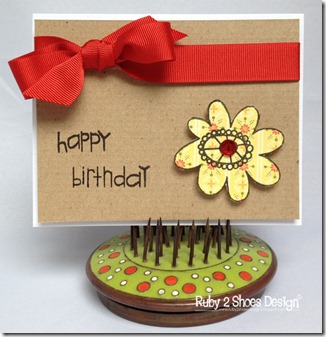
Hi there, it’s Ruby.  It’s been a very busy week so I have just a very simple card to share today with you.  My daughter needed a quick birthday card and this is all I could come up with when I had about a ten minute deadline lol.  Talk about lastminute.com!

170712

I used Paper Smooches Sentiment Sampler for the sentiment and the flower is from Paper Smooches Friendly Flowers, I just stamped it onto some Basic Grey patterned paper and added a gem to the centre.

Have a great week!

Saturday 14 July 2012

Thanks Teacher


Hello.
Its that time of year again to be making teacher cards.
I mixed up some Lawn Fawn and Paper smooches for this card.
My son wanted to make a card for his teacher.
He started by stamping the cat from Critters in the burbs's.
......Then he lost interest after colouring it.
I stamped and coloured the images from paper smooches Smarty pants.
Image coloured with Copics, now available at make the day special.
I made the background using School house backdrops.
And finally have used sentiment form both smarty pants and critters in the burbs.
Thanks for looking.

Thursday 12 July 2012

A Trio Of Cards!

Morning!...I think my post titles are getting worse......

Today, as promised last time are some Christmas cards! At first I was going to use a couple of different stamps, but I thought it might be good to see the same stamp used on 3 different cards...

Here they are...
I have used one of the gorgeous Itty  Bitties by Unity...'Peace and Joy'....Love this stamp. Now I'm not known for my simple, clean cards...in fact I find these the hardest to do...But once I sorted some card and some lovely backing paper I really enjoyed making these...Think my cards are going to be clean and simple this year!


For these two all I've done is stamp and clear emboss onto white card and a lovely Gold card then just made matts and added the embellishments.
For this one I've paper pieced the tree..
I hope these give you a couple of ideas on how to get a bit more mileage out of your stamps.

Thanks for looking I'll see you soon.

She xx


Wednesday 11 July 2012

Squeal ....Birthday wishes


Hello.
Today Ive been playing with some of my paper smooches stamps.
This image and sentiment both come from ...
I made the card base using my nesties.
Thanks for looking.


Tuesday 10 July 2012

Tag/Card/Recipe Set

Hi there.  It's Ruby. Today I have a little tag/card/recipe set to share with you.  You may have seen my lemonade set version on my blog a while ago, well I’ve got the bug now…

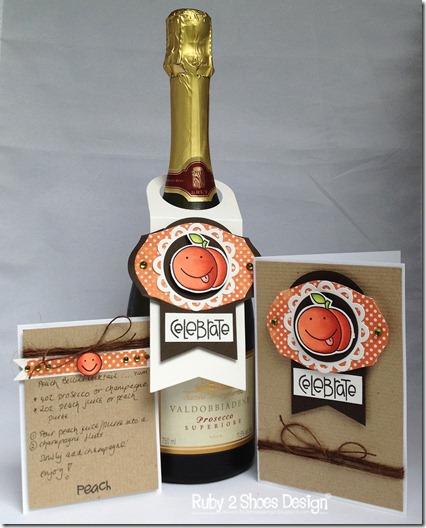
This one is all peachy!  I have been eyeing up the Paper Smooches Fruitastic set for a while now and when we had a gift to give I thought what better excuse to ‘have to’ buy it, I can wrap the gift and then do the bottle/accessories with my lovely new stamp set!  It’s always so much more justifiable if there’s a purpose, after all you’re kind of getting your money back on it in a way, aren’t you?!!

This little set started out with my peach; I stamped and cut 2 out then coloured them in with my Copics.

So taking each one in turn..
100712 (1)
(excuse the crumpled backdrop lol)
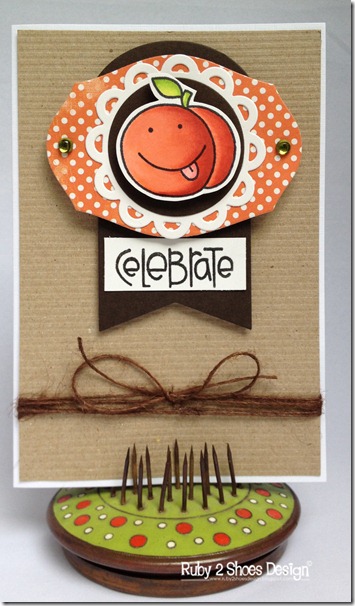
I matted the card base with card stock having tied around the twine bow before adhering.  I die cute the banner and stamped the sentiment ‘Celebrate’ from Paper Smooches Sentiment Sampler onto white cardstock.  I then die cut the label in polka dot paper, the doily label in white and then the chocolate circle (I always have to say chocolate and not brown because it’s my favourite food so brown doesn’t really cut it!) I then pop dotted my little happy peach on the top to finish.
100712 (2)
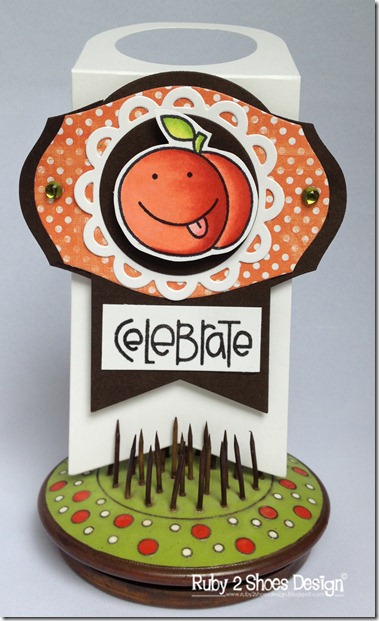
Next up is the little wine tag, the same layered effect but the finished panel was pop dotted onto the wine tag.  This was die cut but you can easily make your own just by cutting a banner shape and using a hole punch to cut out the top hole, I’m just lazy so bought it!
100712 (3)
Finally my little recipe card.  Again I matted the card base with kraft after I’d tied on the twine.  I then cut out the little banner, added some polka dot paper to tie the theme together and stamped a little 'berry’ which I am using as a peach.  I tried adding a little leaf to him but he just looked like he had a mohican so I decided against it!  I stamped the word ‘peach’ and then finally wrote on the little recipe. 
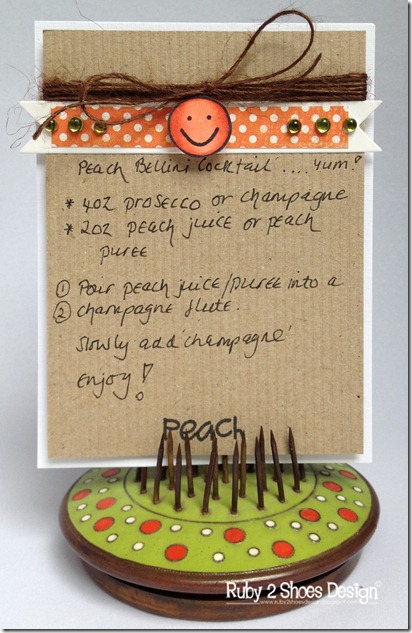
100712 (4)
I kind of worked backwards on this because it all started that I was going to do a ‘Kir Royale’ recipe but then I started reading around the symbolism of fruit and found that in China the peach is a symbol of health, long life and prosperity and that was what we wanted to wish our lovely friends so the peach it was!

Hope you have some fun playing around with some stamping today.  How could these little stamps not make you smile?!

Have fun!

Monday 9 July 2012

Hey, Hey, Hey!

I know, I'm always featuring cards that use greetings like 'Hello', 'Hey' or 'Hi', but really, I don't know that many people who happen to be getting married, or have just had a baby! These more generic greetings are perfect for just reminding someone that I care about them - and I send them all the time. Just because.

Hey

I'm currently in love with the Samantha Walker Blossom Stackers - I simply cannot get enough of the amazing circular and doily style images. I've used two of the larger images on this card - cutting them by hand and 'stacking' them with some dimensional tape.

Hey Detail

The cute 'Hey' sentiment from Boob Tubes by Paper Smooches, is also one of my favourites and, surprisingly, seems to work well with some of the more intricate doilies in the Blossom Stackers set. 

It just goes to show that combining your stamps successfully is all about playing around with colours and styles. So get out your stamps and your inks - and start messing.

Sunday 8 July 2012

Having a play!

Hi everyone its been a very exciting week here as we have finally taken delivery of our first stock of Copic markers! (currently at a special introductory price)  I have of course taken this as an excuse to break out my collection of pens for a play :)

I have made two cards using the Smeared Ink set Occasions Li'l Grumpies - I love the Li'l Grumpies!!!


The images were stamped in Momento black ink and coloured using Copic Ciao markers with a little Crystal Lacquer on the eyes.

Copic colours: Y00, Y02, R00, R20, R22 and C1
Papers and flowers by Prima

Do pop over to the website as we also have new Paper Smooches, Flourishes and Dies available.

Happy stamping
Emily

Saturday 7 July 2012

Teacher Thanks

Happy Saturday everyone.....

With the school summer holidays in sight I thought I would get a thank you card made for my youngest's class teacher and the Paper Smooches stamp set called Smarty Pants is a great set to use ....


The chubby pencil and crayon are fun to colour or paper piece, you could even make a whole pack of crayons or pencils in a rainbow of colours and there are loads of other elements to the set that would be ideal for making backgrounds or using as focal points as well

I've used a couple of sentiments from Chit Chat to make it look like the crayon and pencil have been used to write the sentiments.... now I need to get the grey cells working on a gift idea using the stamp set too!!

STOCK UPDATE
The newest Paper Smooches stamp sets are now in stock, they are called Space Cadet, Squeaky Clean, Teen Routine and Summer Groves and are all found on this page here ......and look what else has arrived...


......Make the Day Special are now Stockists of Copic Ciao markers, the perfect pens for colouring in the bold hand drawn images of Paper Smooches and Lawn fawn :0) ...they can be found here.

Thanks for looking :0)

Jenny x


Thursday 5 July 2012

Chloe checks....

her FaceBook status!!!

Hi there....

Today I have a little Journal page to show you using Chloe by Simply Betty. These stamps are really fun to use...get them whilst you can from Emily here

I have to say I love the left hand page but if I did it again I would probably change the left hand page! I really need to practise my writing!!!

I'd already inked and played on the pages and didn't like them..so out came my Gesso and I painted over them adding a little texture as I did so!
Chloe is coloured with ProMarkers and I used a little Mushroom for her to sit on!
Here she is...
Thanks for looking. I'll see you next time, probably with some cards...Oh yes it's getting close to that dreaded 'C' word and I've just got some lovely little 'Itty Bitties' from Emily...including the first 2 stamps to play with!!

See you soon.

She xx

Wednesday 4 July 2012

Baby girly


**If your looking for the UK Scrappers blog hop please scroll down.**

Hello.
I had to make a baby girl card.....
And in amongst all of my stamps i really do not have many baby things at all.
I have seen stamps of little baby vests but sadly don't own one.
So i went with making a big baby vest as my card base.
After 3 attempts at cutting the shape with my craft  knife and ruler i was finally happy with the shape.
(I will add a template later for those who would like it....EDIT its below.)
I stamped a heart all over in pink to make it less plane.
The heart and sentiment are from Paper smooches "a little lovin"
The girly sentiment comes from "Little lady".
I finished off with pearls.
Thanks for looking.