Wednesday, 12 August 2015

More pretty panels.


Hello.
As I said last week I have two more projects using the same pretty panels and some other reverse confetti products.
I have gone for a different technique this time and used the die cut as a stencil..


For this card i used one of the pretty panels to add some texture paste. 
While it was still wet i added some gold foil and left it to dry...don't rush this step as taking it of too soon will lead to uneven results.
Once everything was dry i added the tag to  my card base on some foam tape and added the card  strip with the sentiment and finished with some sequins and twine.


I used the same technique for this card and used the pretty panel as a stencil with the texture paste.
I coloured the tag with distress inks and perfect pearls than added the texture paste.
This gives a very subtle look and a background pattern for the little dog to go on.
With so much going on i left the dog white and just coloured the bow tie.
I placed the tag over my card base which i repeat stamped the sentiment in hero arts ombre inks.
Again i finished the  card with some clear sequins.

All products can be found by clicking the images below.

Diagonal Stripe Pretty Panel Lots To Say Tag Me, Too Confetti Cuts
 Puppy LoveGold Sparkle Single Twine
Gold Metallic Sequins Crystal Clear Sequins


Light Paste - Opaque Matte Gold Deco Foil

Ombre Ink Pad Mint to Green

Thanks for looking.


Tuesday, 11 August 2015

Hanging Out !


This is the set I've used and its due back in this week in store. If you need to be creating a fun canine (or other animal) scene right NOW, I've picked out a few in store for you that you might have missed.


So, back to the card. 
It started with a scrap.
So do many of my cards!
The blue piece I'd cut for something else and plonked it on a card base and started playing around. I'd stamped and coloured the woofers in a watercolour marker and started arranging them sticking out from the piece.
 Then I wanted them to be a little more tied in with the elements. One of the bottom right dogs is stuck behind the piece but the top ones didn't feel right. So I chopped into the shapes to slot them onto the top. You can see in the next photo that i've simply followed the image outline and this meant I could slot and attach them easily.
Unusually, I've added an even number of dogs. I never do this normally, but for some reason, it seems to work. 5 dogs in the lower right space seemed too many. Anyone any idea of why an even number seems to work here, please let me know, I'm all ears (doggy ears!!).

Better go, I've my own scruffy canine to tend!
See you next week,

Keren xx

Monday, 10 August 2015

Confetti and Cake


Hello, I'm back again :) We had a lovely week away in Cornwall and to ease myself back into creative mode I made a simple 'girly' birthday card for today's blog post using a couple of older Lawn Fawn sets and the new Confetti background stamp from MFT.


I was actually playing around with this design a few weeks ago for a Lawnscaping challenge but didn't quite get the colours right and shelved it for later. I've kind of based it on the style of cards you might see in Paperchase... very loosely based on them you understand ;)
I had already chopped the 'Happy Birthday' sentiment from So Much To Say into two for another card and discovered it looked like a tiered cake when stacked because of the tall, straight font.
I paired it with the cake stand from Bake me a Cake along with some candles and hey presto an easy cake :)

It was easiest to stamp the  pieces individually with Versamark starting from the bottom and apply embossing powder and heat it as you go. To apply small amounts of powder or selectively add coloured powder to different areas of the stamped image, I use a section of straw cut on the diagonal to act as a small scoop. I used this method for the white and yellow of the candles :)


When the cake was all embossed I made a rough mask from Post-it note paper and then used the Confetti background with a shimmery embossing powder to give the card some sparkle and interest on the white space.


                        Bake me a cake  So Much To Say   Confetti Background Stamp

Thanks for stopping by :)
Jenny x

Sunday, 9 August 2015

August Challenge Week 2

Here's your first reminder to play along in our sketch challenge this month.


You can flip the sketch and change the shapes a little to fit your design, as long as we can see our sketch was your jumping off point.  You must also use at least one product we sell in store to be eligible for the £15 prize voucher.

Need a little inspiration?   Well our fabulously talented design team will be here each week with our interpretations , here are the two great ones but make sure you come back in 7 days to see some more.


You have until 10pm on the 22nd August to link up your entry here when you've made it.


Open Windows

I was really excited by the new interactive window stax dies that arrived from My Favorite Things this week, so my projects today give a couple of examples of how to use them.  Grab a cuppa - it's a long post!

Firstly, I am playing at being a magician, and cutting a girl in half....   Let's open the window on Brittany the Birthday girl one of the Uptown Girl range from Stamping Bella.


The images are large enough to be the solo element on a card, and detailed enough too.    I cut a panel of copic colouring card the full size of my card base and stamped her on it.  I know they can look scary to colour, but it doesn't have to be complex.  This one took me around 15 minutes and I used just 4 copic markers for the whole dress.  Once she was fully coloured, I used the die and cut her in half at the knees, so I could add this on the front of the card inside the window...


....A view of what that yummy cake she is colouring would look like when you slice it ;-)   I used My Favorite Things Piece of Cake stamp set and then used a little die from Hip Clips to create a faux fastener for the window.

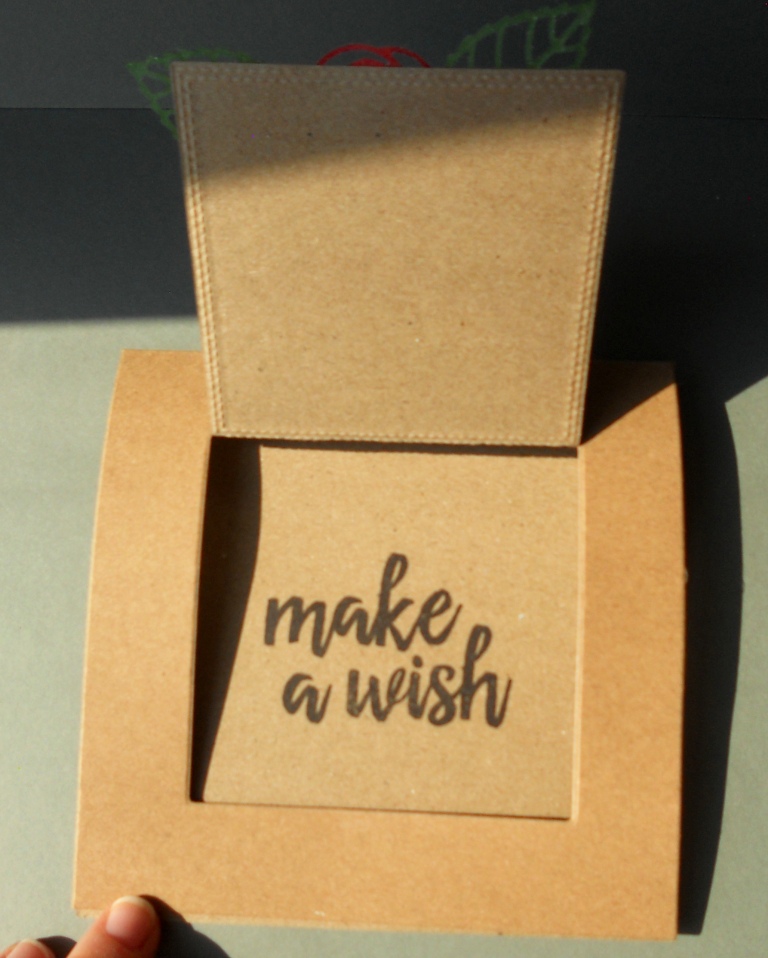
You can also use the windows directly onto the front of your card so the window opens up to see the sentiment on the inside.  That's what I did on this one.


A really simple kraft card with Scribbled Rose Overlay and Layered Leaves dies which have been foiled using stick-it and pumpkin and lime foil respectively.   When you use the foil in this way YOU DON'T NEED A LAMINATOR - YEAH!   Simply put stick-it on both sides of your card before you start to die-cut and then remove the release paper on the top and press onto your foil - remove - et voila - no fuss foiled embellishments!

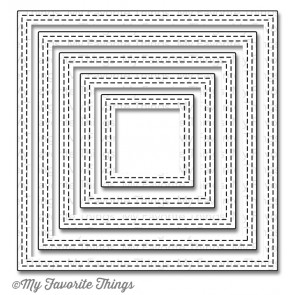
With a die like this, you can easily get a two-for out of it too.  I'll explain below, but first let's finish this card.  I added some double stitched lines around the window using the new double stitched square die (the large one fits the largest window die exactly) and then stamped a sentiment from Wplus9 on the outside and a complementary sentiment from Brushstroke Birthday on the inside of the card where it can be seen inside the window.


So, for the two-for - as the Scribbled Rose Overlay die is an intricate one, the "negative" spaces are close enough to create a interesting shape to use.  So here's a little tutorial on how to easily get them out of the die in their original spacing using foil.


  1. Add stick-it to the front and back of your card stock before die cutting.  [Using coloured card stock close in colour to your foil will be more forgiving than white if it comes out a bit rustic ;-)]  If you use a thick card, the back sheet of the stick it will stay in tact which is important for the two-for.  (Image 1)
  2. Take it out of the die, flip it over and remove the release paper from the front of the stick it ON THE OUTLINE AREA ONLY and apply the foil (Image 2) 
  3. Carefully remove the outline die away from the rear release paper using tweezers and leaving the negative pieces in place. - Create your first card with the outline die.
  4. Now comes the two-for bit.  Using tweezers remove the front release paper from the negative bits whilst ensuring the stay in place on the solid backing release paper.  (Image 3)
  5. Flip it over onto your foil and rub down well but DO NOT TAKE IT OFF THE FOIL
  6. Whilst still on the foil, remove the backing release paper and turn over and apply to your project (Image 4)  This way - all your pieces stay where they are until you are ready to place them down all at once - no fiddly messing around ;-)

Here's what I did with my negative bits from the card above - not bad for a two-for and bits that may have otherwise ended up in the bin.


 NEWS FROM THE STORE:

Arrivals and releases this coming week should include:

  • Wplus9
  • Mama Elephant
  • and with luck Altenew


Saturday, 8 August 2015

Stamping Bella Tiny Townies & Inktense Coloring

Hi guys, Julia here!

Today I get to share a stamp company that is "newish" to the Make the Day Special Stamp Store and was completely new to me, but their darling images have won me over immediately: Stamping Bella. You might know their quirky images, and I got a few of the newer stamps. They are blue rubber stamps, not red, and they are fantastic.


You might have already seen this image on Instagram, I posted it a while ago, but I didn't know if I wanted to turn into a card or not. Eventually, I used a Mama Elephant die to cut it from the watercolor card stock and glued it onto a purple card base.

The coloring was done with Inktense pencils, and I found that it takes quite a while longer to color with these than with, say, Copic markers. Why? Cause you're putting down one layer (lighter color) first, then let it dry. Then you go back with a darker shade and let that dry. And then you repeat this until you are happy with the results. In total, this image took me about two hours (easily) to color, but I found it very relaxing.


I hope you enjoyed my little behind the scene look at how I put the card together. Thanks for stopping by, let me know what you think, and have a great day!

Friday, 7 August 2015

Bright and bold mini mice shakers.

Hi everybody,

Hope you're well.

I've got some bright and bold watercoloured shakers to share with you today...


Which I brought, slightly, back down to earth with the help of some vellum.


And, just for a change, (she jokes), I used all Mama Elephant goodies...I can't help it, I just look at them and I need to play with them!
I started by die cutting three circles from my panel.  I then took the uber cute little mice from the 'Tandem Rides' set, and stamped them out on my leftover circles.  I coloured them using the Zig Clean Colour Pens with water - such vibrant colours!  
I then used the 'Zenith Borders' set;  repeatedly stamping out one of the borders and clear heat embossing, to create my background, ready for some smooshing and washing across with various Distress Inks, (Mermaid Lagoon, Mustard Seed, and Picked Raspberry).  Now I love me some bright and bold colour - but my background ended up resembling a ker-azy tie-dye t-shirt..a bit much, even for me, so I muted it slightly by covering in vellum.


I adhered some acetate behind my windows, surrounded in shaker tape, added all the delicious sequins and glitters I wanted to use, and covered the back with a piece of acetate - it's such an easier way of sealing everything in so you can then line your background up without needing an extra 3 hands!  I cut the 'Friends' die a few times and covered the front in Black Sparkle embossing powder.  I then stamped out the 'Happy Birthday' from the 'Woodland Gifts' set, (love, love, love this font!), and, again, heat embossed in Black Sparkle.  I added the little speech bubble from the 'Tandem Extras' set for a bit of extra fun and lined up my little critters along the back, adhering them to a piece of card, and then putting the whole thing together.  There was quite a lot going on already (understatement of the year!), so I skipped on embellishments!


Oh, I also added a little trim of die cut grass behind each little window - but it kind of got swallowed up by all the mayhem haha. 

As always, everything is linked below, so go check out the cuteness.

See you next week where, I promise, I'll 'step away from the Mama Elpehant'...maybe ;)

Jillx

                                                Tandem Ride   Friend Script Creative Cut                                                 Woodland Gifts     Zenith Borders
Tandem Extras