Wednesday 31 July 2013

Dino birthday


Hello.
Today i have a dino birthday card that i made for my nephew Keane.
He knows all the names for dinosaurs and has done from a very young age, he loves them in a big way.
So it seemed appropriate to make a card using Paper smooches Cutasaurus which is currently out of stock.
I also used the matching dies which are in stock and you can get here.
I coloured all the images using copics.
Other sets used are Birthday sampler and He said she said.
Thanks for looking.

Tuesday 30 July 2013

Layers of Lawn Fawn

Hello! 
Keeping you on your toes again today-its Lou here!

Today's card is a Lawn Fawn one,using the Bright Side Petite Paper Pad and Grand Greetings  sentiment set (SUCH a useful set!),plus a handmade flower and a bit of ribbon. 


It is surprisingly easy to do-I cut four circles out from each of the papers I wanted to use,using a 3/4 inch circle punch. The hardest part is lining up that first line,but once you have them in place,the rest are easy peasy. Just glue the smallest bit at the top of the circle,then you can slot all the other circles underneath. Trim any overhangs and in between each circle along the bottom and add ribbon across the top and flower or any other embellishment and add your sentiment.
 I love the look of this card as it seems to appeal to all ages-my 3 and 7 year olds went mad over it,each requesting one (Oh great!) and my Mum and her friends love it too. So I can declare with conviction that Lawn Fawn papers are universally appealing ;-)
I hope you give this technique a try-it is great fun :-)

Lou


Monday 29 July 2013

Colour Me In!!

Hi everyone!  I was just thinking about what would be needed on a dull, wet Monday in the middle of British summertime.. and I thought...bright colours!
So here is my card for today!
It's such a versatile set which just shouts "colour me in!!".  I used promarkers to colour these.
Hope you like it!
 
Tracyx

Sunday 28 July 2013

Dreams of books

I seem to be overrun with cards and tags so decided to make a bookmark for today's post as I'm always needing more of them, with books lying all around the house!!

I started with a base of watercolour paper which I sprayed with Dylusions inks and then stamped the image from Unity's Love Life stamp set using black Memento ink. I then doodled around the edges using Posca paint pens and added a ribbon:


Hope you're having a wonderful day where you are and thanks for visiting!

Jo  xx

Saturday 27 July 2013

A Little Something.....

Good Morning.... Jenny here :0)

No Prizes for guessing which companies stamps I've been playing with for todays blog post!!!
We're all bathing in Wplus9 yumminess here at Make the Day Special 
as I expect many of you are too :0)

I dived straight into the Blanket Stitch Blooms and Dies and had fun making up some flowers...


Blanket stitch takes me back to my early school days, I think it was the 
second or third stich I ever learnt in sewing club and I definitely remember sitting and carefully 
stitching all the way round my Girl Guide campfire blanket!!

It's not so time consuming to make these blooms and I found that stamping the
stitching first and then filling in the coloured layers was the easiest, before die-cutting
 them out using the method I highlighted on this post.
I love the two part sentiments in this set which are geared up for
Get Well Soon cards although I think this sentiment could be used 
for other occasions too :0)

I also managed to finish off my Mini Card set from last weeks post, I made a small box in 
the end and decorated the lid....


... I was really pleased with the end result and they were gratefully received too :0)

Thanks for stopping by
Jenny x

Friday 26 July 2013

Using Up Some Waste ...

Happy Friday one and all. I hope you have all had a great week, me and the little ones have had a very relaxed first week to the summer holidays crafting, movies and running around.

It's my day to post over at Make The Day Special..... and guess what (if you hadn't seen my post yesterday) Wplus9 has landed at the Make The Day Special store ... I'm sooo excited about this as the Fresh Cut Florals stamps and dies have become my favourite go-to set :-D

When cutting out the flowers out of white card I was left with quite a bit of negative 'waste' so I thought it might be fun to have a play with this and utilize it on a card. So I inked it up in a ombre effect from pink to purple and layered it onto a kraft card.

I then thought it would be fun and a bit different to stamp the flowers on to a kraft background. It gives such a different look to stamped onto white - much more muted.

The frame on which the bouquet has been placed is from the Avery Elle set 'Framed Fonts', it is such a great set - the sentiments are awesome and the frame is soooo easy to cut out ..bonus!! I then added the lil 'You Are Invited' from the Paper Smooches set 'Salutations'

I hope I have inspired you to use up that pesky 'waste', have a great weekend.

Hugs, Lydia xxx

Wednesday 24 July 2013

Quick thank you cards

Hello.
Sorry for the late post today.
Today was the kids last day of school and yesterday morning i thought i had better whip up some quick cards.
I didn't want to go down the normal route of apples ,books and blackboards so i went with something more personal.
My son has had the best support from his teacher and TA and i wanted it to look like he was saying "Thank you".

I found this recent photo and loved it.
I then used the Lawn fawn stamp set Many thanks for the speech bubble.
And then added the teacher and TA's names using Claire' ABC.


There you have it two quick thank you cards.
 It took about 10 minutes to make both.
Thanks for looking.


Tuesday 23 July 2013

Bee Mine- You know you want to!


Happy happy Tuesday! The world may still be buzzing (!) with the news of a new royal prince, and had I stayed up until 2am I might've been able to produce a successor to this card fit for a royal announcement. As it is, you're stuck with these little creatures. It is such an incredibly fine stamp set that it is out of stock.
(shhh...)
However, specially for your perusal, I'd like to introduce you to this wonderful set that you could so use the similar images for to create a royally circular one like mine.
The sentiment of 'woohoo' is entirely appropriate. I'll stop now with the celebratory mood- it wouldn't do for us Brits to get too excited!
See you next Tuesday with my usual subdued self ;-)
 

Monday 22 July 2013

Keeping it Simple!

Hi! Tracy here wishing you a happy Monday!  My card today is a simple one - as I've been on holiday and had no crafty-me time!  Will soon put that right though - I've a stack of new goodies from MTDS that I've not had a chance to play with yet!

Today's card shows (I hope) just what you can do with some very small embellishments!  I've gone with the gorgeous and co-ordinating goodies from Lawn Fawn for this card.

 
Using one of the small flowers from Summertime Charm, and the co-ordinating die, and the little "thanks" sentiment from Good Fortune
And now I've just realised that Summertime Charm is out of stock at the moment - although the same card could be made with a multitude of other stamps (Blissful Botanicals would work a treat!!).. so I thought I would make another card for today - sticking with Good Fortune.. using the co-ordinating dies again, and the lovely Daphnes Closet papers!
Have a lucky Monday!
Tx

Saturday 20 July 2013

Paper Smooches Mini Card set

Hello :0)

With the end of the school year approaching next Weds(!!!) I thought I would perhaps make some mini card sets as teacher gifts. I always leave these kinds of projects to the last minute and the hot weather just hasn't helped the enthusiasum either but here is a six mini card set using Paper Smooches stamps..

The cards are 4" square and I've used Bold Blooms, Leafy Greens and Reflections stamp sets. I had some fun with colour combos on the three unisex patterned designs and loved mixing up stamps to make pretty florals on the remaining three designs.
I tried to choose a selection of useful greetings and kept the cards quite simple and without loads of embellishment.... not everyone appreciates paying higher postage!!

I have every intention to make a lovely folder/wallet to put them in but alas time and the heat beat me this week!! I'll pop back and show you that next Saturday.

I know you're not supposed to pick favourites but this has to be it...


... the SU Wisteria Wonder ink pad inspired this design :0)

Thanks for stopping by
Jenny x

Friday 19 July 2013

A Floral Thank You

I can't believe that its my baby boys last day in nursery... it only seems like yesterday that i was crying that my baby was starting nursery and now he will be going full time in September. It's true what they say - times stops for no man.

So today it's my day to post over at Make The Day Special and I'm going to share a CAS thank you card......


If you have been looking at the Paper Smooches set 'Leafy Greens' thinking 'I love those leaves but I wish there were some flowers'.... well if you use the three leaf stamp and stamp it twice, making sure the second stamping is inbetween the spokes of the first you can make the cute little flowers on this card.

After stamping the flower cluster and stamped a sentiment block from the Avery Elle set 'Framed Fonts' and finished the card with a couple of scattered liquid pearls. 

Have a great weekend!

Love Lydia xxx

Wednesday 17 July 2013

Framed fonts


Hello.
I have  a really easy simple card for you today.
As we are having this heatwave in the UK its too much to sit down crafting for a long time.
I have used Avery Elle's Framed fonts stamp set.
The frames were stamped in various colour inks before i added the sentiment and some sequins to finish.
Thanks for looking.


Tuesday 16 July 2013

Sweet Letters


Hi again! It's a trendy Tuesday! Just incorporating some of the current paper crafting trends; ombré and sequins. I've used 2 small stamps from this set
 

and by just masking using post-it notes created a much larger focal point that I've simply coloured in with Copics and added some glitter to finish. I thought I'd use up some cream cardstock but I'm struggling to make friends with vanilla. Vanilla should be saved for an ice cream cone. I'm returning to white for next week. The brief dalliance with off white was exactly that; brief! 
I'm going back to stroke my white cardstock and leave that colour for all of you talented artsy and vintage crafters. Lessons on 'creating with cream' gladly accepted!
 
See you next week with some dazzling white!


Monday 15 July 2013

Sit! HEEL! Stay!

Hello! 
Lou here back with another of those accordion album cards (oh my,I do love this die!). The title is in both reference to the stamps used and the method needed to wrangle this card together lol. This one is a birthday card for my daughters BFF,who,I was informed,happens to love dogs with a passion so I thought this was a great opportunity to pull out that awesome new stamp set and matching dies from Lawn Fawn "Critters at the dog park" ,plus a bit of twine and the Lawn Fawn "Daphne's Closet" petite paper pad,one happy birthday girl :-)
Hope you like it!

Lou


Sunday 14 July 2013

Sunny Sunday cards...

A little bit late in the day for my card but it's been stinking hot here and the last thing I've felt like doing is crafting!!

I've made a couple of cards using a stamp from Unity's kit "The Right Words" but coloured the stamp in two different ways:


I hope that you're enjoying the weather wherever you are?!

Thanks for visiting
Jo xx

Saturday 13 July 2013

Fishy Fun!!

Hi there, looks like we are going to have another weekend of hot, dry weather so my subconscious took me in the direction of water for todays card!!
I've used the chalkboard from A Good Apple and turned it 180° to make an aquarium for some fishy fun.....


To create the water I stamped the board/tank onto a post-it note, then using a craft knife I cut out the middle section with a splash and ripple along the top for the water line. Place the mask over the stamped image on the white card and then I used distress inks blended together with a flick of water afterwards to make watery bubbles. I handcut a couple or water splashes from a post-it note too so I could use them the same way :0)


To give a realistic glass sheen to my aquarium I cut the frame from grey card and stuck a piece of stamp packaging behind it before adhereing to the card... not so bulky as acetate. The fish are from Critters under the Sea and the sentiment is from another watery set called Swimsuit Season which are both out of stock at this time.

I hope you enjoy your weekend and thanks for looking :0)
Jenny x
Friday 12 July 2013

A Bright Framed Fonts

First things first ... "Happy 4th Birthday Little Roo, I hope you have a great day lil' dude, Mummy loves you :-D". I so can't believe that my little boy is growing soooo quickly and that his little sis will be two on Sunday!!! Eeeek, time flies.

Well on to my post over at Make The Day Special today and guess what ?!?! I have made a birthday card... oh and guess what stamp set I used... my fave of the moment Avery Elle's Framed Fonts!! 


Just totally loving how this set could be used for anything and for any crafting style ... it can be used for the main feature or just an added sentiment. Just an all round great staple to have in your crafting arsenal.

Well gotta run, have a great day and even greater weekend xxxx

Wednesday 10 July 2013

And many more


Hello.
I'm here today with a card using Avery Elle stamps.
Sets i used are All occasions tags and framed fonts.
I kept the design simple and used masking to get parts of the sentiment different colours.
If you head on over to the shop the Avery Elle pre order is up and running :)
Thanks for looking.

Tuesday 9 July 2013

New Home Card !


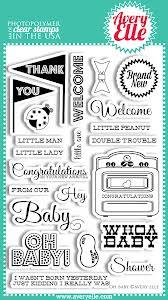
Hey! Wow. It's so hot. Not the weather to be baking really- but we all need eat cake sometime! So on the theme of baking and welcoming this little card is a new home card. Another project in my mini series of using Avery Elle's 'Oh Baby'. Aka 'thrashing the living daylights out of one solitary set of stamps'!!
I hope you've seen how versatile one baby set can be- I can't tell you how much I've used this set already - for so many different occasions and not one has been to welcome a new baby ;-)
I know you've probably seen the set already- but thought I'd post it for any new readers & just to remind you of its supreme gorgeousness! I've masked off the congratulations sentiment near the bottom so it wouldn't show through & then used the sentiment over the heart in the oven.
The bottom edge of this clean and simple offering (its so clean there's hardly anything on the card and it's so simple my 5 year old could do it) is a smidgeon of Lawn Fawn papers- these ones..
The little bow has been coloured in and then some of the colour 'pushed' away with the colourless blender pen. I love making little details on my projects using this handy little pen.
 
Anyhow- better dash..
see you next Tuesday.. and I promise to use another stamp set ;-)
 
Keren x


Monday 8 July 2013

Nice in a Jar!

Hi, and happy Monday!  I've been busy playing with these gorgeous new goodies from Lawn Fawn this week! 
 
I coloured them using Promarkers - the strawberries were great fun to colour and they look good enough to eat!
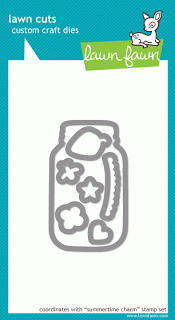
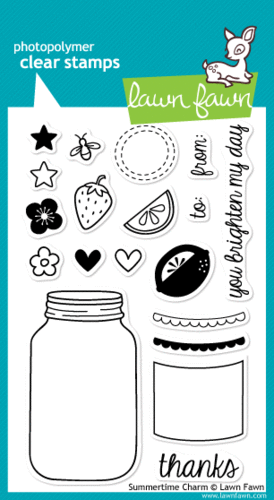
The stamps are from the love Summertime Charm set. I used the co-ordinating die set to get lovely clean die cut shapes.
 
 
The papers are from Lawn Fawn "Daphne's Closet".  Lovely fresh colours and cheery patterns!
I hope you like them!
 
Tracy x


Daphne's Closet Petite Paper Pack Summertime Charm Dies Summertime Charm


Saturday 6 July 2013

Party Fireworks

Happy Saturday to you.... Jenny here :0)

I think here in the UK we tend to associate fireworks with Bonfire Nifght celebrations when it's cold and dark early in the evening but of course our American friends like to mark Independence day with them in the summer.  It was only natural that Lawn Fawn would have a stamp set called 'Happy 4th' geared up for this occasion in their latest release... I had to have it because the colourful bursts come in handy for lots of celebration cards....


I've used a technique for this card that has become quite popular in the cardmaking world but I have simplified it and I think I like the end result better :0)
After stamping the fireworks across the white card I placed my letter dies on top, cutting edge down, and secured with washi tape so they couldn't move whilst passing them through the big shot!!
Next I used a contrasting colour card to die-cut the word four more times before stacking and glueing the letters together... this gives the raised effect whilst also giving a hint of colour around the edge of the letters....


Once you've backed the white card onto another piece it's just a case of placing the letters back in their holes...  like an easy puzzle :0) oh and remember to save and add the small pieces from the middle of any letters just like I had to here with the P,A and R.... then embellish with gems and glitter as you wish :0)


Thanks for stopping by :0)
Jenny x

Friday 5 July 2013

Hello Again...

Hello again!!! It's Lydia here again at Make The Day Special and have a card to share with you using a fabulous stamp from Avery Elle....... did you hear that Avery Elle is the next pre-order happening at the Make The Day Special store next week!!!! Eeeek too too excited !!


I used the frame and one of the sentiments from the Framed Fonts stamp set.

Hope you likie, see you next week.

Love, Lydia xxx

Thursday 4 July 2013

You Rock

Hi there, Lydia here a day early!!! Hope everyone is enjoying their week and can you believe it's only thursday ?!?!?!

Today I want to share with you a one-layer card.... totally out of my comfort zone, but being part of this awesome team I really wanted to give it a go...... would love to here what you guys think.....


I used a masking technique to get the trees behind the rock, then coloured with copicss. All of the image stamps are from the Paper Smooches set 'Cutasurus'.... one of my absolute faves. The 'You' is also from PS and is part of a sentiment from the 'Birthday Sampler' set. The 'rock' and arrow I have doodled in myself.


Hope you have enjoyed.... TTFN..... see you REAL soon ;)

Love, Lydia xxxx

Wednesday 3 July 2013

Love & huge hugs


Hello.
A simple one layer card from me today.
I used paper smooches We connect and reflections stamp sets.
I stamped the sentiment in black archival ink and then stamped the flowers around using chalk inks.
I simply added some rhinestones to 3 of the flowers to finish.
Thanks for looking


Tuesday 2 July 2013

Shabby Star

Hello!
All mixed up,just to keep you on your toes today as it is Lou here :-D

Ok,so today's card/tag is one of those things that happens from something completely different to what was originally in your head. 
I thought I was making a good friend a fairly punk rock Birthday card,using the gorgeous new Lawn Fawn Blue Skies set available here and using the largest Puffy Star die from the set as a base. But instead I saw my poor underused Sunny Skies set and their awesome new dies available here and here staring at me...(you know how they do). 
I have been desperate for those Puffy Star dies-how can anyone resist them! So I cut the largest on blue cardstock,then used white ink and a piece of cotton wool to blend out some clouds all over it. Roughed up the edges and inked them just a bit,for a bit of definition. Cut,stamped and coloured the birds and roughly placed them so I could get the ribbon in the right place. It took a little while to get the ribbon in the right looking way,but got there in the end! I used a tacky glue to sick tiny bits of its edged down as this gives fabric a bit more flexability. Then stamped the sentiment onto it and inked the edges of that too,as it looked to clean lol. I dyed a piece of seam binding to look slightly cloudy and sky-ish to top it off. I hope you like it as much as she did :-)

Lou x


Monday 1 July 2013

Celebrating the Tiny Stamps!


We're mixing it up a little this week. I'm up one day early and you'll find a few of us are swapping around. Variety is the spice of life and all that! I'm following on from last week's post using Avery Elle's 'Oh Baby' set...
 
..except this card isn't remotely a baby one. I wanted to use a tiny stamp and do lots of repeat stamping - so, if you look carefully you can see the circles are just repeated bows. Just by adding a little colour using Copics you can create something a little different.
Enjoy your Monday- and see you next week,
 
Love, Keren x