Friday 31 July 2015

July Challenge Winner

We'll have a brand new challenge starting tomorrow as it's the first of a new month, so it's high time we announced the winners of this month's challenge which I think its fair to say you all found a little tricky as the number of entrants was pretty low.  I promise we have some easier for August!

However, we did have some brilliant entrants to our twisted Christmas challenge and I know those who gave it a go did find it a lot of fun and they certainly stretched their stash to get more out of those stamps that only see daylight at Christmas!

The winner of the £15 prize this month is Claire - her idea to take the Narwhal to the beach for his holidays was brilliant and I love how she used the Christmas stamps to create palm trees and even shells on the beach!


Our runners up were Thordis who created a stunning stamped background using some of the smaller stamps from Avery Elle's Noel set that might otherwise be overlooked.


and Cornelia who used a Christmas tree to create this brilliant rainbow focal point on her card.


Don't forget to pop back tomorrow afternoon to find out what our new challenge is - we love it when you play along!


A friend for all weathers.

Hi everybody,

I hope you're doing just fine.


Well, well, well, what suprise, we're in July, the peak of the, not so fabulous, British summer ... and it has rained non-stop up here in Newcastle for the last 3 days!

So I thought this card was particualrly fitting...


I used Mama Elephant's 'Chance Of Rain' set to make my card.  I adore this set...it's the little bear in his little raincoat, he is just beyond adorable, the expression on his face just makes me chuckle!


I started by stamping out all my elements, coloured them using Crafter's Companion's pencils, and fussy cut.  I then used Tumbled Glass, Mermaid Lagoon, and Mustard seed Distress Inks to create a watercolour wash background, which, once dry, I added some sparkly raindrops to, using a stencil and some sparkle paste.  I then stamped out my sentiment, into one of the empty cloud shapes that comes in the set, and onto vellum, setting with clear embossing powder,  
Now I love vellum, but there's always the, 'hmmmm, how am I gonna attatch it?', vellum conundrum that comes with it.  Well, I think I may have just found the answer...the wonder pruduct that is 'Stick-it'.  Now excuse me if I'm a little late to this party, and y'all are like, 'erm, yeah Jill, everybody knows that', but I didn't!  I was wondering how to adhere my piece, and thought I'd give it a shot and see how much the Stick-it showed up behind, so stuck to the back and cut down to the same size - and it was all but invisible!  Now, I'm not sure how it would look on, say, plain white card, (I'm gonna have a little play), but it worked an absolute treat here!  


My little characters are all adhered using foam tape for some dimension, and there you have it.

I really hope you like it, and, even if you all already knew the Stick-it/vellum secret...can we at least pretend I made a discovery :)

As always, all products I used are linked below so be sure to click and peek!

See you next week.

Jillx

Chance of Rain      Stick It Die Cut Adhesive Sheets (pack of 5) Large

Thursday 30 July 2015

Buzzy Birthday

Hello!


I love a good pun so the stamp set from Reverse Confetti The Buzz makes me very happy!  I have two punny birthday cards for you today.

 
I stamped the smaller bee from the set randomly in the background and coloured them with Spectrum Noir pencils and wink of stella.  The sentiment is white embossed on black and popped up.


Given my terrible track record in actually sending birthday cards I am more likely to use this one with its 'I forgot' message!  This time I used the larger bee from the set and added glitter to the trail and wings.
 
I love the round, clean look of the bees in this set - they are very easy to make clean designs with.
 
Thanks for stopping by,
 
Sarah x
 
 
The Buzz

Wednesday 29 July 2015

Needle Free Embroidery


Hi, Tara here today in a rare mid-week appearance as Kate is taking a day off but don't worry she'll be back next week with her usual stunning creations.

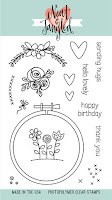
I thought I'd take the opportunity to have a quick play with the new release from Neat and Tangled as I really love cross stitch so was very excited when they brought out a hand stitched stamp set to pair with the fabulous Hoop die.  The hoop is unfortunately still out of stock as there was a manufacturing issue with it - the problem with dies is there is only ONE manufacturer in the whole of the USA so everyone uses the same place and therefore getting "rush" jobs through is never easy as they are always busy.   Rest assured though I will get it back as soon as I can as I have some lovely projects made with it I'm dying to share with you!    For now though here are a couple of cards made just with the stamps instead which are just as fun as the dies!


For this one I stamped the hoop and added some shading with copics and then just arranged the stitched stamps inside for a quick mini card.


For this one I used the jumbo peek-a-boo dies from My Favorite Things to create a frame and then used a selective inking technique to ink the flowers and leaves in different colours.  I love that the stamp has French knots as I could never master those in embroidery - they always came out on the back of my fabric!   So I used a lot of them here as stamping them is much easier!   I hand drew the stitched border around the edge.


Tuesday 28 July 2015

Teeny Dies

Hi! How are you?
Whether you're at work or enjoying a vague lie-in, I thought we'd look at making the most of the small things.
The smaller bits of kit that are the add-ons.
The under dogs, Cinderellas...you get the picture!
I've brought back a favourite die today as it's back in stock.
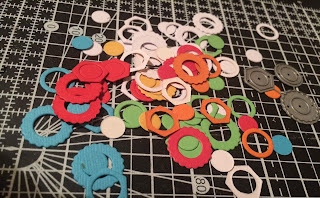
But we're going to look at the little eyelet designs that come in addition to the main die. You could obviously place them over the holes created by the die or make a whole card just using them!
I've left them connected together. Unless I really want an individual placed shape, these smaller dies have a habit of disappearing in my craft space, so the bigger the shape, the more chance I have of keeping tabs on it!
 I've simply laid out the dies onto my card, turning them to create a more interesting pattern and die cutting them in a swirly form.
 I then cut out lots of colours from odd bits of card and paper that hadn't quite reached the bin! I overlapped shapes and added centres into the holes by adhering a layer of acetate behind the front of the card, so I'd got something to anchor them all onto.
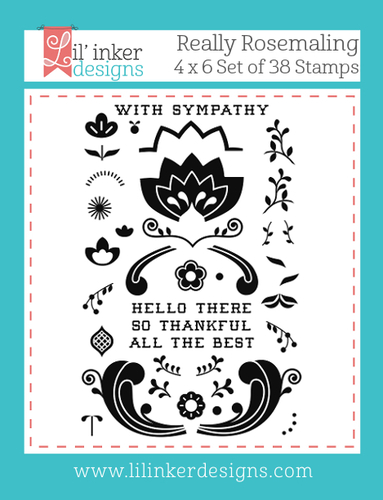
 Simple really- and perfect for a guy or girls card. One of the shapes looks like a bolt and the other a cog, so you could really make some interesting shapes. One of the ideas I had was to create a fluid DNA type pattern that would be great for a man-card, but that's for another day. The stamp set is Really Rosemaling and I love the font they've used for the sentiments
Hope you've been inspired to dig out your little shapes and make something completely new with them!
See you next week!
Keren xx

Monday 27 July 2015

Hip Hip Hooray!!


Hello there :)
I hope you're ready to party this Monday morning because I've got a couple of little characters on my card today that seem to have it all wrapped up....


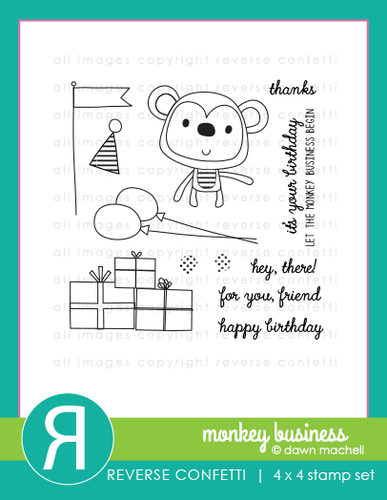
The cute 'hand-drawn' style of these stamps was too much of a temptation for me and I just knew they would look rather sweet water-coloured too. I've used two sets and their matching dies by Reverse Confetti... Monkey Business and Later Alligator. The sets mix and match perfectly ... in fact one of the lions from Leaping Lions was also due to be joining these guys but I felt the card would be a little over-crowded so he'll have to join the party fun later ;)


I have stamped and water-coloured the images on watercolour card then used the dies to trim them out... it makes a much neater and easier job than I could do with scissors, especially around those balloon strings and the spikes on the alligators back!!!
I brushed on a simple wash of Distress ink for a water-colour background on my card base and added some gold and grey splatters too.
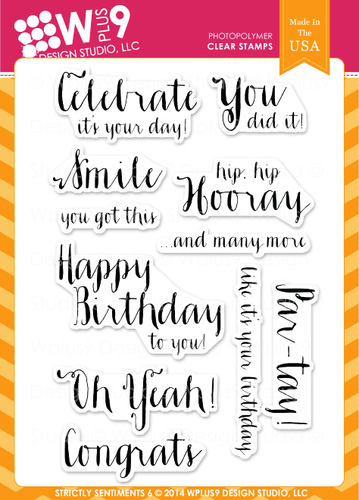
There are great sentiments in both stamp sets but I wanted something a little bolder for this card and the brushstroke style writing in Wplus9's Strictly Sentiments 5 suited my needs not to mention the fun phrases. I thought this would be perfect for a kids card, inside I've selectively inked 'it's your birthday' from the same set :)

                   Monkey Business  Monkey Business Confetti Cuts  LaterAlligatorProductGraphic 
                                        CC_LaterAlligatorProductGraphic Strictly Sentiments 5

Thanks for stopping by :)
Jenny x

Sunday 26 July 2015

Herd you're a winner!

I'm very late with my post today as I've been quite busy this weekend and didn't get much time to play yesterday and Saturday's are when I normally prepare my post each week.  I knew what set I wanted to play with as I've been desperate to get my hands on it since we started stocking MFT but its been constantly out of stock there.  We have it now and the timing is perfect as I made this first card for my friend at work who has just won her class (Welsh Cob D) at the Royal Welsh Show this week and will now be heading to the Horse of the Year Show!   So this is a quirky take on a congratulations card.


I made a trifold card from a sheet of green card and used the Rolling Hills die to create some background hills and a fence.  I coloured that to look like a barbed wire fence so in the for-ground I used the barbed wire fence die for contrast and interest.  I was also so excited to get to play with the barn die - as well as the die cut pieces (including bales of hay!) the barn itself gets groves embossed as you cut for that authentic wooden board look.  Its even large enough to make stand alone cards with - you'll probably be seeing it alot!  The clouds in the background are by Paper Smooches.  For all the small die cuts like the clouds and fence I applied stick-it to my card stock before die cutting - it makes applying fiddly die cuts SUPER EASY!

The animals and sentiment all come from The Whole Herd set which is just so fabulous and has many uses. I needed to make the pony look like Yswain Amaranthus so he's very dark brown with a black mane but it doesn't show well on the photo - I added his winners rosette using scraps of card and an enamel dot.  The cow and egg nest were also coloured with copics and stuck onto the scene.  You could add more animals to the fields as a tri-fold card gives you lots of surfaces to cover but I kept it simple just adding one cow to match the sentiment.

I couldn't stop there - I'd seen a card by one of the MFT DT when this set was released that I really loved the idea of, so here is my reinterpretation of it.


What I loved was her use of the cow print stencil but I wanted a traditional black and white not red.  I used distress ink in black soot through the stencil, cleaned the stencil and then offset it and drew around the edges using a white pencil.   It gives a funky 3D look that is quick and easy to create.  I just added a couple more copic coloured cows and a sentiment on a spotted teal banner for a pop of colour using foam tape for dimension to make them stand out.

NEWS FROM THE STORE:

  • We had restocks and some new items which customers had requested from My Favorite Things yesterday.
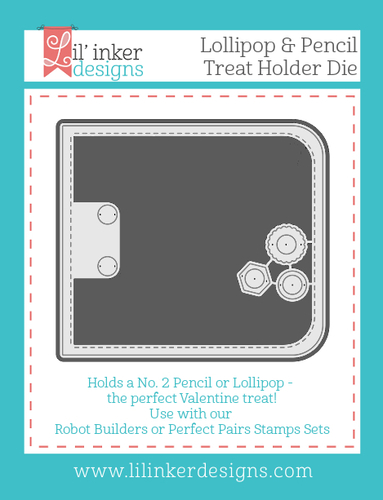
  • We are waiting for delivery of the new release from Neat and Tangled and Lil' Inker Designs - they should be here early to mid-week this week.
  • We have our order in for the new release from Altenew but it will be at least couple of weeks until it arrives as they are not the fastest shippers.
  • Our MASSIVE order for the Lawn Fawn winter release is in - delivery is expected at the end of August.  Please note we are not taking pre-orders.

Saturday 25 July 2015

You Are Wonderful

Sometimes you just gotta be bold! What holds true in life also holds true for your card making. I bet most of you have bold sentiment stamp sets at home and you might struggle on how to use them best. Well, today I am using the Kudos set by Paper Smooches and I will show you how you can easily create a simple and elegant card with it.


The stamps in this set are all very large and bold, at least compared to most other stamp sets. They would be perfect to match with any image stamps like critters or even people. But I also know that not all of us have the moneyz for many stamp sets, so I tried to stick with just _one_ set today (gosh, that really took quite a bit of discipline!). I started by drawing a diagonal line with my pencil across the front of my card and then grabbed a grey pigment ink from Mama Elephant and stamped the "you are" as a pattern across the upper part of the card. I also sprinkled in some butterflies (from the same stamp set) with orange ink for a colorful accent.

I gave that pigment ink a quick spray over with hair spray (that helps me to set it so it won't smudge later) and zapped it with my heat gun to dry it. Then I put down a strip of slim double sided adhesive tape (you can also cut a strip of double sided adhesive sheet) exactly where I had drawn my pencil line and poured Microfine Glitter on top. You need to rub the glitter gently into the adhesive and it will not only stay where it's supposed to stay but become really shiny.


I cut down a piece of vellum to cover the upper part of the card and then stamped my "wonderful" with Versafine ink. You have to be careful about which ink you use on which type of vellum. A lot of inks start to feather/bleed on vellum. To prevent that, I immediately dumped some embossing powder over the wet ink and heat set it so it would remain crisp.

I could have glued the vellum to the card base and it would have looked neat, but instead I opted to make two holes and thread twine through them and keep the vellum attached this way.

I hope you like this unusual take on bold sentiments. Thanks for stopping by and commenting, you make me super happy with your feedback!

Friday 24 July 2015

Friends in Tandem

Hi everyone,

Eeeeek, so another awesome Mama Elephant release happened this week, and I couldn't wait to have a play...


It's no secret that I'm in love with all things Mama Elephant, I mean, I'm out and proud...I am an obsessed, massive, huge, megafan!  And this release has knocked my socks off. It is just soooo cute!


I mean...look at the Beaver's little buck teeth!!!  ...look at his teeeeeth!!!  I just wanna squeeeeeze him!


I started by stamping out this amazing, massive 'Friend' from the brand new 'Friend Indeed' set.  I love the look a lot of recent sentiment sets have, where the sentiment stretches all the way across the page, so I decided to extend my stamp, either side, with a black pen, to create a similar look.  I then used the matching 'Friend' die to partially die-cut the bottom from the card.  I then stamped this, 'oh my god how can one little critter be so cuuuuuuute' beaver from the 'Tandem Extras' set, masked him off, and gave him his little cute balloon from the same set to hold.  I masked both of these off, and inked up my background, using Cracked Pistachio and Tumbled Glass Distress Ink.  Once my inking was done, I took off my masks, and coloured my characters using alcohol markers.  I took the cloud die from the 'Landscape trio' die set, and cut myself a nice little skyline.  At this point, everything was one layer, but I decided I wanted my balloon to stand off the page, so stamped, coloured, and fussy cut another, and added over the top.  I used the same cloud die to cut a few layers of vellum.  I then added the rest of my sentiment, (the 'Friends Indeed set' is one of those brilliant Mama Elephant sets where you get a load of different options to personalise your sentiment - love it!), by stamping onto the vellum peaking out the bottom, and clear heat embossing.

And there you have it.  My first play with my new Mama Elephant Goodies...and trust me, I can't wait to get going again!

As always, everything I used is linked up below, so go feast your eyes around the amazing new stamps in the release.

See you next week.

Jillx


  Friend Indeed      Tandem Extras
Friend Script Creative Cut       Landscape Trio Creative Cuts