Hello there :0)
I'm back with my usual Monday morning Paper Smooches blog post because I'm sharing this card on my own blog for the new PS Sparks challenge. This week it's a sketch and I've gone back to Christmas mode and used the fab set called 'All Yule Need'.
I love contemporary colours at Christmas just as much as the traditional hues and heat embossing the bauble in white just makes that teal colour pop!! The Hot Spots die is actually really good as an interesting background panel especially when using patterned paper and the aperture has white vellum behind it so I could adhere the lettering to it. The sentiment is from a new set of dies by Paper Smooches that will be available to pre-order soon. The large 'Christmas' is in three sections which is why I needed the vellum to help it span the gap.
Thanks for popping by today and don't forget to visit the PS Sparks blog and play along with this weeks challenge :0)
Jenny x
Showing posts with label Hot Spots large base die. Show all posts
Showing posts with label Hot Spots large base die. Show all posts
Monday, 11 November 2013
Saturday, 18 May 2013
Exploring A Hot Spot (part 2)
Good morning :0)
Okay, first I have to apologise for the title of these posts... it's a bit suspect
verging on the cheeky but hey it got your attention though didn't it!! :0)
So, I'm back again, as promised, with a couple more cards to share with you using the
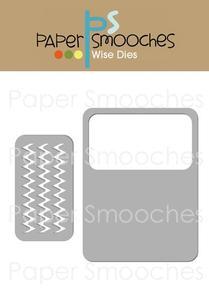
Paper Smooches Hot Spots Large Base Die and first up is a New Home card that
uses the die as a Polaroid style frame....
The retro photograph is still a very popular trend, well it is in my stash *wink*....and there are
many dies on the market but by using the Hot Spots die to make your own you can have
rounded corners both inside and out!!
Here's how I did it...
The smaller of the two dies cuts a rounded rectangle that is an exact fit for the space in the
large die so it can be used to extend the size of the hole in the base die... as shown in the photo :0)
Did you see the grey faux washi tape?? To make it I used the row of dots from the Alphadot set and inked the back of the stamp with Memento London Fog then used it the right way round to stamp the dots on top in Flannel Grey and by stamping across a torn piece of copy paper you get the faux ripped edge too :0)
My next card uses the large base die as is and cut from Patterned Paper,
makes the focal panel for my card...
The window is perfect for framing a scene using Paper Smooches characters, even cheeky monkeys like this little fella who's hanging around!! The ladybird was an afterthought!!....you'll have to pretend he's either in a zoo or it's an exotic little bug :0)
Well I hope I've given you some inspiration for using this die and if you missed part 1 it's here
Thanks for visiting and hope you have some crafting time this weekend :0)
Jenny x
Saturday, 11 May 2013
Exploring a Hot Spot!!
Hello there...
As the title suggests I decided to have a play with the Paper Smooches
Hot Spots large base die that is available in the store.

It's actually a versatile shape with many creative uses and you can let your
imagination run with it :0) I find the easiest thing to do is cut out the pieces in scrap card
so you can play with the shapes and stamps to generate some sparks of creativity.
I don't know about you but when I was a child I used to love, and still do, a new pack of coloured pencils or crayons... all those rainbow colours and sharpened points, not to mention the lovely smell so seeing the window in the larger die, I set about stamping the pencils from I Heart Art in a rainbow of colours to make a teacher thanks card.You can use the same die for the acetate and base layer and just turn them upside down so the window is hidden at the base of the box.
I added shading to the pencils with coloursoft pencils so they look more 3 dimensional and cut them out all together in one piece :0)
I also wanted to use the zig zag shapes in the smaller die... these little pieces can be so fun to play with!!
By cutting the panel in three different blues I could make this pattern, the zig-zags fit snugly together and each die cut actually gives you 5 strips by snipping out the remaining two zig-zags from the panel when three have been removed.... neat eh??!!
I needed to make a card with a specific request for a seal on it and I thought this pattern would make great looking water in an ice hole for Mr Seal... I think he looks quite happy perched there :0)
Has that got you thinking?? I have a couple more ideas that I want to turn into cards this week to show you next Saturday, hope to see you then !!
Thanks for stopping by
Jenny x
Subscribe to:
Posts (Atom)


