It's November! That means you probably should start thinking about your Christmas cards (yes, really, because you need to post them in time for the holidays ;) ). If you're lacking ideas, check out my series on holiday cards - I'm sure that will get your creative juices flowing.
Today I have a card that showcases a delightful stamp and die set - Cozy Christmas by Mama Elephant. I have a video over on my blog showing you how I made the card, so feel free to hop over and check it out.
I tried to keep the card clean and simple and yet add a touch of oomph to it - you'll be the judge of whether or not I succeeded.
I found stamping on the little front panel and the card base especially difficult. If you're using thicker card stock, you can end up with an area right next to the panel where the stamp didn't touch down. With clear stamps, make sure to like them up well and just "fill in the blanks" as I did in the video.
Finally, by pouring some glitter on wet embossing paste you can get that perfect subtle sparkle that gives the awesome impression of snow. I also made sure to have the "snowflakes" be on top of the tree and Santa to add the illusion of dimension.
By the way, if you don't have heavy card stock that doesn't bleed through with your Copic markers and you need to mount the entire thing on a card base, consider using a colored card stock that reflects the colors of Santa or the tree. I created a variation as well, let me know which version you like best!
I hope you enjoyed these cards and the video over at my blog - I'd love to read your comments or have your thumbs up over at YouTube. Thank you!
Supply List
Showing posts with label copics. Show all posts
Showing posts with label copics. Show all posts
Thursday, 30 October 2014
Sunday, 5 October 2014
Exotic Copic Color Combinations & Embossing with Dies
Hello crafty friends! This week was coloring week here at Make the Day Special and the Design Team has shared many awesome tips with you on how to get more out of your markers.
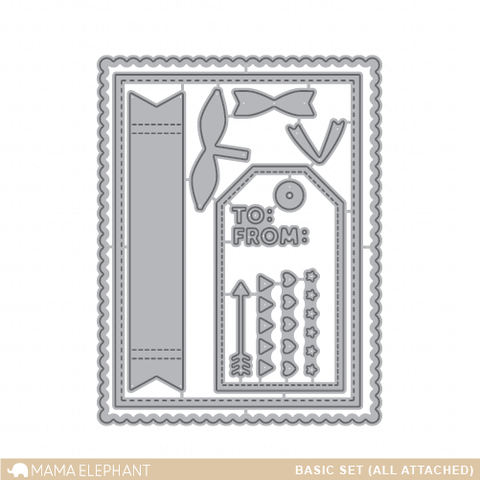
As you can see, I used the emboss-with-dies technique to create some "fake" dimension on my card since it's entirely one layer. You've seen me using this technique for the very first time - not live, but on camera :) - and it fits great with the current challenge we have at the Make the Day Special challenge blog: try something new or resurrect a technique not used for ages. For the embossing, I used the "Basic Creative Cuts" by Mama Elephant and the "Label Layers 1" by Wplus9 (alternatively, reach for Label Layers 3 or even go for Paper Smooches' Frame 1).
My Copic "trick", to come back to the current topic, is to blend colors that usually don't go together. Normally, you would only blend colors in the same families or those close to each other (oranges with yellows; yellow greens with greens etc). But with some patience you can blend colors that are not related at all, like I did.
You can either feather the two colors into each other or use one of these two techniques: tip-to-tip blending where you touch the tip of one marker to the other to pick up its color, or acetate palette blending, where you scribble one color onto a piece of acetate or plastic and the pick it up with the other marker.
For the "background" on this card I used the beautiful star background from a company that's not present in the store, but if you're shopping with Make The Day Special, you can alternatively reach for Lawn Fawn's "Starry Backdrops" or Avery Elle's "Written in the Stars". For a light ink that doesn't overload the background, I suggest Hero Arts Soft Granite or Wet Cement.
I hope you got inspired to try your makers in some different ways! Thanks for stopping by!
Supply List
As you can see, I used the emboss-with-dies technique to create some "fake" dimension on my card since it's entirely one layer. You've seen me using this technique for the very first time - not live, but on camera :) - and it fits great with the current challenge we have at the Make the Day Special challenge blog: try something new or resurrect a technique not used for ages. For the embossing, I used the "Basic Creative Cuts" by Mama Elephant and the "Label Layers 1" by Wplus9 (alternatively, reach for Label Layers 3 or even go for Paper Smooches' Frame 1).
My Copic "trick", to come back to the current topic, is to blend colors that usually don't go together. Normally, you would only blend colors in the same families or those close to each other (oranges with yellows; yellow greens with greens etc). But with some patience you can blend colors that are not related at all, like I did.
 |
| On the cupcake topping, I combined BG11 with RV02 |
 |
| Check out this beautiful embossing on the outer frame and the inner label |
I hope you got inspired to try your makers in some different ways! Thanks for stopping by!
Supply List
- Carnival Cupcakes by Mama Elephant
- Make a Wish by Mama Elephant
- Basic Set Creative Cuts by Mama Elephant
- Label Layers 1 by Wplus9 - alternatively reach for Label Layers 3 or Paper Smooches Frame 1
- For a light ink reach for Hero Arts Soft Granite or Wet Cement
- For a starry background reach for Lawn Fawn Starry Backdrops or Avery Elle Written in the Stars
- Copic Markers
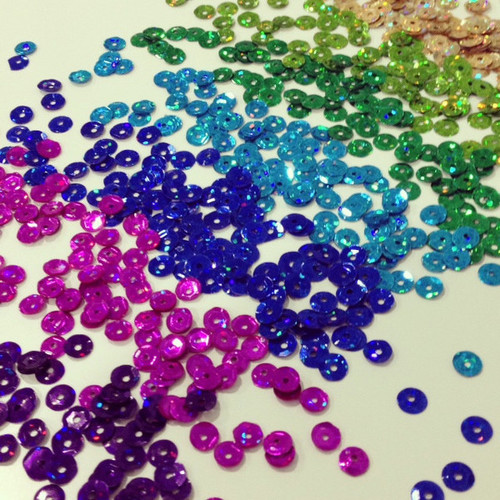
- Sequins
Wednesday, 1 October 2014
Colour week day 3
Hello.
I hope you are enjoying our colouring week so far :)
So as you can see I'm colouring this fun unicorn from Paper smooches Spectrum stamp set.
I have used copic ciaos pens.
I think we all have our own way of colouring and mine is pretty random lol.
I am far from an expert but hopefully i can inspire you to give it a go.
For this first image i have used the no lines technique.
To start simple stamp the image in any light colour ink, making sure its compatible with alcohol markers.
I have used momento dessert sand but have also tried with distress inks.
Hopefully you can see that i have started with the lightest colour first and gradually built the colour up.
For his one i have coloured the image completely with the lightest blue then continued as i did for the last image.
You can see i got a bit carried away and coloured all four images.
Once the main colouring was finished i added some extra little touches using a white gel pen and also with the copics just using a darker colour to add details.
Then fussy cut them all out.
Please click the image to go straight to the products :)
Thanks for looking.
Saturday, 13 September 2014
Chase Your Dreams
Hello fellow crafters!
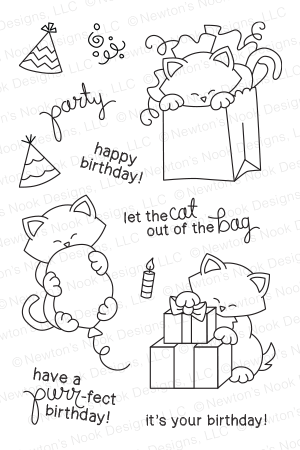
For today's card I wanted something bright and cheerful. Also, I haven't played with my Newton's Nook stamps nearly enough, so they had to be thrown in the mix.
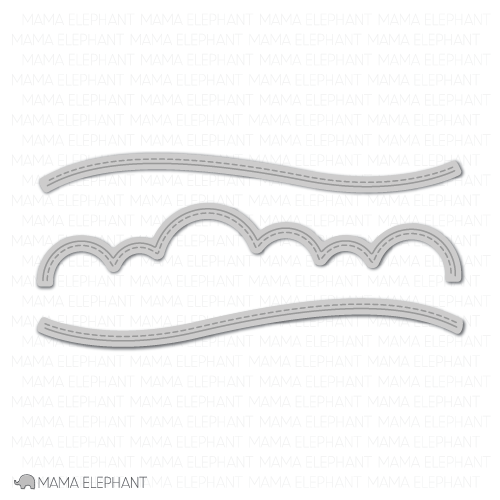
I started by coloring the super cute cat with my Copics, then added clear Wink Of Stella to the balloon to give it some sparkle. It's also easy to fuzzy cut these stamps; if you leave a white border, it goes rather fast. For the background I used the Landscape Trio dies by Mama Elephant. Who doesn't love stitched borders? Some careful sponging with Distress Ink and voilà - a sky!
Hint: I cut the same scalloped rectangle shape that the front panel is in from a piece of thin copy paper and then glued the cut up cloud panel on that paper, then adhered that to the card front. I didn't want to start puzzling the clouds together on the card itself because I was worried I might not get the alignment right (knowing myself, it would have been catastrophic) so I used that little trick.
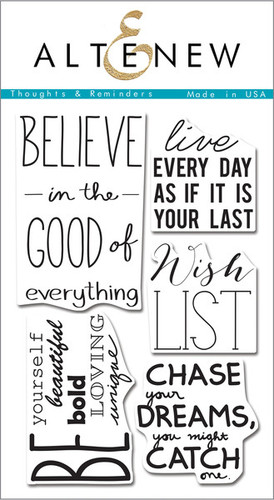
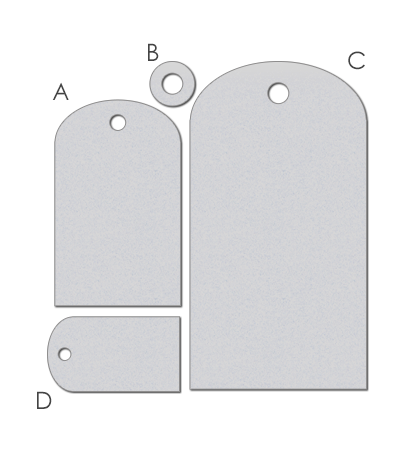
As a sentiment, I picked one of the beautiful sayings from Altenew. I wanted it to dangle from the cat's balloon, but it was too big. I simply masked off the part I didn't need with a post it, stamped the first part onto the tag and the other part inside. The Wplus9 Timeless Tags 2 fit perfectly here. Some Judikins Iridescent embossing powder on top of the Versafine pigment ink and - sparkle!
The other half of the sentiment was stamped inside of the card. I thought that would be fun for the recipient: super funny card front and a very encouraging sentiment once opened up. Just a cute fit with the cat hanging on to the balloon, don't you think? :)
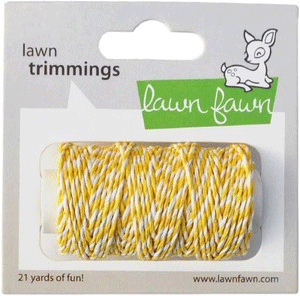
I mounted the little cat with foam squares to add dimension, fiddled a really long time with the twine to make it look good and spent ages to "properly" sprinkle my sequins across the card. I never get the "random" placement right the first time and rearrange my elements to make them look great. Not sure I always succeed, but it's fun :)
Thanks for stopping by!
Wednesday, 26 June 2013
Admit one
Hello.
I took the more is more approach with today's card lol.
Not my normal more cas style.
As the new lawn fawn stamps and dies have arrived at make the day special i was having a play with an older set Admit one, this set is out of stock but i guess most of you already have it :)
I also used the new matching dies which you can find here.
I love that by having matching dies it rings this set back to life and no more fussy cutting.
I used all the dies and the stamps that go with them.
Coloured with copics and layered them up.
I also used Bannerifiic and matching dies and happy everything for the sentiment.
You can see all our Lawn fawn products here.
Thanks for looking.
Labels:
Admit One,
bannerific,
copics,
happy everything,
Kate,
lawn cuts,
Lawn Fawn
Tuesday, 23 April 2013
Clean and simple
Happy Tuesday! It's Ruby here. I think you might want throw tomatoes at me this week. I haven't had time to make a card so am posting one I made a couple of weeks ago with my new fave set, Lawn Fawn Flutter By. I know, I said I'd do something different but this set is soooo adorable. Hope you forgive me!

The sentiment is from Paper Smooches Sentiment Sampler. I think both sets are out of stock right now, maybe I've started a trend!


The sentiment is from Paper Smooches Sentiment Sampler. I think both sets are out of stock right now, maybe I've started a trend!
Have a fabulous week!

Tuesday, 2 April 2013
Perky Plants
Hi there, it’s Ruby. I hope you had a lovely Easter break and ate lots of delicious chocolate! Today I have a little thank you card to share with you. I thought the colour in the papers would add a bit of colour as we are entering Spring.
That little flower has always been one of my favourites, it’s from the Paper Smooches Perky Plants. I think they might be out of stock at the moment, but check back soon. It’s a fun one to colour too.
I hope you made the most of the long weekend. Everyone seems so much happier with that extra couple of days, don’t you think. Shame all weekends aren’t all that long!
Copics used…
R20, R21, R22, V09, V06, V04, YG05, YG03
Have a great week!

Tuesday, 19 March 2013
Thanks So Much
Hi, it’s Ruby! Have you ever lost a stamp? You know.. that one that’s your absolute favourite? Well for my card today I am sooo happy to share a card using my favourite stamp from the Lawn Fawn Grand Greetings set. It honestly is my favourite sentiment, I love the funky writing.
I was rummaging (as you do) through my crafty supplies and came across this really old paper (I think it’s Bo Bunny) and thought how pretty it was, so I dug out my new (to me) Lawn Fawn Flutterby set and started playing. I have wanted this set for ages, why oh why have I not bought it before, it is so much fun to use.
There are so many different combinations, yummy! I coloured the two smaller leaves in the set that I attached to the top left, adding those adorable little flowers with pop dots and then coloured and pop dotted that fab butterfly on the right. A bit of gem treatment to finish. I think it’s a really happy card because of the colours. I just love how paper can inspire you to use different colours, don’t you!

Copics used;
BG70, BG75, BG78, Y19, Y15, Y13, RV29, RV25, YG06, YG05, YG03, BG10
I think you might be seeing more of this set!
Have a great week!

I was rummaging (as you do) through my crafty supplies and came across this really old paper (I think it’s Bo Bunny) and thought how pretty it was, so I dug out my new (to me) Lawn Fawn Flutterby set and started playing. I have wanted this set for ages, why oh why have I not bought it before, it is so much fun to use.
There are so many different combinations, yummy! I coloured the two smaller leaves in the set that I attached to the top left, adding those adorable little flowers with pop dots and then coloured and pop dotted that fab butterfly on the right. A bit of gem treatment to finish. I think it’s a really happy card because of the colours. I just love how paper can inspire you to use different colours, don’t you!

Copics used;
BG70, BG75, BG78, Y19, Y15, Y13, RV29, RV25, YG06, YG05, YG03, BG10
I think you might be seeing more of this set!
Have a great week!

Tuesday, 12 March 2013
Out of this world
Hi there, it’s Ruby. I’m sharing a little card today that’s out of this world! I used the lovely Paper Smooches Space Cadet set to create this little alien card.

It’s a pretty straightforward card, nothing fancy. I used the following Copics to colour it in;
Ciao for now!


It’s a pretty straightforward card, nothing fancy. I used the following Copics to colour it in;
- YG05, YG03, YG01
- BG78, BG72, BG70
- BG15, BG13, BG11, BG10
- Y15, Y13, Y11
- R29, R27, R24, R22
Ciao for now!

Tuesday, 26 February 2013
Mad Butterfly
Happy Tuesday!
Sorry you didn’t hear from me last week, my hubby hasn’t been very well. He’s had several attacks of gout recently and we ended up at the hospital for an x-ray to see if there was anything else going on. Thankfully he seems to be on the mend now. We still haven’t figured out why he gets it though.
Anyway, on to today’s card for my post over at MTDS – a mad butterfly. I made this for my friend, she’s mad about polka dots and I didn’t want to do traditional colours for her.
![IMG_2367[1]_thumb[7] IMG_2367[1]_thumb[7]](https://blogger.googleusercontent.com/img/b/R29vZ2xl/AVvXsEir29es5LD4Kp3BtPm6odNrtl0NV-2sKxYLTBaS9H3jB4YMKTjqMXENubprp8wTjRCLAPDgvciSZ1_-WPPpKRc8SEQ7x2rRHqtqpl19aD1NoXkiJjIh1mwpkVwCk7RxgOt7Uaf7ZVEk-F4/?imgmax=800)
The butterfly is from the set by Paper Smooches’ Giddy Bugs and the sentiment is from Party Posse.
For this card I dug out some very old patterned paper and paper pieced the butterfly. I just Copic coloured in his body using BG15, BG11 & BG10, RV63, RV66 & RV69.
The ribbon was VERY naughty, it just would not sit flat and although this card looks simple that bow took FOREVER to get right and I’m still not sure I like it lol. To finish the card I added some little silver pearls (makes her look like she has bunches!) and a trail.
Hope you have a great week.

Wednesday, 20 February 2013
Just wavin' hello
Hello.
Ive been having a play with some of my Lawn Fawn stash :)
I used Critters in the sea and the petite paper pad.
All of the images are coloured with copics.
Thanks for looking.
Tuesday, 12 February 2013
Just a Note
Happy Tuesday! It’s Ruby. I hope you’re having a fab week so far. I’ve got a little book to share with you today and a matching peg.
I was given this little spiral bound book a while back and I thought it needed a bit of colour to liven it up so using my Paper Smooches Perky Plants I added a bit of fun to it.
I stamped and coloured in both flower images using the Perky Plants set and I stamped the ‘Just a Note’ from Paper Smooches Sentiment Sampler. The peg was just covered both sides with paper, I sanded down the edges, softening them off with some distress ink and attached the flower with pop dots. I LOVE covering pegs, they are so quick to make and yet so pretty.
Copics used…
B91, B93, B95, R08, R05, R02, R20, £81, E84
I hope you like it, I know it will brighten up my office. Those flower stamps always make me smile!

Tuesday, 5 February 2013
He'll think I'm mad!
Hi, it's Ruby. My post today is a bit of fun for my man! He will think I’m totally mad, but often he says that’s why he loves me, for my quirkiness. Here’s hoping that continues after this…
![IMG_2267[1]_thumb[7] IMG_2267[1]_thumb[7]](https://blogger.googleusercontent.com/img/b/R29vZ2xl/AVvXsEiZqKlKGYoLCbJa1SiC0ntWmL-Ay_mFw7IrgGlJ8BILeCWNricfMjO8EdgO4d9j5RtAD5hbgVNeaKL6ad_T8EGRoBhAtgu9F4B5O2b0Xa5NxG5Kg__b7T71_dWhF1vhAUnpVBzOh-CN_2Y/?imgmax=800)
Hopefully it will make him smile too when I present it to him in a glass of something. I think we often take life far too seriously, we need to add in some of that childlike fun back into our lives. Here’s mine, wish me luck. He will either think it’s funny or will get me certified as totally mad! If you don’t hear from me again you’ll know why lol.
I used Lawn Fawn’s Love ‘n’ Breakfast set, it has some adorable little brekkie images.
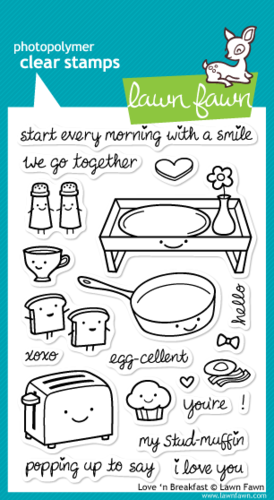 You can use them for all sorts of things.. I’ve used it to congratulate someone on losing lots of weight, Get Well cards, Valentines and my friend even made us a Wedding card using the toaster, the toast, salt and pepper to build up a little scene. It was adorable.
Copics:
R20 (cheeks), BG10 (outline), R39, R27, R24 (heart), YG05, YG03, YG01 (cupcake case) and YR30 and YR31 for the cupcake.
Hope you get time to play.
Have fun!

![IMG_2267[1]_thumb[7] IMG_2267[1]_thumb[7]](https://blogger.googleusercontent.com/img/b/R29vZ2xl/AVvXsEiZqKlKGYoLCbJa1SiC0ntWmL-Ay_mFw7IrgGlJ8BILeCWNricfMjO8EdgO4d9j5RtAD5hbgVNeaKL6ad_T8EGRoBhAtgu9F4B5O2b0Xa5NxG5Kg__b7T71_dWhF1vhAUnpVBzOh-CN_2Y/?imgmax=800)
Hopefully it will make him smile too when I present it to him in a glass of something. I think we often take life far too seriously, we need to add in some of that childlike fun back into our lives. Here’s mine, wish me luck. He will either think it’s funny or will get me certified as totally mad! If you don’t hear from me again you’ll know why lol.
I used Lawn Fawn’s Love ‘n’ Breakfast set, it has some adorable little brekkie images.

Copics:
R20 (cheeks), BG10 (outline), R39, R27, R24 (heart), YG05, YG03, YG01 (cupcake case) and YR30 and YR31 for the cupcake.
Hope you get time to play.
Have fun!

Tuesday, 29 January 2013
Part 2!
Hey there everyone. It’s Ruby. Sorry this will be a very quick post from me today because I’ve not been very well and still don’t feel great so can’t stay on the computer too long at a time.
I made this little notebook last week using Paper Smooches My Peeps to match the card I made my friend. I also made her a flower brooch to go with it, I thought the colours blended quite well so it felt like I was giving her a matching gift set.
![MTDS 290113_thumb[1] MTDS 290113_thumb[1]](https://blogger.googleusercontent.com/img/b/R29vZ2xl/AVvXsEj82ynNiGHMhZpdv0pkBcjhRKpWkuVqSi5ceciP1qHxpVHIBGdiveFUwG8rzhEM8oGF3nEZxBqf2RkZjpqsn84aMFE-d48quIsH6AdKUpbh1i70VkyoQHmuIpDY96j167rljDGpXeoqaX8/?imgmax=800)
This was my card from last week…
![MTDS 220113_thumb[1] MTDS 220113_thumb[1]](https://blogger.googleusercontent.com/img/b/R29vZ2xl/AVvXsEiQGJMOHkcgToN7NxZtmsoV7XN4BWh0UGlqzC55h0j_NCHHTsAq3N7nvfqYQImtHlfkebnGj90m0qUslSec5qPRW0FtRgPWPMQJWHsoQYUwqxhVY7rxJ-DcfKoaauSxBldUtuuB5V35_7c/?imgmax=800)
Finally this is the little crochet flower I made for her…
![IMG_2244[1]_thumb[2] IMG_2244[1]_thumb[2]](https://blogger.googleusercontent.com/img/b/R29vZ2xl/AVvXsEiC0Ugs19WRxa6AJuEjcnW7ItDyC0pbd2p8eQzmwXFq4ApS4U-LUY7PkcMVpP9B9SlmpM3HdJ3GwL4N0cJpp-dg6Xs3hbPobN2DZ3VQsrpxSPhfxmMS6_988-dJ00Jy_GgBI-luPemo6qw/?imgmax=800)
All I need to do now is actually post it to her!
Until next week …

Subscribe to:
Posts (Atom)




.jpg)

