Sunday 31 May 2015

May Challenge Winners

It's time to announce the winners of this month's challenge, just before our new one starts tomorrow.....

I think some of you found the sketch a little tricky (to be honest so did I and I drew it!) but our winner really rocked it and I love the card she made so congrats Thordis - you win the £15 prize this month!


I love the strong sentiment and the bold geometric pattern from the triangles.  A simply brilliant card!

Our runners up this month were, in no particular order:

Kate - this floral theme is a real knockout!


Calissa - the scene she created with her little robot is just adorable!


Congratulations ladies - do take your winners badges for your blogs.


Don't forget to come back tomorrow afternoon to see what our theme for June is.............

June Brides

June is the traditional wedding month in the UK for that classic summer wedding (not that June shows much signs of being very summery this year according to the weather forecast for next week!) so I thought I'd make both a wedding and anniversary card today.

I thought weddings when we got the new stencils from Hero Arts as the Glorious Petal Stencil reminded me of wedding dress lace and it is such a beautiful pattern I wanted it to be the star of my card so I chose to emboss it white on white using our light texture paste.


Sorry the photo is rubbish - its so grey in Sheffield today.   I cut a couple of balloons and the word Congrats from the same colour card as my base card using Congrats dies set from Waffle Flower.  The balloon strings are just sewing cotton tied around the hidden behind the C.   The bows and heart are from the Finished Frame die set from Avery Elle.

It can sometimes be a bit difficult and fiddly to glue tiny images and words like this to your project - often I use stick-it, but as I was using these over paste I needed a stronger wet glue so I thought I share my trick for how I do it.


I turn a post-it upside down and add my tiny die cuts to the sticky part with the bit you want to add glue to facing upwards.  You can then hold the post-it and not the die and not get glue on you which can then transfer to your project.   Just pick the glued die cuts up with tweezers when you've finished adding glue.

So that's the wedding taken care of, let's move onto anniversaries.   For this I wanted to use the 3D diamond die from Waffle Flower.   Now I will admit it took me a couple of attempts to get the folding right so I would definitely recommend you watch Nina's video and do as she says try it with thin card first, but as someone who never cracked origami I can promise once you "get it" it really is very simple!


I cut it from holographic card (yes I ignored the video advice and went straight to thick hard to fold card!) and simple stuck it on my card with strong double sided tape (the back is very flat so it's easy to do) and then made up my own sentiment to match it using a few Winnie and Walter sets.  The flawless word is from My Precious, wishing you is from Big, Bold and Merry, anniversary is from Big Bold and Happy and "a" from Big Bold and Friends.  Sets like these are really useful to mix and match as you can find so many words you can create endless sentiments beyond the intention of each individual set!   The little sparkles are also from Winnie and Walter from the Sparkle set.

I would have to say it's not possible to put this in an envelope in the post - it would get crushed - so you would need to pop it in a box.  It does fit in an envelope if you are giving it my hand though.

What I do love about the die though is that if you make two - you can stick them together with a string loop sandwiched in between and hey presto - a perfect 3D decoration for an engagement party, or even to pop on your Christmas tree.

That's all folks - see you next Sunday!
Tara


NEWS FROM THE STORE:

The big news from the store this week is that the following brands have major releases next week:

  • Lawn Fawn
  • Avery Elle
  • Wplus9

They are all currently in transit and we should be releasing them on the same day  here as in the USA (customs permitting)


Saturday 30 May 2015

Let The Cat Out Of The Bag

Hello crafters, here's Julia popping in with a really easy to make and fun card. I haven't given my stamps from Newton’s Nook enough love, so I thought it would be time to do that. And since I have a cat that likes to crawl into literally every open box that is there in my apartment, I went with the the Birthday Bash set and the cat jumping out of the bag :-)


I stamped the image on some Copic friendly card stock and colored it with my alcohol markers. I went with bright cheerful colors that are appropriate for a party :-) My cat is actually completely black, but since that is not quite as much fun to color, I gave this some tiger stripes. To add additional interest to the image, I used my white gel pen at dots to the wrapping paper and to the bag itself. As you can see, a mixture of bigger and smaller dots looks actually quite nice.


And of course I needed some sparkle and shine. I used some glue and gilding flakes with the confetti stamp from the same set, but you can easily to this with some sparkling embossing powder as well, for example the Hero Arts Gold embossing powder we have in the store.


Of course my Copic markers bled through the card stock and very visible on the other side. I simply cut a piece of card stock that was a little bit smaller than the front of the card and adhered it to the inside of the front panel. It looks very clean on the inside, and from the outside it still looks like one layer card. I'm so happy I came up with this idea because it helps me to keep the look of my cards really simple.

I hope you've enjoyed the card. See you again soon!

Friday 29 May 2015

Shake what you've got

Hi everybody,


Jill here, I hope you are all well.

Now you may remember a couple of weeks ago, Tara, came up with a fun challenge for us to play along with.  The idea is for the same stamp and die set, (we're using the oh so lovely, 'Birthday Celebration Stamp and Die Set' from Echo Park), to be sent around each Design Team member, and see where it takes us! 

I was first up, and here's where it took me...


As soon as I set eyes on the fun die shapes they screamed out 'shaker' to me.  I think all the shapes would work really well in this way, (just imagine the little cute crowns full of gold sparkles!), but I chose to use the candle.


I used vellum as my card base, so the light could shine all the way through my wee shakers.

I started by measuring where I wanted my candles, and cutting them from my card panel.  While this piece was still one-dimensional, I stamped out the sentiment from the same set, and heat embossed it using Gold Sparkle powder.  I took some heat resistant acetate, and stamped out the candles three times, in Versmark, and carefully poured gold powder over the flame, and silver powder over the candlestick, then heat set.  I lined each candle up with my die-cut areas, and adhered down.  I then outlined each candle with shaker tape, from the back, to create 3 seperate compartments, and filled each space with lots of loveliness - glitter, tinsel, and micro beads.  I then adhered another panel of acetate over the back, sealing all the fun bits in, and creating three individual mini shakers.  I kept the card clean and simple by embellishing with only a few scattered, matching sequins.


This card was so easy to make, and so much fun, I couldn't help but go for it again in a different colour way.


I can't wait to see what the rest of the team come up with :)
High five to Tara for a great idea!

See you all next week.

Jillx

Birthday Celebration Stamp & Die Set

Thursday 28 May 2015

Fun with Flamingos

Hello!


I mentioned the other day that I had recently received the Fabulous Flamingo stamps and dies* from Reverse Confetti so I am here to share a few cards that I have made with them.  They are lots of fun!!  *(sorry the dies are currently on back order and will be back as soon as possible)

First up is a shaker card:


I die cut the flamingos out of pink card and the wings out of Avery Elle patterned paper.  These two love birds were calling out for a shaker and so I created a heart shaped window for them.  The patterned paper in the background is from the same Avery Elle pad. 

Then I decided to try a different look on kraft card:


I stamped the flamingo in white pigment ink and coloured over it with Spectrum Noir pencils.  The dotty wing is the stamp which I cut out and stuck on.  I quite like the more subdued colours that the kraft gives to pencil colouring.

This stamp set has lots of fun sentiments too!

I hope you like my flamingo creations :)

Sarah x

Fabulous FlamingoFabulous Flamingo Confetti CutsThe Everyday Collection 6x6 Pad
       

Wednesday 27 May 2015

My precious


Hello.
Today i have a trio of cards using Some Winnie and Walter stamps. 


For this card i stamped the mini scenery stamp in versamark and lightly covered in some gold perfect pearls then just tapped the excess off.
This creates a gorgeous sparkly gold but its very hard to photograph.
I then stamped the sentiment straight onto it with black archival ink.
The diamond was coloured with pencils and added with some some foam tape.


My second card uses one of the diamonds from My precious stamp set.
I simply stamped in rainbow colours using distress inks.
The sentiment is from the party.


Lastly i just wanted to play with a random look.
I still had my distress inks out and just mixed some coloured onto my card and stamped the circles in black to stand out. 
I splashed some gold perfect pearls and added sequins and some liquid pearls to finish.
All sequins used can be found here.

Mini Scenery:  Multifaceted My Precious TrueThe Party


Thanks for looking.

Tuesday 26 May 2015

Purrrfect Kitties


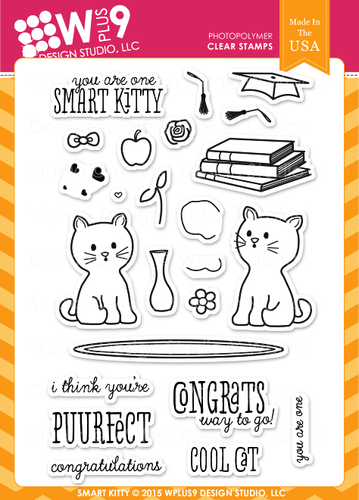
 Hi! Hope your Tuesday is going well. I've some puurrfectly formed little kitties to show you today.
You would be forgiven for wondering where the hula hoops are in this set.. you've not seen them before? Check out the set...
http://www.makethedayspecial.co.uk/shop.php#!/Smart-Kitty/p/49440783/category=3351881
See the hoop? It's the mat!
People ask sometimes how to have ideas that are different from the norm. The secret?
Look at the set in a broad way.
Don't try and match up the different elements initially; i.e. the mat is for the cats to go on top of.. simply look at the shapes. When I saw the elongated oval...I thought 'hula hoop'!
Obviously, she is a smart kitty to hula 3 at once, so the sentiment fits perfectly.
Now, as the cats are unmarked, it's easy to change them... add in new colours of alcohol marker and a little fun with a blending pen and the cat looks so different.
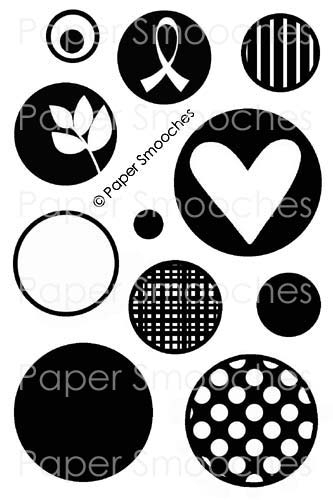
 See the splat.. you can create something similar with this Paper Smooches set
http://www.makethedayspecial.co.uk/shop.php#!/Whirligigs/p/24933813
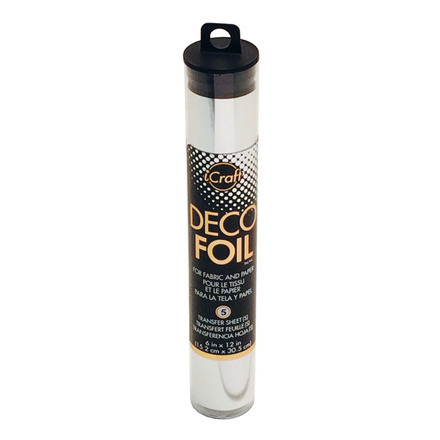
plus some of the gorgeous Silver Deco Foil
http://www.makethedayspecial.co.uk/shop.php#!/Silver-Deco-Foil/p/48337566
I've simply added mats at unusual angles and made sure there was enough of the grey card touching the ground so the card remained balanced. I also added some eyelashes and slight lips to the mouth with a fine liner so it creates a female kitty!

 Add sequins onto both cards to complete them.
Two very different ways to use the same cat stamp- without even touching the extras that go to create cute scenes for the cats.
I've picked this set as there are enough to go around. I'll leave the pampered pets alone for a week or two!
Which pets would you like to see in a stamp set?
Keren xx