Monday 31 August 2015

August Challenge Winner

It seems you all had lots of fun with our sketch this month as we had some awesome entries but we managed to settle on a winner, and our winner this month is Anni.


We loved Anni's design - clean and simple but with lots of clever details.  Congrats Anni - drop me a line and I'll forward you your £15 voucher.

Our runners up this month were Gemma and Nonni - both of whom also went with floral themes for their cards - there must have been something in the air!   Thanks ladies -  your cards were stunning.


Here's your blog badge ladies - wear it with pride!


We'll be back tomorrow with a brand new challenge for September with another chance to win £15 and this time we'll be breaking out another set of colours for you to play with ;-)

The Tool Shed


Good Bank Holiday morning to you :)

I couldn't resist the new Garden Grow set from Altenew, having a large garden and allotment, this set was definitely coming to live with me :) There are so many images for scene building so I decided to use the elements you'd find in a gardeners shed..... not that gardening is exclusively a guy thing but this set is great for masculine cards....


Having looked at the bench stamp I decided to mask off the legs on the stamp with washi tape and use the top as a shelf instead for my tool shed.
This is a one layer card which needed quite a bit of masking so I started by stamping out the hanging tools first and then went onto the shelf. I find it much easier to stamp out the whole design first on an A6 piece of rough paper to use as my spacing guide. I needed to make masks for all the items on the shelf which is really easy to do with Post It notes (you can but the 'all over sticky' kind in stationary shops here in the UK now).

I've water-coloured with distress inks although, because it isn't watercolour card I had to be quite sparing with the water!! The sentiment is from another Altenew set called Birthday Greetings, I thought the scripty font suited the sketchy style of the images :)

Garden Grow   Birthday Greetings

Not sure if much gardening is going to be taking place here today....... that depends on the Great British Bank Holiday weather as usual!! Hope you enjoy your day whatever you're doing :)
Thanks for stopping by :)
Jenny x

Sunday 30 August 2015

Let it snow!

I know in theory it's still summer but it is almost cold and wet enough to snow here today and with the arrival of all the new Lawn Fawn Christmas products this week my thoughts turned to snow and Christmas cards and I have 3 to share with you today.

Firstly, I'm taking the Hero Arts Snowflake background stamp I used last week for another spin and pairing it with the new Let is Snow Border Die from Lawn Fawn.  If you need to make a lot of cards then this is a really quick make - you could knock out loads of these super fast!


Simply stamped in grey onto a silver pearl card with the die cut mounted on a pop of pink (grey and pink is a great contemporary combo but a more traditional Christmas colour would work just as well if pink is not your thing).   I used stick-it on the back of my white card before die cutting to make sticking the fiddly border on a breeze!

I wanted to have a play with the Lawn Fawn Ready Set Snow Shaker dies - it does look a little confusing that they have two die sets to match one stamp - but this die set can be used as a stand alone as well as with the stamp.


Here I used it as a traditional shaker.  Use the smallest dome die to cut the hole from the centre of a piece of white card, poking out all the little bits and keeping them to be your snow in the shaker.  Stamp the snowflake background in blue.   On the base card, stamp the contents of your globe - here I've used the snowman from Mama Elephant's Polar Pals to show that lots of things fit in the globe.  Then there are two outer globe dies that are the same size - one simple outline and one with the base and outline shape together.  Use the simple one to cut your acetate and the other to cut your outer globe - here I chose a dark blue to make my globe stand out.  Fix your card to the front using foam tape ensuring your have no gaps around your globe for your snow to escape.  Use a powder tool to make sure there are no "sticky bit" around the inside for your snow to stick to.  Fill with your snow bits and some sequins and beads.  Fix your acetate over the top and cover with you globe.

You don't necessarily have to make a shaker with this die set though - if you are worried about dimension and postage, you can make really cute flat snow globes too!


Here I die cut the original dome in blue to give a snowy background to the inside of the globe (thanks to Jenny for that idea!)  The snowy hill comes in the set too and I just added the deer from Toboggan Together before covering with acetate and and a holographic globe.   This would pass the Royal Mail thickness test!


NEWS FROM THE STORE:

  • Stamping Bella's winter release plus lots of other stamps that are new to us are now in stock
  • Lawn Fawn's full release is now available here
  • Winnie and Walter restocks are now also available.  They have a new release out at the end of September/early October.
  • We received restocks from Hero Arts yesterday and they will be in store this afternoon (including the stamp I used above)   
  • We have the latest Christmas collections from My Minds Eye - they will be available this afternoon too in the Paper and Embellishment sections of the store.
  • Avery Elle will start showing their new release tomorrow and it is already en-route to us so will be available on Thursday when it is released in the USA.
  • We are starting work on our new website - if there is something you really dislike about our current website - do leave a comment to let me know as I want to make the new site as user friendly as possible so your feedback would be really helpful!

That's all for now as I will be back this afternoon with the winners of our current challenge ahead of the new one starting on Tuesday!

Tara
 

Saturday 29 August 2015

Happy Robots

Hello there, crafters! I was lucky enough to get my hands on one of the new stamp sets by My Favorite Things called "Bionic Robots". I love gadgets and technology and these robots are so cute, they immediately found a place in my heart.


Even though robots are most often associated with high technology, I wanted to create a playful and happy card. That's why my coloring doesn't have any of the grays or maybe blues that you would usually associate with a robot.

As a coloring medium I used my Stabilo pens. I know that you have seen me use these pens so far to achieve a very intense coloring, but you can use them perfectly as a watercolor medium.

I simply scribbled the color onto an acrylic block (you can use any piece of plastic or acetate as well) and then picked it up with a damp watercolor brush. I worked in multiple layers to slowly build up the color because I wanted to be sure to have proper highlights on my robot. I also found that the Stabilo pens, when used as a watercolor, can give very smooth and perfect blending.


The balloons are from a Wplus9  stamp set and I stem them repeatedly, with some masking. I started coloring them with the lightest color and then it dropped in the darker colors to achieve some shading. As with all watercolors, remember to not work in adjacent areas when the first area is still wet. You risk one color bleeding into the other one.

Thanks for stopping by today and I hope you have a very happy day!

Friday 28 August 2015

Pretend Pencil Sketching.

Hi everybody,

Jill here.  How are you all feeling today?


I was on Instagram the other day, and the guys at Mama Elephant posted this amazing picture to celebrate 'National Elephant Day'.  It was so simple, yet beautiful and brilliant.  It was the 'Ella and friends' set, and it looked like it had been pencil sketched.  I fell in love with it instantly, and knew I had to try something similar...


I don't even know how they did it to be fair, but certainly mine doesn't come close to how awesome theirs looked, haha.  Never mind, practise makes perfect, eh?
I used grey colouring pencils, but I think it would have looked much better using actual pencils.


I used Mama Elephant's 'Woodland Gifts' to create my 'sketch'.  I stamped out my scene using a really pale ink, and followed/sketched over the lines using a dark grey colouring pencil with a lighter grey to blend.  I introduced a touch of colour and some Glossy Accents to the balloon for a little interest.  I stamped the sentiment in grey ink, and matted onto an Avery Elle 'Truffle' note card.   Obviously this technique is all about the simplicity, so I left it there.

*update*
I've had a try with a normal pencil, and a little shading and blending, so thought I'd share where that got me...


...I actually much prefer this as it's a lot darker and a lot more intense.
What a relaxing technique though?!  I really enjoyed it and can't wait to give it a little more time.


I hope you like both efforts, and would love to see if any of you have given this technique a try yet, if so, maybe leave a link below and we can share our findings?

As always, everything I used is linked below.

See you next week.

Jillx

Woodland Gifts  Natural Collection Notecards (12 pack)

       Carnival Cupcakes  Sunday Sentiments

Thursday 27 August 2015

Lawn Fawn has arrived!

Sarah is away so I'm filling in with a super-quick card featuring some of the stamps released today by Lawn Fawn.   This little dude is so cute he's hard to resist!


The sheep and sentiment are from Baaah Humbug, simply stamped and coloured with pencils.  I love that you can add wool and have him knitting!   I framed him using the cute little corner stamp from Let's Bokeh using my favourite shade of ink from Mama Elephant - Winter - it's such a great shade for Christmas cards where you want a snowy feel.

Right - back to packing!

See you Sunday for some more inspiration.


Wednesday 26 August 2015

Party animals


Hello.
Today's card came about because i was practising colouring with my inktense pencils.
I love the look you can get from them either very loose watercolour or by taking more time and more layers you can have a lot of control.


I have used Lawn fawn stamps sets Party animal and scripty sayings.
The images were all coloured with inktense pencils and a water brush then fussy cut.
I made the background with distress inks and perfect pearls the tamped the sripty sayings to looking like streamers at a party.
I didn't add any extras as i feel there is plenty going on.


Party Animals Scripty Sayings

Thanks for looking.

Tuesday 25 August 2015

Pop-out Letters


 Hey! How is it nearly September?! I had one of those days where nothing really went right and after a piece of annoying news, I decided to experiment (only on your behalf of course ;-) )
I wanted to do something different with my alphabet dies & had an idea to partially cut them in a circular fashion. Can't say I've ever been very successful with partial cutting, so decided to have a go!
First off... draw a circle around a die-cut circle (you'll need the same size as the die for later)
 Now you can see what I ended up with- how did I get to that point? By adding the letter slightly below the circle so it would remain attached after the next few steps. The photo below shows part of the die sticking out from the top cutting mat (so it doesn't get cut) but actually I ended up moving the mat further away so there was more letter showing as otherwise the pressure cuts the whole letter anyway!
 The beauty of the circle is that no matter where you start and finish, it looks perfectly placed. I did have to keep my piece of cardstock fairly small so I could fit it onto the cutting area and turn it as each letter needed to be aligned straight with the cutting mat.
Next I cut out a central piece. The idea behind this was saying to a couple of friends that they were a blessing, but I decided to go with a ring shaped idea so you could use this for a wedding or blessing.
 To create the cut out part- this took a little more thought. I added washi tape just below the edge of each end letter. I then had to line up the cutting mat (so the bits protruding were the bits I DIDN'T want cutting)
 yep, scuse my messy cutting mat!

 Once I'd cut nearly up to the washi, I rearranged the mat so it lined straight with the other side and die cut again.
You end up with this shape cut into the cardstock. At this point you could use a craft knife to cut between each letter and create a standalone shape if you preferred.
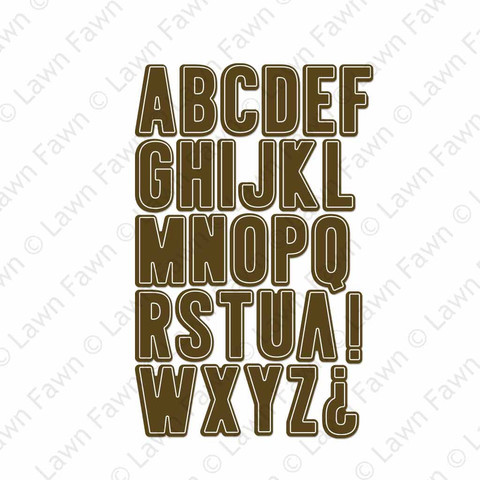
I should mention here that the alpha dies are Cole's ABC's from Lawn Fawn. They're a great price too.


I could have left it there, but wanted to bend the letters forward and add a contrast with some patterned paper. I die cut the letters again using this Beachside patterned paper pack
I flipped the piece over to the back- this was the easiest way to line them up. I added little dots of glue to the base of each letter and adhere them that way. Once I'd added glue to the back of the piece it meant when I turned the piece over, the letters didn't move from their position.

It might have seen a lot of work for one card- but I loved the process and want to include partial die cutting in my projects now. I added some tiny heart dies from a Lawn Fawn set 'Hello Baby' .
That's it.
No stamping.
Shocker ;-)

See you soon!
Keren xx