Sunday 30 November 2014

Japan meets Scandinavia....

I have something a little different again today - I want you all to get as much from your supplies as possible so I like to show that you can do so much more than cards with them.  So today I have a lampshade/tealight cover inspired by Japanese lanterns but with a more Scandinavian theme with reindeer........   (yes the inside of my head is sometimes a little muddled!)

My husband and I are slight Japanophiles and met whilst learning Japanese at night school over 20 years ago.  One of the things are love are shoji screens and the lanterns they make in that style.  So this was my starting point for inspiration.


I went with the black frame and vellum but went for a circle rather than a cube as it was easier to create.


To make the frame I used a couple of the Lawn Fawn Stitched Rectangles (NOW BACK IN STOCK) taped together with washi tape (the largest from the large and small together to get a nice thin frame) and used the die cut lengthening technique to get a longer frame than you would normally get.   This is easy to do with any die cut - just let one end hang out of the edge of your acrylic plates on your first cut so you don't cut all the way.  Then move the die along your paper (take care to keep it on the same angle) and turn it around so the other end is hanging out and then you'll cut one long frame (you can keep repeating it for however long your paper is!)   Hopefully this image makes it a little easier to understand if you've not done it before.


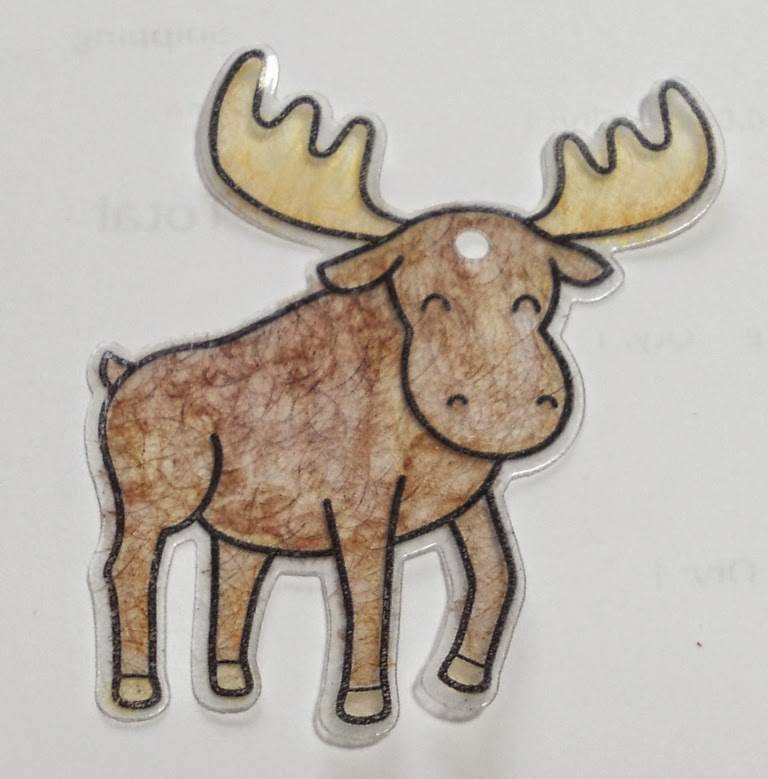
Once I had my two frames I cut two pieces of vellum just a millimeter smaller so the edges wouldn't show outside my frame.  I dusted the vellum thickly with my embossing buddy and then stamped the reindeer from A Holy Holiday from Paper Smooches using versamark and then carefully heat embossed it using Hero Arts gold powder.  For the noses I used a very old embossing powder called red tinsel which is translucent - but you could easily just use a red glitter instead like our Ruby Red ultra fine glitter.

Once the design is complete, all you need to do is run strong double-sided tape around the inside of the frame and then overlap the two uprights to stick the two frames together and make a lovely circular shade.

Obviously this project really comes into it's own at night - so here's a night shot with a candle inside.  As always with candles and paper - be SUPER careful and if in doubt use a battery operated tea light.  However as this is a wide shade it is far enough way not to set on fire so can be used with real candles.  I think it would make a nice gift if you boxed if up with a set of nice Christmas smelling tealights!


News from the Store:

As we're getting very close to December now - I should let you know about our Christmas closure.

The store will be closing at 8pm on Thursday 18th December - this will be a full closure so there will be holding page on the store and you will not be able to place orders until we open again on 2nd January 2015.

Please bear in mind that the postal service is now getting very busy so it is generally take longer for parcels to come through.  If you want items from the store as gifts - don't leave it until the last minute to buy as once it leaves me there is little I can do to ensure it reaches you on time.

If you are ordering Gift Vouchers - please put in the notes if it is for Christmas or some other occasion, and if it is for a man or a woman so I can send an appropriate card.

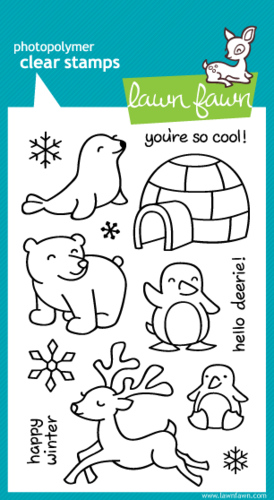
We are still expecting some more stock in the next week or two:

  • Penguin restocks from Mama Elephant will hopefully be here in a few days.
  • Avery Elle, Paper Smooches and Wplus9 all have new releases which are on they're way and should be here before we close I hope.
  • Lawn Fawn have a mini release for Valentine's Day which I have ordered and it will ship mid-December but this will not be here before we close.  But will be available as soon as we open.  They will have their major 2015 release showing at CHA in early January and that will be here just as soon as I can get my hands on it.   
  • We will also be adding some new items to the store in 2015 - starting with adhesive products.

Catch you next week!

Tara


Saturday 29 November 2014

Traditional Christmas

Hello crafty friends! Today I’m sharing with you a card using Mama Elephant stamps, the wonderful Believe in Magic set. The options with this set are endless and you could go and create most of your cards with just this set because it’s so versatile.


I started out by distressing the little globe with two colors after I die cut it, then gold embossed the wonderful intricate tree from the stamp set. To keep the colors traditional, I stamped the footer of the globe in brown and die cut it as well – both elements are mounted on 3D foam.

Before I adhered them to the front panel, I used the die for the globe to help me bend the sentiment into a half circle so it would curve perfectly, matching my element.


To add some more color to the card I mounted the white front panel on a piece of green card stock, just wide enough to peek out about 1/8 of an inch on each side. Now, for the twine: As usual, I wrapped the twine a few times around the front piece and then tied a secure know and cut off the entire rest of the twine. I created the bow separately and then glued it onto the knot if the original twine – you really can’t see it unless you know what you are looking for and you look really closely. I just find that so much easier.


On the grey card base, I stamped a woodgrain pattern to make it more interesting, but you can use literally every kind of pattern that you like… stars, dots, triangles – your creativity can go wild here.

You can find the products I used in the links below – if my used product isn't available in the store, I've offered suggestions on what you could use alternatively.

Friday 28 November 2014

An Unconventional Christmas Card

Hi there and happy Black Friday! Can you believe this is the last Friday in November? No?!?! Neither can I ! This year seems to have rushed past in a blur.

Today I'm sharing with you a Christmas card that is very unconventional.... and I think this would work great for some of the older people in the family or even someone who doesn't celebrate Christmas but you want them to know that you are thinking of them.


For my card layers I have used the to large frame dies from Mama Elephant 'Basics Set', I just love how easy it then is to design my card on the smaller panel.

The flowers are from Winnie & Walter 'Big, Bold Extras'  and the foliage is from Wplus9 'Under The Mistletoe' die set - both have which I have painted with watercolours for a softer effect. The 'jolly' die-cut is from Lil Inkers. 

Hope you a great weekend!

Hugs Lydia xxx

Basic Set - Creative Cuts


Thursday 27 November 2014

Throwback Thursday

Hello!
Feeling Christmassy yet? Everyone seems to have a lot more enthusiasm for decorating early this year-everyone I know has their tree up already! 
Today's card is a fun scene made using Lawn Fawn Winter Bunny and Lawn Fawn Critters in the Arctic,for a Winter rabbit team up.


The snowflakes are from the Lawn Fawn snowflake dies (oh I LOVE love those!) The bunnies are Copic coloured and fussy cut out (although both stamp sets do have matching dies) and the snow is just torn up glitter card.


Well that's it from me this week-hope you like it!

Lou x


Wednesday 26 November 2014

Little santa girl


Hello.
Have you seen the new Neat and tangled stamps in store? 
I'm using one of them today Little santa girl.
I have kept both cards very simple in design.
The little  girl in this card is coloured with copics and a white gel pen.
I used the bell stamp and heat embossed it in platinum onto my card base.
The neat and tangled sequins are the perfect finishing touch.


For this card i have paper pieced most of the little girl and coloured the skin parts with copics.
I added some gold stickles to the hat and shoes and a bow to the present.
I went with non traditional colours but still think its kind of wintry looking lol.
Again i heat embossed the card base using stamps from everyday circles gifts for you.

Click the image to go to the products.

Little Santa GirlGifts for YouEveryday Circles

Thanks for looking.

Tuesday 25 November 2014

Pic'n'Mix Christmas!


Morning! I thought I'd do a bit of a combo card - there are a fair few products on this project but I wanted to show that not having Christmas sets shouldn't ever be a problem.
Let's play spot the set again!!
First up..Louie's ABC's. It's size is just brilliant - I've used it for both cards and layouts and it's one of my most used die sets.
http://www.makethedayspecial.co.uk/shop.php#!/Louies-ABCs-Lawn-Cuts/p/36694226/category=5302074
The Cole's ABC's dies are not in stock right now- but a perfect substitute for 'world' would be Quinn's die set or Paper Smooches 'Alphawhimsy'.
http://www.makethedayspecial.co.uk/shop.php#!/Quinns-Capitals-ABCs-Dies/p/33461032/category=5302074
http://www.makethedayspecial.co.uk/shop.php#!/Alphawhimsy-Die/p/21462420/category=5169117
 
I love the Snow Days paper, that I've used to back the die-cut negative space and also die-cut the 'world' out of
http://www.makethedayspecial.co.uk/shop.php#!/Snow-Day-6x6-Paper-Pad/p/39872511/category=10168036

 You can see the vellum trees cut out.. you could use this scalloped set for the same effect
http://www.makethedayspecial.co.uk/shop.php#!/Stitched-Scalloped-Borders-Die/p/33080927/category=5302074

The Snowflakes are from this set
http://www.makethedayspecial.co.uk/shop.php#!/Critters-in-the-Snow/p/12011398/category=2717768
and the cute little musical notes are from the Year Four set
http://images-cdn.ecwid.com/images/1150504/214176184.jpg

 
And - lastly but by no means least, are the inks I've used- they're both Hero Arts ones- one is the gorgeous silver one
http://www.makethedayspecial.co.uk/shop.php#!/Silver-Shadow-Ink/p/42462358/category=10168038
and the Pale Tomato ink
http://www.makethedayspecial.co.uk/shop.php#!/Pale-Tomato-Shadow-Ink/p/38780814/category=10168038
 
 
Well- hope you've enjoyed this 'little bits of everything' on a project. Take a look at your stash and see what seasonal projects you can create with non-Christmassy stash.
See you next week,
 

Monday 24 November 2014

A Case of Bauble (CASE)ing!!!

Hello there..... I hope you're enjoying our month of Christmas projects?? It's certainly helping me to get in the festive mood :0)

Well after last weeks fun cards I have a slice of sophistication for you this morning in the form of Cream and Gold mixed with some natural twine......


After a recent trip to our local Homebase, where Christmas seems to arrive earlier each year!!, I spied this gorgeous tree decoration and decided it would translate well for a bauble on a card so I've used the Paper Smooches Ornaments dies which give you a good selection of shapes and sizes for baubles along with the hanging accessories!!
I've die-cut a piece of shimmery cream card using the largest circle in the set and applied a strip of adhesive across the cente so I could attach lengths of jute as per the photo :0) 
                                                Ornaments Dies

Do you see the diamond background on the Kraft panel?? It's created using part of the Argyle Backdrops set from Lawn Fawn... it's a very easy pattern to line up for repeat stamping which I managed to do in Versamark so I could heat emboss it in white. I love how subtle it is while adding interest to the panel.
The sentiment is from Lawn Fawns Let it Snow and is heat embossed on Vellum.

                          Argyle Backdrops   Let it Snow

As always... a quick reminder to hop over and check out the sketch this week at the Paper Smooches Sparks challenge blog... my teamies have some great inspiration projects to share with you this week and it would be great to see you playing along in the gallery too :0)

 Thanks for stopping by
Jenny x


Sunday 23 November 2014

Gift Giving on a Budget

Get yourself a cuppa, this is a loooooong post with lots of images, but I've done something a little different today and wanted to do a bit of a tutorial on how I did it so step-by-step photography was required.

I'm always looking for thrifty ways of making homemade gifts, especially at Christmas when we're all on limited budgets, and for me "adding handmade value" to standard gifts, like bottles of wine, is always a winner.  So today I have both a simple tag to dress up a bottle for a last minute gift, and also a set of wine glass charms that you can tie on a bottle to make the gift a little more special.


For the quick and simple tag - you need the fabulous stamp and die set from Avery Elle called Cheers.   I simply die cut the bottle tag from kraft card and then added strips of washi tape from the Sleigh Bells Ring washi tape collection and die cut it again before stamping the very appropriate sentiment in the gap I left in the middle.  I finished with a wooden snowflake from Lawn Fawn.  This is such a quick and easy way to dress up your bottles and much cheaper than those boring old bottle bags!

Now for the slightly more complicated gift - a set of 6 wine glass charms on a nice big tag.  This is still an easy make but does take a little longer - you will need:

  • Shrink Plastic
  • A selection of large(ish) stamps - shrink plastic shrinks by 70%!
  • Stazon Ink
  • Copic or other markers
  • Matching dies or scissors for fussy cutting
  • A hole punch
  • A heat gun/oven
  • Wine Glass Charm blanks (as these could be hard to get hold of I have added them to our basic supplies section of the store)
  • Jump rings

I decided to go down the Lawn Fawn critters route for this set and selected 6 critters with a winter theme from Critters in the Arctic, Into the Woods and Critters in the Snow.

First you need to stamp your chosen critter using stazon ink onto the shiny side of your shrink plastic.


Turn it over and colour the back lightly with copics or other markers - you won't be able to do lots of blending and shading as the ink just sits on the surface, and bear in mind that when it shrinks the colours will intensify as well.


Use your matching dies or scissors to cut it out.  If you use a die - they will cut shrink plastic - you may need a couple of passes and/or a shim but they do cut the plastic surprisingly well.


You must remember to punch a hole in your critter before you shrink it - and again remember it needs to be large as it too will shrink with your critter and it needs to be big enough to get a jump ring through when shrunk.   I used the small size on my crop-a-dile.


Shrink your critter down with your heat gun or in the oven as per the manufacturers instructions.  I use my heat gun and put them one at a time into the lid of a cardboard box to stop them blowing all over the desk (holding them down with tools can cause them to shrink unevenly so free and easy is better for shrinking).  Turn them out and whilst still hot flatten them down with an acrylic block.   Here's the moose finished inside the die so you can see just how much he shrinks!


All that is left to do then is to pop a jump ring through the hole, close it and hang it off one of the wine glass charm blanks and they're ready to use at your Christmas party so everyone knows who's glass is who's.


To turn them from individual charms into a gift you ca give, I made a tag to hang them on.  I used the gorgeous large tag from Tags A Lot from Mama Elephant and die cut it from kraft again and decorate the bottom with more washi tape.  I stamped the large Cheers! from the cheers set from Avery Elle at the top and then to hang the tags I drew some light pencil lines at the 1/4, 1/2 and 3/4 points to get 3 columns, and then drew two horizontal lines at the height of the charms to get 2 rows.  You then need to make a hole on the horizontal lines a couple of mm's on either side of every vertical line.  Make sure all your charms are facing the same direction (ie with the eye on the same side) and then feed the hook through both holes securing into the eye so they hang on your tag.   Add some ribbon and tie around your bottle - et voila - a gift the recipients can keep using long after the contents of the bottle has been drunk....


Happy Shrinking!   See you next weekend.

Tara

Saturday 22 November 2014

Less Is More With Clear Embossing Powder

Some cards are so much fun to make and you’d have never guessed it before you started. This card is a shining (yes, pun intended) example of how you can use clear embossing powder, which is now also available at the Make The Day Special Stamp Store, to create stunning effects. I discovered this quite accidentally and I’m so happy I changed my original plan.


I sponged the background to create a wonderful cold winter night (using cold colors like dark blues and purple). Once I was done, I originally wanted to use golden Gilding Flakes on the stamped image, but after I lifted the stamp off and saw the effect I was already achieving with just the Versamark ink, I grabbed my clear embossing powder.


As you can see, the clear embossing powder changes the brightness of the underlying color a tiny bit and that’s all I needed. I wanted a very clean and simple card and I feel that’s exactly what I got with this technique. Also, very non-messy as long as you remember to heat set your background first and use an anti-static tool so the embossing powder won’t cling to it.

I intentionally made this huge snowy hill so it would take up most of the card. In total, including die cutting and getting out all the tools, this card took me about 20 minutes. Once you have everything out and ready, you could probably cut that in half, so this card would be perfect to mass produce. It’s the first time, really, I’m using Neat and Tangled products and I’m delighted.