Friday, 8 November 2013

Noel


Hello.
I have another Christmas card for today.
I made the sentiment for this card using Quinn's capital ABC's and Bows and holly both from Lawn Fawn.
Everything has been heat embossed with in an inch of its life lol.
The letters are coloured with copics and the wreath was coloured with distress inks and inktense pencils.
I also used the let it snow set  for the snow drift which was also embossed.
I finished with some tumbled glass distress ink and dylusions white linen spray inks.
If you are still deciding on your Christmas supply's why not check out our Christmas section.
Thanks for looking.

Wednesday, 6 November 2013

Chilly chums


Hello.
I thought i had better get started on some Christmas cards as we are now into November.
I have used Paper smooches Chilly chums set.
I started by making the background with distress ink then heat embossed some snowflakes from the set
The snowy panel at the bottom of the card is actually glitter card .
My camera didn't want to show you that though lol.
I stamped each of the characters in archival black ink then coloured using inktense pencils and water.
That was the first time i have tried them and would recommend them ....although i still need some practise :)
The sentiment is also from Paper smooches and is in the Joyful greetings set.
If you are looking for Christmas stamps Louise has made a special section in the shop just for it HERE. 
Thanks for looking.


Tuesday, 5 November 2013

Summer Strawberries!

There should be a firework themed card today- in the UK we have Bonfire night. Alas, it's so wet and miserable, I thought I'd mix it up and think of warmer times. Strawberries are one of my favourites- and it's easy to miss them on this set
They're not quite ripe- see the yellow- I was trying to shoehorn the sentiment into the images. The idea that the strawberries need something else to be good-not quite bang on- but you can see my logic!!
It's making me think of cream teas, and scones & sitting out looking over the water…
Before I drag you into my daydream- go and check out some of the other sets in Make the Day Special- right now we've a new Christmas section. Lou has cleverly put together a perfect selection of products for handcrafting your Christmas. It's a shame she can't do the same for all my Christmas shopping ;-)

See you next Tuesday!

Happy stamping!

Monday, 4 November 2013

A Foxy shaker card

Hello!
Tomorrow is my eldest daughter's 8th Birthday,and so there was much hinting at what sort of card she wanted. The main thing was that it needs to contain a fox,her most favorite of all animals. This is great as we have a few sets of stamps with foxes on. I went with Paper Smooches Chilly Chums in the end,as she is a very cute fox.  I decided to try making a shaker card using old packaging (when you are a hoarder crafter,you tend to keep all kinds of packaging,don't you?) ,a simple enough process unless of course you are rubbish with measurements like me. So below is the method I used based largely on guess work,and loosely on exact ruler measurements. Ladies and gentlemen,I give you.....THE FOXY SHAKER!


The process....
Measure the shape you are inserting and cut a cavity to fit.


When you are happy with your fit,work on the shape of your card.
 

Cut a piece of cardstock for your base. Start arranging all the pieces until you are happy with the position. Keep checking that they all fit in the 'view box' of your packaging.


Once happy with the position and fit,glue eveything in place. Bear in mind some shaken items might get stuck onto things like grass etc.so try to keep it flat!


If you are adding a paper piece to the front of your card,do so now

I left a wide margin on mine to neaten the edges around the cavity. This will narrow the space,so check it all still fits well!


Apply tape to all the areas you want stuck on the inside of the view box card,and glue the view box into place. Put the sprinkles inside the viewbox and lay the backing card with your picture onto the strips. 


Voila! A 3D shaker card fit for a fox obsessed birthday girl!


Hope you could follow that!
Lou 


Sunday, 3 November 2013

Night Owl!!!

Helloooo there :0)

As I write this blog post on Saturday, I'm quite literally blowing the dust off my computer keyboard here as we are in the middle of building works at home..... despite covering everything with dust sheets all week it still finds it's way in to leave a tell tale layer!!!
Access to my craftspace has been limited too which is why I'm sharing a card I created for Octobers Craft Stamper magazine so I apologise if you've seen this before...


I've used the Paper Smooches sets called Autumn Groves, Chubby Chums* and My Peeps* to make this night-time woodland scene. The sky has been inked on the base card over a circle mask to give a bright white moon. The owl is nestled on the edge of the window aperture and the trees are placed at different heights behind it to give the scene some depth. 
The fun sentiment is quite good for a 'Well done' style of card or simply a quick 'Hello' ..... a bit different from the chilling screeches the Tawny Owls use in the woods near us at night!! Perfect for Halloween last week!!

Thanks for stopping by today :0)
Jenny x

* Sorry, currently out of stock


Saturday, 2 November 2013

Anniversary Cake

Hi all - Tara here with my weekly post a day early just to confuse you and today I'm sharing an anniversary card I made for our niece and nephew's wedding anniversary this weekend.  I decided to use Fanfare from Avery Elle to make them a cake instead of baking them one ;-)


I stamped the two layers of cake onto some lovely paper from Echo Park (Victorian Garden set) and as all the papers in that pad are double-sided I used the reverse to create the cake ribbons and bows and paper-pieced it all together.  To add a little dimension to the ribbons, I used a couple of shades of toner grey copics to knock the "insides" back a little - toner greys are your friends when you don't have the exact shade you need.  I stamped the sentiment from the same set onto the larger cake.

For the cake stand I stamped and embossed it in gold on a scrap of card and fussy cut it before sticking it down and outlining it in black to match the cake with a fineliner.  I cut it out with a nestie and used the larger die to cut a mat from the same patterned paper I cut the ribbons from.

I finished with a little sheer lemon ribbon and a liquid pearl centre to the bows and it looks good enough to eat ;-)


Have a fabulous crafty week folks - see you next Sunday!

Friday, 1 November 2013

A Bit Of Avery Elle


Hi there fellow stamp lovers, so sorry for the late post. With the kids off school I actullay forgot it was Friday?!?!?! Imagine that ?!?! So I'll be quick ...cakes to bake.

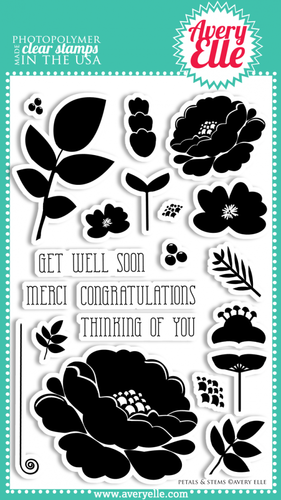
To today's card I have used the Avery Elle sets 'Petals and Stems',( and some oss ones Framed Fonts and Oh Happy Day)

Petals & Stems

I also used the sketch from the Avery Elle blog.


So sorry for the rushed post.... the kids are running wild!

I promise to do better next week.

Hugs, Lydia xx