Tuesday, 30 June 2015

June Challenge Winner

I think we must have heralded summer finally with our beachy colour combo as it's super hot and sunny here today!

We had some superb entrants and you made it really hard to chose a winner, but the votes are in and I can now reveal that the winner of the £15 voucher this month is My Girl Lollipop with this classy floral design.


We loved the contrast between the blue flowers and the bold white space with the pop of red to divide the two.  Great eye for detail and design.   Drop me a message so I can mail your voucher to you.

Our runners up this month were:

Karin  - loved the lovely background Newton is floating around on (we could do with joining him today in this heat!)


Finally Friday - we loved that she hand drew a swimsuit on this pair of bears!   How cute :-)


Thanks for playing everyone - we love to see what you do with our stock.   We'll be back tomorrow afternoon with our brand new challenge for July!


Origami Birds and Encouraging Words!

 Hey!
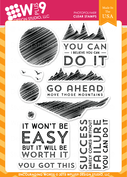
Ever feel a little blue and need some encouraging words? Or maybe you've a friend who really needs a lift..well this set is just perfect for those occasions using WPlus9's Encouraging Words
http://www.makethedayspecial.co.uk/shop.php#!/Encouraging-Words/p/49440776/category=3351881

See the hills- the third one down? Turn it over and then stamp the edge again on a 90 degree angle against the first stamping and you get...a origami-ish looking bird. Kinda a little Jurassic World too.
But, you don't need to mess around with the set..you can just stamp it plain and simple.
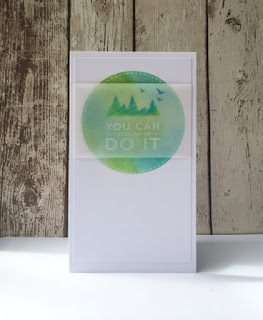
 I've done a dual colour on the mountain stamp by adding ink to one half and then turning the stamp and inking with a different colour. The sentiment could have been stamped and embossed in white except I wanted a really soft subtle feel to the card
The background was simply distress ink, sponged through a die cut aperture. Really simple. I had the idea of creating a earth-like pattern, but the detail was lost through the vellum.
Do check out this set- it's perfect for one layer cards- really easy peasy.
 
Hope you have a really lovely day!
Keren x


Monday, 29 June 2015

Cookie Dough Ice Cream


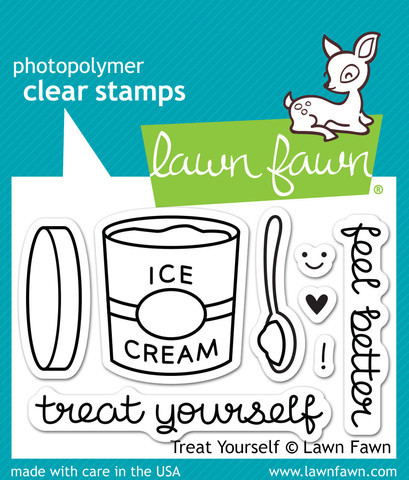
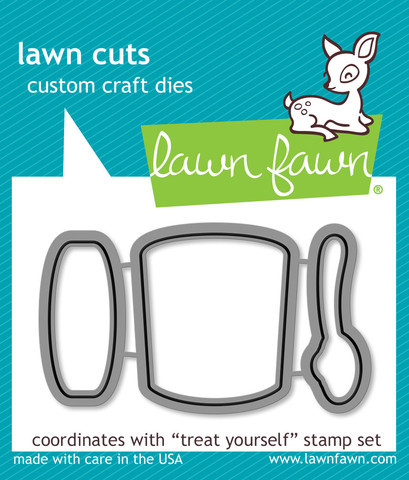
Are you an ice-cream fan?? Are you into all those yummy flavours that Ben n' Jerry's have introduced us to ??....Well cookie dough is one of my faves so I made a whole tub full using the lawn fawn set called Treat Yourself..

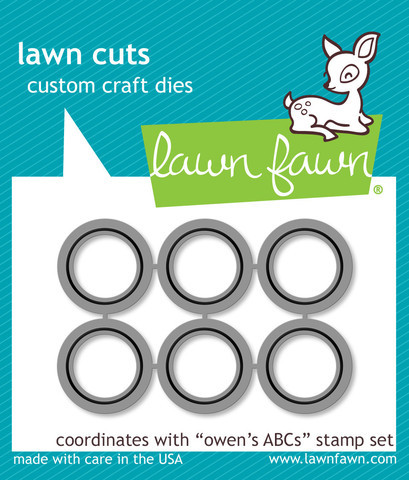
I had the idea of using the dies for Owens ABC's to cut a grid of circles as a background for my tub of ice-cream but it wasn't until I'd done that I had the idea to ink behind them and turn them into cookies.
I think I'll leave my circle dies wired together because it creates such a good pattern
without any effort to line up the circles ;) 
Once I had passed the die through my Bigshot once I moved the die down slightly and re-inserted the top row of circles dies into the bottom row I had just cut ... perfect spacing and no hassle :)
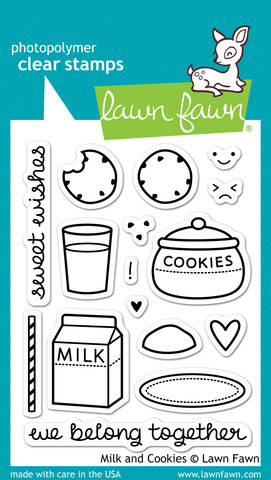
The cookies are created by sponging ink onto the card base underneath and adding chocolate chips from the Milk and Cookies set by Lawn Fawn.


Owen's ABCs Lawn Cuts  Treat Yourself  Treat Yourself Lawn Cuts  Milk and Cookies

Over at the Paper Smooches Sparks blog we have a sketch for you this week so do pop over and check it out. This is my last inspiration card with the design team and uses the Spiffy Scooter stamps and dies for a shrunk down version of the sketch..

I hope you can join us in the gallery :)

Jenny x

Sunday, 28 June 2015

Sweet Smiles and Umbrellas!

I have a couple of cards to share today both of which feature Lawn Fawn's Sweet Smiles stamp set but the first one is probably not quite what you'd expect from that set!    I have a card I saw on the Mama Elephant blog on Friday to thank for my inspiration for this card, which I would credit, but it seems to have been removed.  [edited - the post is back again now so click here to see the card that inspired mine] It was a card filled with a rainbow of umbrellas and when I saw it I immediately thought of my favourite Pixar "short" - The Blue Umbrella where two "different" umbrellas meet and fall in love.  So I recreated a scene from the movie to make an anniversary card for my husband who is a huge Pixar fan.


Here's a still from the movie in case you haven't seen it so you can see where I got the idea to add the faces to the umbrella's from Mama Elephant's Chance of Rain set (it's only 6 minutes long so google it and watch it, its such a sweet story)   To make it into an anniversary card I needed an appropriately mushy sentiment - that came from Sunday Sentiments - I just didn't ink up the second line of this one as I'll pop that on the inside!   The background is a simple watercolour technique using the new hickory smoke distress ink and wide brush to get deliberate downward strokes to look like rain falling.


For my second card I used the gumball machine and ignored the faces this time!  I wanted to concentrate on the machine and make it realistic with a clear dome and a back that could be seen inside the card.


You don't need anything fancy to do this - just a piece of acetate and some stazon ink.  Stamp it twice (taking care to not stamp the gumballs on one image - only ink up the outline) and cut it out taking care to cut outside the lines on the glass dome, but just inside the lines on the parts you want to cover up with cardstock at the top and bottom so that the acetate edges don't show.

Now stamp once more on card stock with copic friendly ink - this will be your front so it is a "full" stamp.

To stamp the back I inked up the whole machine again but then used a cotton bud to wipe away the ink from the mechanism that would only be on the front.  This leaves you with a gap in the bottom of the machine so just use a multi-liner to join the lines back up again and you've got the back of your machine!

You need one more stamping process to get the back view of the gumballs - some mirror stamping.   You can do this several ways - stamp onto acetate (or even your acrylic block) and then press that onto your card, stamp onto the back of another stamp and use that to transfer your image or use a roller to take the image from your stamp and roll it onto the paper.   As this is a pretty simple image, I just used my acrylic block and then a multi liner to make the lines more solid to match the front as mirror stamping gives you a second generation style line.

Colour everything with copics and cut out all the pieces you need.  Stick the gumball images together so the colour is showing on the outsides and then using a clear glue like glossy accents stick it to the front acetate making sure to line it up with the black circles.  Sandwich the two acetate sheets together.  Glue on the backs and fronts of the machine pieces and set it aside to dry.

To make the card itself, set a stitched circle die just off the edge of your card to cut your aperture and use the next size up die to emboss a second circle around it.  Stamp the "HAVE A BALL!" sentiment which comes in the set underneath it.  The other sentiment is from "Year 3" also from Lawn Fawn is stamped onto a strip of paper from their Beachside pad.


NEWS FROM THE STORE:

  • We will be getting our first shipment from My Favorite Things this week - we are starting small and got all that was available from the last couple of releases along with a few other bits and pieces that caught my eye.  Some items were out of stock so I will try again to get those with the next release which will be available in early July.
  • WaffleFlower Crafts latest release will be here shortly as well along with their ink pads which several of you asked for last time.
  • We will be restocking Paper Smooches this week and getting their latest couple of releases.

Have a great week - catch you on the flipside ;-)


Saturday, 27 June 2015

Unforgettable Coloring and a Glittery Hello

Hi crafters, Julia here! I know that a lot of you have the "Unforgettable" set by Wplus9 and and since it's back in stock at the Store, I wanted to play with it.


I started out by stamping the little elephant onto some white card stock. Then I grabbed my Prismacolor pencils and started to create my background. You can do this with any medium you like: Copic markers, watercolor, you name it. Whatever feels good to you, go for it!


For the front panel, I die cut it with the Wplus9 Sunshine Layers dies and then also die cut a circle through which my elephant would peak. Any shape would work, but I am currently stuck on my circle shapes so you will probably see more of them in the future. Sorry ;)

I also used the Hello die by Wplus9 for the sentiment and die cut it into the top layer of my front panel. The front panel is actually two layers of white card stock. They are adhered together by using a sticky sheet and before I adhered them together, I poured some Micro Fine Glitter onto the sticky sheet so it would shimmer through the word that I die cut from the top layer.


Then it was just a matter of mounting the front panel onto the card base with some foam tape. I finished up the card by adding some enamel dots and some rhinestones for sparkle.

I hope you enjoyed the card. Thanks for stopping by and leaving a comment, you brighten my day!

Friday, 26 June 2015

Party In The Woods

Hi everybody,

Hope you are all well.

I've got a fun card to share with you today.


I used Lawn Fawn's 'Party Animal's' set as the main focus of my card.  As soon as I set eyes on this set, I thought it looked like the animals were dancing - and I couldn't wait to help them shake what their mama's gave them!  So that's exactly what I did...


I have no idea what this type of card is called - but the little cute bear is on invisible thread, so spins, and twirls, and dances like the party animal he is :)


Woah...check me out...yeah I added a video...(I think)!  Excuse my inky fingers - but I'm sure I'm in the right crowd to understand!

Everything on this card is Lawn Fawn, (megafan).  The cute critter's and my sentiment are from the the Party Animal set, the tree's are from Joy to the Woods, the banner is from Home Sweet Home, I used the Grassy Border die for my grass (state the obvious why don't you, Jill?), and all the patterned paper is, yup, from Lawn Fawn.  

I took all the elements I wanted to use to create my scene, stamped them out, coloured them using alcohol markers, and fussy cut.  I gave the bear a party pat, and some cutlery, (because everybody knows the best thing about a party is the party food!), which are included in the set, and all of which I had to stamp, colour, and cut twice, as I needed the matching image on the front and back.
I inked up my background, cut a circle from the centre, and built my scene around it.  To make my bear 'dance', I simply stuck the two coloured images back to back, with a string of invisible thread sandwiched between the two, then adhered the thread at the top and bottom of my die cut circle.  To keep everything nice, neat and tidy, I covered the back with a piece of matching die cut card.  I added a piece of patterned paper on the back wall, so it looks pretty through the peep hole, and there you have it.  a dancing bear all ready to party with his pals :)

I hope you like it.

As always, everything  I used is linked below.

See you next week.

Jillx


Party Animals   Joy To The Woods   Grassy Border Die   Home Sweet Home

Thursday, 25 June 2015

Little Folk

Hello!

There was a challenge at CASology recently with the code word Kids which prompted me to get out the cute characters from Mama Elephant's In My Heart set.  I haven't used this little people very much but once I got going I made a few cards which I will share with you today :)


First up I used my Lawn Fawn polaroid die to create a focal point for my little girl and die cut a stitched circle to create a very simple scene.  I coloured the girl in with Chameleon pens.  The polaroid is intended to look like it is pinned to a notice board with the cork effect paper behind.


Using another of the little girls I coloured her with Spectrum Noir pencils and filled a Lawn Fawn speech bubble die with hearts.  A bit of shading grounded the girl on the card.

Finally I made a super hero card for my youngest's birthday which is in a week or so's time using Mama Elephant's Tiny Heroes set.  The you are is from this Neat and Tangled set and the patterned paper behind the 10 is from Avery Elle's Everyday Paper Pad:


Hopefully this has given you some ideas for using your little people.  They are super cute and can add lots of personality to your designs :)

Thanks for stopping by!

Sarah x


In My Heart   Tiny Heroes   Large Stitched Journalling Die (4x6)   Say Cheese Die
 
Large Stitched Square Lawn Cuts   On the Corner   The Everyday Collection 6x6 Pad