Showing posts with label Acetate cards. Show all posts

Tuesday, 18 August 2015

Nightmare Surfaces!

 Ever start a card and wish you hadn't?!!
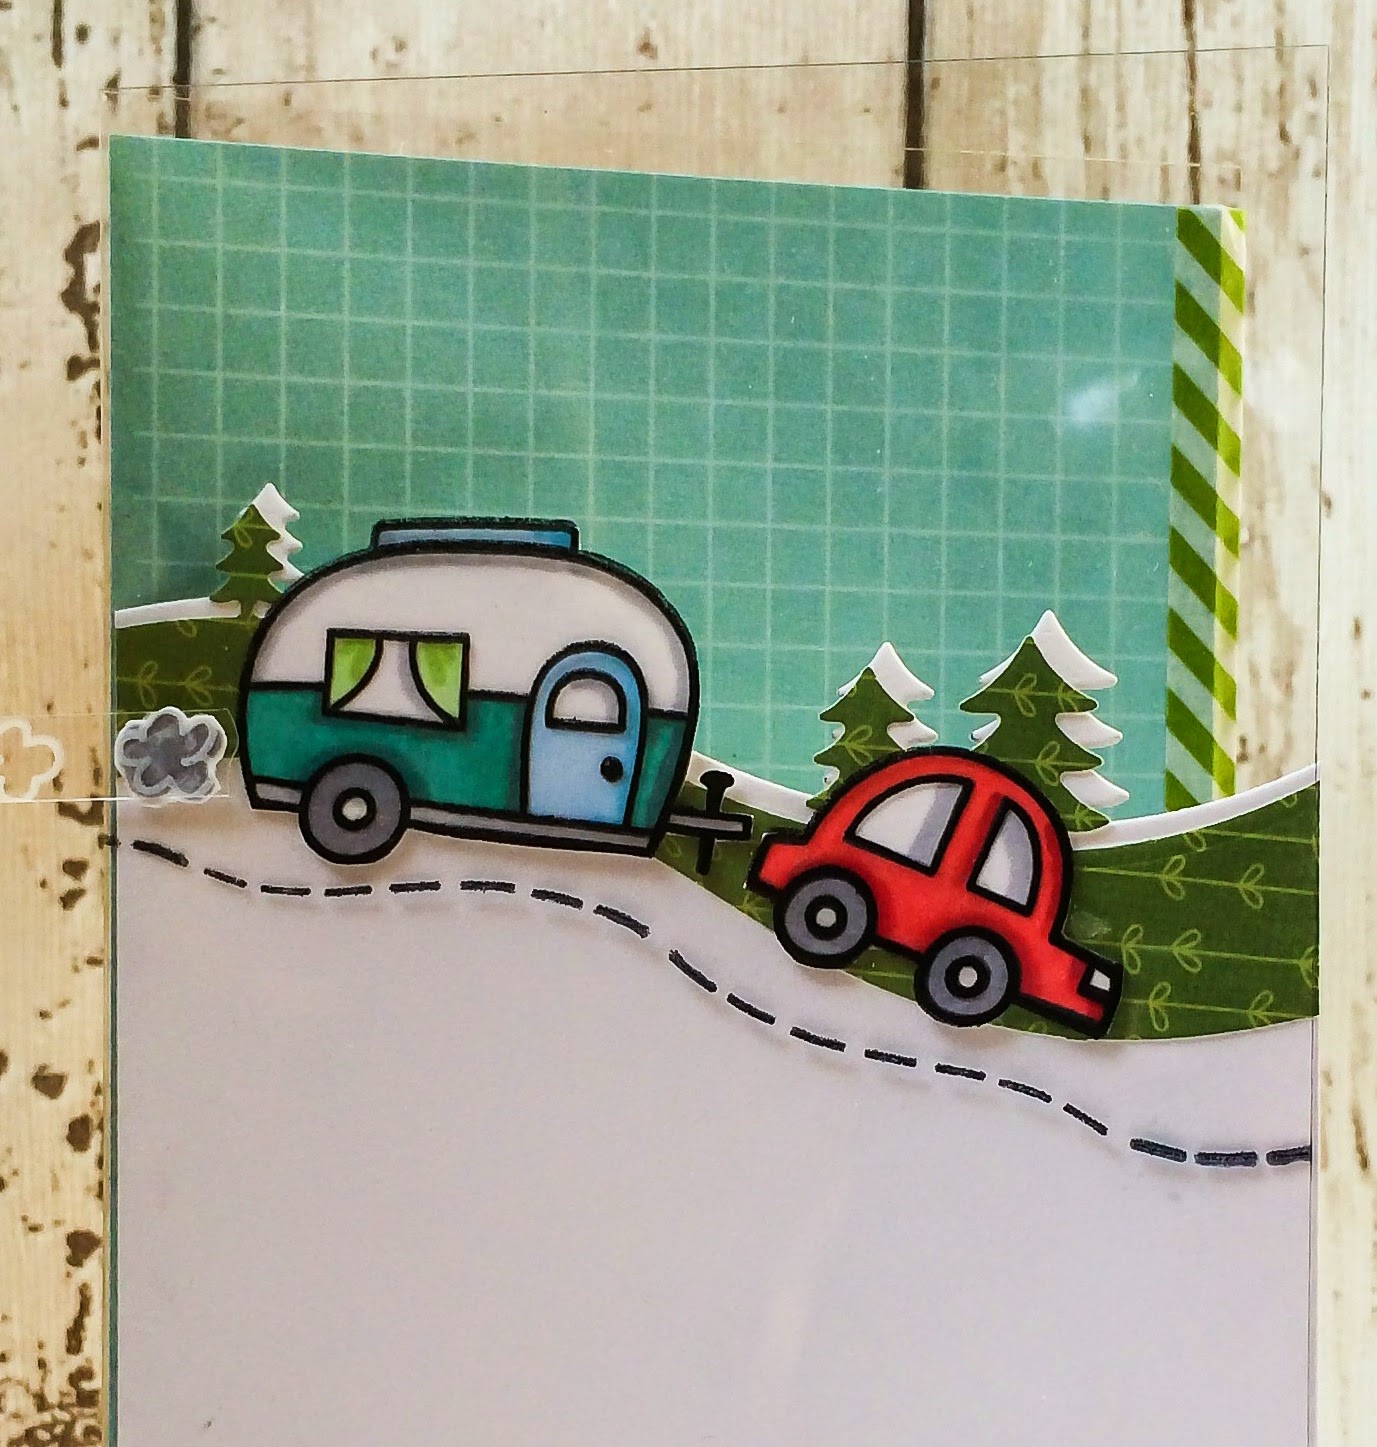
This one definitely fits into that category.. vellum, stitching acetate and flakes plus trying to photograph them too!
So- how do you do the whole 'don't let the glue show' thing ?
The acetate.. washi, Stick It (a fantastic adhesive available in store that's pretty invisible!) or stitching. like I've done here.
The acetate is the same... use the same sort of devices, or use an embellishment over the top to hide the glue.
I've used the following supplies
Trying to photograph it?
Ha.
The acetate shows your reflection and then if you angle it, it looks weird, but there is help in taking the photo when the light's not too bright- early morning so there are less rays bouncing off your picture.

Just pop a few sequins to add some colour to it. I added silver flakes to vellum which worked surprisingly well. You could easily use cardstock but I wanted to keep the light and airy feel to it.

Hope you like my unusual card- just don't have a clue where to write the greeting now ;-)

Tuesday, 21 July 2015

Just One tiny Stamp..

 Hi! Thanks to Julia for filling in for me last week. This week I'm championing little things.. or more precisely.. the little stamps.
Those ones that aren't always exciting enough to be a focus of themselves.
Take this card, I thought I'd use the spoons from the Lawn Fawn set..Baked With Love
I stamped lots of spoons and coloured them in with alcohol markers. Then I pierced the tops & threaded some cotton through.
 I love creating what I've named 'chandelier' cards- so very easy.
Just a length of sturdy acetate, measured so its longer than the gap you'll fill. Measure two slits where you want to insert the acetate & fold the strip at either end (leaving enough either side to glue down at the back).
Slot in the acetate and secure at the back. Now you just want to suspend the hanging elements from some washi (or double sided tape) and secure onto the acetate curve.
Just decorate and you're done.
Yeah, I know it would be tricky fitting into an envelope. You could always create a square version that would fold flat, but I think this shape is lots of fun and you could always send it in a little box.

It would look amazing on a bigger card with lots of the cooking items dangling down. I wanted to keep it simple- I thought the spoons looked a little like hanging balloons!

Hope you have fun creating a 3D card,
See you next week,

Keren xx

Tuesday, 7 April 2015

Flirty Bunny!


Hi! Hope you've all had a lovely Easter weekend. I have a question for you…..Can bunnies be flirty?
This one looks a little coy!
I've got out Hello Baby and mixed it with Flirty Frames…(get the question now?!)
You can see the background- I've stamped on acetate which is one of my favourite surfaces to stamp on. I've used Stazon Opaque Cotton White which is a much easier ink to get a result from- it doesn't slip as easily as the normal Stazon colours


I've sneaked in the foliage from Stuck on You and tied it all together using the focus in one small area and stacking the elements over each other.

A simple card that you could utilise for a 'happy Spring', a Birthday, or something more. The frames set is so brilliant- you need to get it before someone else rushes in and swipes it from the store!

See you next week..


PS- for those of you lovely girls who answered my question- I'd taken the photograph before the glue had dried properly.. if you check out the sequins in last weeks post, you'll see what I mean! xx

Tuesday, 7 October 2014

Anyone for a Holiday?!

 
Hi! Have you noticed all the holiday adverts on TV? The promise of a perfect holiday with perfect weather in a perfect place with a perfect family?! Do you have those kind of holidays? Me neither?!
 
I was thinking about getting out and about and this Happy Trails set by Lawn Fawn came to mind
http://www.makethedayspecial.co.uk/shop.php#!/Happy-Trails/p/33080911/category=2717757
I've tried to make it look like it's slightly snowy by adding white trees behind the green. It's stamped onto acetate in black first. I've then stamped it onto white cardstock, coloured it in and then adhered it directly behind the acetate layer so it looks coloured.. an easy technique when you can't colour in a surface.


You can see in the first picture that there are little puffs of exhaust fumes actually coming off the card. I'm afraid the photo has a little of me reflected in it, but taking pictures of shiny surfaces is sooo hard. Tips anybody?
 
I'll leave you thinking about holidays and crisp white mornings in snowy climes. Where's the travel brochure..quick!!
 
 
Keren xx


Tuesday, 27 May 2014

Something Wonderful!

Hello! How are you all? Thought I'd squeeze another project out of what is probably my favourite stamp set at the moment..'Wanderlust' by Mama Elephant.
The tiny map stamp is gorgeous for a background image & I've simply punched out lots of little holes where the circles are on the stamped image & backed them with coloured cardstock giving a rainbow coloured effect. I'm on a bit of a rainbow kick right now so the black and white main part of the card is the perfect base for colour.
I die-cut circles out of the panel & added a few extra bits- such as the sentiment & an angled matt. Another big go-to supply right now is acetate, so I used that for the card base to make more of an unusual card. 

Hope your day has something wonderful in it ( mine will involve baking, crafting & a kids party !)

See you next Tuesday,