Showing posts with label Stick It Sheets. Show all posts

Friday, 11 September 2015

A friendly natter

Hi everybody,

Well, after the mid-week excitement of our 'Surprise' blog hop, it's a pleasure to see you all again so soon!  And I'm going to keep the fun, friend feels going with this weeks offering...


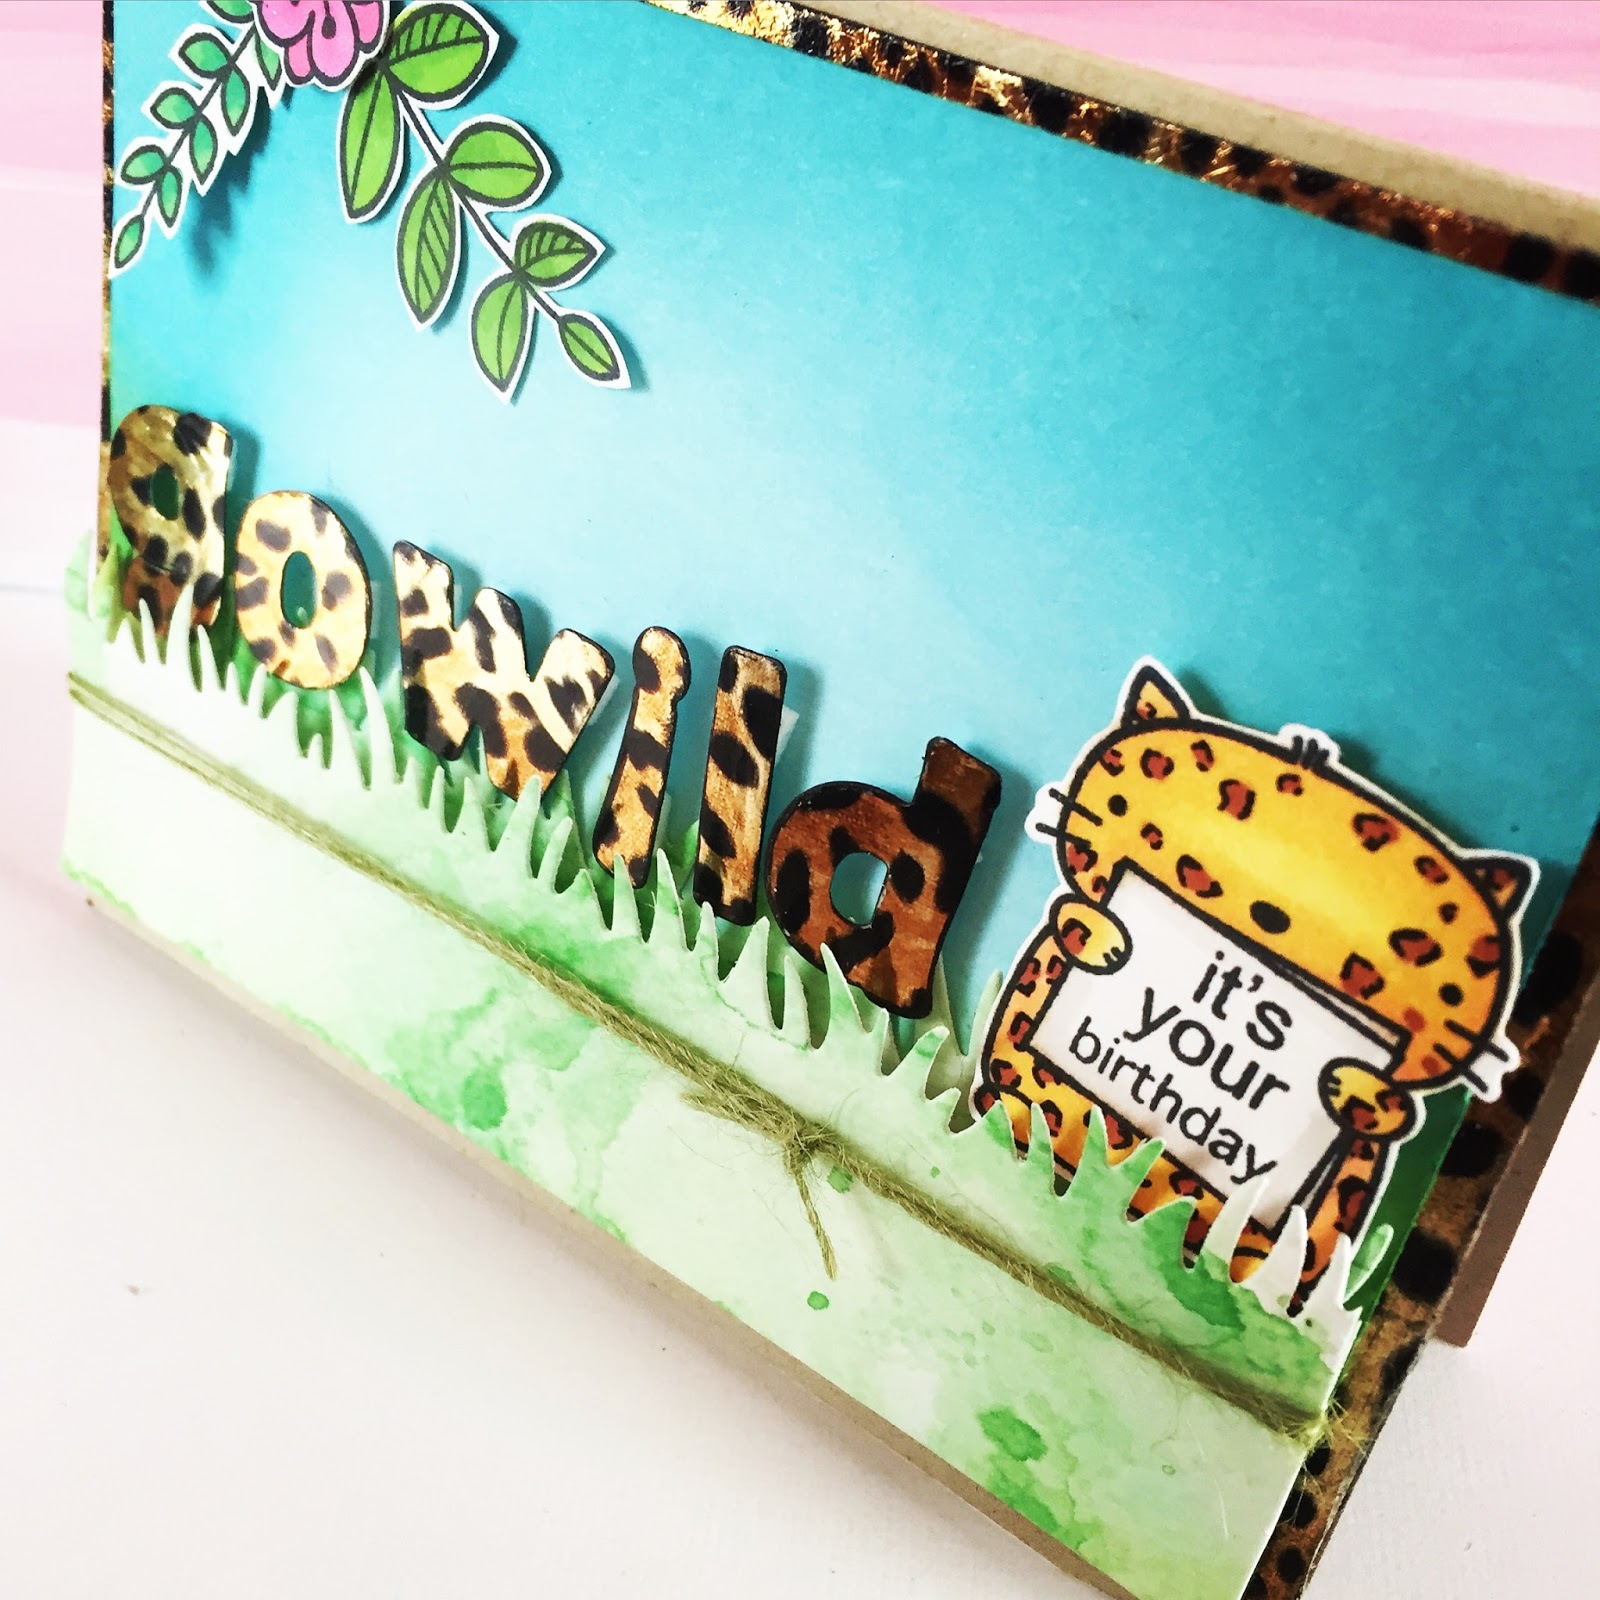
I used Wplus9's 'Going Places' stamp and matching die set to create this week's card.


The set comes with a little cute hot air balloon, and all the little critters sit in the basket and look awesome, but I wanted to see what else I could do with them, so dreamt up this little, 'neighbours chatting across the garden fence' scene.


Everything on my card is coloured using Distress Ink as watercolour.  I used Mama Elephant's 'Landscape Trio' cloud die to create my hedges, and Lawn Fawn's 'Picket Fence Border' die as, well, obviously, my picket fence!  The sun is from Lawn Fawn's 'Spring Showers' set, and the sentiment, which is stamped onto vellum and attached using 'Stick-It', is from Mama Elephant's 'Sunday Sentiments' set.

You are, literally, spoilt for choice with the amount of cuteness to choose from in the 'Going Places' set, all as adorable as each other.  As you can see, I couldn't choose, so didn't...and just went with them all haha.  I only wish I knew what they were chatting about :)

I really hope you like it.  As always, everything I used is linked below so be sure to go have a look and see what world you want to create!

See you next week.

Jillx

Going Places   Going Places Die 
 Sunday SentimentsLandscape Trio Creative Cuts 
Picket Fence Border Lawn Cuts Spring Showers Dies

Stick It Die Cut Adhesive Sheets (pack of 5) Large


Friday, 21 August 2015

A Wild Watercolour Ride.

Hi everybody,

Jill here.  I hope you're all well.


I've got some of the newest release from WPlus9 for you today, and boy oh boy what a killer release it was!


I used the 'Going Places' stamp and matching die sets to make my card.  I'm not sure if it shows well on the pictures, but I added a sneaky little shaker behind the hot air balloon!  


I started by stamping out my elements, and watercolouring them using Distress Ink.  I washed over my background at the same time, to create a pretty sky of pinks and blues.  I then took the matching die set, and cut out my pieces, cutting the balloon from my background at the same time.  I only needed to cut the balloon to create my little shaker window, so inlaid the rest back in.  I covered my window in acetate, filled with some beautiful Neat and Tangled sequins, and sealed up.  I cut a couple of layers of clouds using Mama Elephant's 'Landscape Trio die', one layer from white card, and one layer from vellum.  I then put all my pieces together and built up my scene.  I stamped my sentiment onto vellum and adhered using 'Stick-it' (I can't stop sticking vellum any, and every, where now I know 'Stick-it' is invisible!).  I matted onto another layer of vellum, and another piece of card I had washed with Distress Ink, then onto a soft grey card base.  I embellished with a couple of black enamel hearts, and there you have it.

I hope you like it and would love to read what you think of the newest Wplus9 release.

Everything I used is linked below, so be sure to go and be blown away by how awesome the new sets are!

See you next week.

Jillx

Going PlacesGoing Places Die

Landscape Trio Creative CutsIndex Card Creative Cuts

Stick It Die Cut Adhesive Sheets (pack of 5) Large

     Sunset Shimmer Sequin Mix      Crystal Clear Sequins

Friday, 31 July 2015

A friend for all weathers.

Hi everybody,

I hope you're doing just fine.


Well, well, well, what suprise, we're in July, the peak of the, not so fabulous, British summer ... and it has rained non-stop up here in Newcastle for the last 3 days!

So I thought this card was particualrly fitting...


I used Mama Elephant's 'Chance Of Rain' set to make my card.  I adore this set...it's the little bear in his little raincoat, he is just beyond adorable, the expression on his face just makes me chuckle!


I started by stamping out all my elements, coloured them using Crafter's Companion's pencils, and fussy cut.  I then used Tumbled Glass, Mermaid Lagoon, and Mustard seed Distress Inks to create a watercolour wash background, which, once dry, I added some sparkly raindrops to, using a stencil and some sparkle paste.  I then stamped out my sentiment, into one of the empty cloud shapes that comes in the set, and onto vellum, setting with clear embossing powder,  
Now I love vellum, but there's always the, 'hmmmm, how am I gonna attatch it?', vellum conundrum that comes with it.  Well, I think I may have just found the answer...the wonder pruduct that is 'Stick-it'.  Now excuse me if I'm a little late to this party, and y'all are like, 'erm, yeah Jill, everybody knows that', but I didn't!  I was wondering how to adhere my piece, and thought I'd give it a shot and see how much the Stick-it showed up behind, so stuck to the back and cut down to the same size - and it was all but invisible!  Now, I'm not sure how it would look on, say, plain white card, (I'm gonna have a little play), but it worked an absolute treat here!  


My little characters are all adhered using foam tape for some dimension, and there you have it.

I really hope you like it, and, even if you all already knew the Stick-it/vellum secret...can we at least pretend I made a discovery :)

As always, all products I used are linked below so be sure to click and peek!

See you next week.

Jillx

Chance of Rain      Stick It Die Cut Adhesive Sheets (pack of 5) Large

Friday, 3 July 2015

Foil Fun and Frolics

Hi everybody,

Hope you're all well.

I'm getting in touch with my wild side today...


..by going crazy with leopard print!


So foiling is EVERYWHERE at the moment;  it's the 'trend du jour' for sure, and I'm all for it!  I love the look you get with foiling, and, although it can seem a little scary, and like you need expensive machines etc, that's really need not the case, and with the right tools, the look can be really easy to achieve. (...although blumming hard to photograph!).


I used the genius product 'Stick-it' to help with my foiling.  I added my Stick-It to a piece of card, die-cut my letter's using Lawn Fawn's 'Quinn's abc's, removed the protective sheet and covered in the ridiculously cool and quirky, Thermoweb Gold Leopard Deco foil.  I then ran all my die-cut pieces through my Laminator (a cheap as chips one) so that the foil would adhere to the Stick-it.  I LOVE how my letters turned out - I am a huge fan of leopard print, it just makes me smile, but if you're not, the other colours in the collection are also gorgeous!  
My leopard is actually the cat from Mama Elephant's Three Amigo's set.  Sadly, I can't take credit for the idea to change him into a leopard, I saw someone else do it out there in blog land and just HAD to try it and, well, this was the perfect opportunity! 

To make up my scene, I inked my background, water-colour washed a seperate piece of card to cut Lawn Fawn's Grassy Border from, coloured a few elements from Lawn Fawn's Blissful Botanics and fussy cut.
I put all my elements together using foam adhesive for added dimension and matted onto a piece of card edged with more leopard print foil.  I finished with a tie of twine, and there you have it.  I hope you like my walk on the wild side, it's fun to let your leopard out once in a while :)

As always, everything I used is linked below, so be sure to have a loook. 
See you next week.

Jillx

Three AmigosQuinn's ABC's Dies (lower case)Blissful Botanicals Gold Leopard Deco FoilGrassy Border Die


Stick It Die Cut Adhesive Sheets (pack of 5) Large


Saturday, 27 June 2015

Unforgettable Coloring and a Glittery Hello

Hi crafters, Julia here! I know that a lot of you have the "Unforgettable" set by Wplus9 and and since it's back in stock at the Store, I wanted to play with it.


I started out by stamping the little elephant onto some white card stock. Then I grabbed my Prismacolor pencils and started to create my background. You can do this with any medium you like: Copic markers, watercolor, you name it. Whatever feels good to you, go for it!


For the front panel, I die cut it with the Wplus9 Sunshine Layers dies and then also die cut a circle through which my elephant would peak. Any shape would work, but I am currently stuck on my circle shapes so you will probably see more of them in the future. Sorry ;)

I also used the Hello die by Wplus9 for the sentiment and die cut it into the top layer of my front panel. The front panel is actually two layers of white card stock. They are adhered together by using a sticky sheet and before I adhered them together, I poured some Micro Fine Glitter onto the sticky sheet so it would shimmer through the word that I die cut from the top layer.


Then it was just a matter of mounting the front panel onto the card base with some foam tape. I finished up the card by adding some enamel dots and some rhinestones for sparkle.

I hope you enjoyed the card. Thanks for stopping by and leaving a comment, you brighten my day!