Showing posts with label Wplus9 Sunshine Layer Dies. Show all posts

Saturday, 10 October 2015

Pumpkin Goodness - Stretch Your Stamps

Hi there, crafters! Today I'm back with one of the stamp and die set combos which has quickly turned into one of my all time favorites this fall season! At first glance, the "Witch Way is the Candy" set by My Favorite Things is all about Halloween, but you can totally use it for Thanksgiving and fall-themed cards as well!


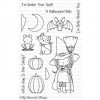
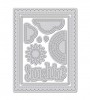
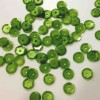
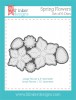
I kept the card very simple – just a die cut window for which I choose a circle, but you can do a scalloped circle, a square or whatever else strikes your fancy. I wanted the focus to be on the gorgeous pumpkins and the contrasting green grass.

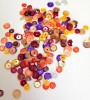
Of course you could turn this card easily into a shaker card, or add more pumpkins to make it an entire field of orange deliciousness (pumpkin soup, anyone??), or even use the pumpkins themselves as shaker elements! There really is no limit to what you can do with them. I simply added a few gold dots with a glossy finish to add a little bit of interest.


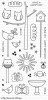
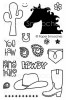
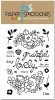
To finish up the card, I grabbed one of my all time favorite sentiment sets by Paper Smooches. It's so incredibly versatile and fits almost any occasion, so that's a great one to have handy at any time.

Thanks for stopping by today – I hope you enjoyed the project and have a great day!

Saturday, 26 September 2015

Cute Bird Bath Card with My Favorite Things

Hi crafty friends! For my cards today I am using a stamp set by My Favorite Things which is called "Things with Wings". I wanted to keep the card as clean and white as possible, so I created a window to look through onto the card base with a die by My Favorite Things. The background was created with distress colors.


The coloring of the bird and the bird bath was done with Polychromos Pencils and I also used some blending solution to smooth it out. If you want to see it in detail, check out my blog (link in the sidebar to the left) for a video of the entire process.


I punched two holes into the card front to add some twine … just for additional interest because it seemed to me that the card was a little too bland otherwise.

Hope you enjoyed the project! See you again in a week.

Saturday, 19 September 2015

Autumn Watercolor Leaves

Happy fall, crafters! This and spring are my favorite seasons – you can literally see the passage of time, the changing of seasons, and even more important: finally the oppressive summer heat is gone!

Of course, one of the most wonderful side effects of warm days and cold nights are the colorful leaves on the trees and strewn across grassy plains. And even though I was afraid I was going to end up with a terrible mess, I decided to whip out my watercolors and the beautiful Hero Arts Autumn stamp set for a fall card.


I inked up each stamp with numerous different distress inks. I made sure to only combine colors which would blend pleasantly with each other and not result in brown puddles of color. With a very fine brush – I'd recommend a #1 or #2 – I added some water close to the outer border of the leaves and then touched the tip of the brush against the stamped line and dragged the color out. By wetting the area close to the leaf first, the colors blended out super smoothly.


After I was done, I loaded up my brush with some gold watercolor from Kuretake and flicked against the brush to produce those gold splatters. The frame was cut from the same watercolor card stock with the Sunshine die by Wplus9 and mounted with some foam tape – after I had adhered vellum with the heat embossed sentiment to the backside of the frame.


And of course as a finishing touch, I added a few sequins in fall colors – the sequins I used are not from the shop, but I've found some similar colors for you and linked to them below.

Thanks for stopping by today, I hope you enjoyed the project and have a wonderful fall day, wherever you are!

Saturday, 5 September 2015

Colored Pencils on Black Card Stock

Hi there, fellow crafters! I hope you’re starting rested into your weekend, or that your weekend is at least beginning at a restful pace. Originally, I wanted to surprise you with a video, but new camera + cryptic settings kind of ruined the recording, so you'll have to make due with close up photos.

I was wondering how colored pencils like my Polychromos would hold up on black card stock – I know they are brilliant on kraft, but black? I almost expected the colors to be dull and never in my wildest dreams had I expected the brilliance I'd get. I used a white pencil as a “foundation” to lighten the base color a bit so it would show up even better against the black.


For this coloring, I didn't try to get a "blended" effect where colors would smoothly blend into each other. I wanted something more _organic_, as you can often see streaks of color on the petals of flowers. That's what I was going for and I think it worked out rather nicely.

I also used my Letterpress as a stamp positioning tool for the sentiment. When I use white pigment ink, I usually need to stamp multiple times to get even and solid color. I’m not great with lining up stamps, so I grabbed my Letterpress for that purpose. As you can see, it worked perfectly – you can see the fine print in the Altenew stamp and that is despite stamping it about four times. Perfect positioning!


Thanks for stopping by today! I hope you enjoyed the project!

Saturday, 4 July 2015

Howdy!

Well, howdy, folks! Today we'll be using an oldie – the Buckaroo stamp set by Paper Smooches. As ya'll know I love to pretend that I'm one of them artsy folks so I am using watercolor on today's card.


I started out by stamping the images in Distress Ink and then, using very little water, softening the stamped lines and pulling the color into the actual image. Since I tend to overdo it and go too intense, leaving too little space for highlights, I went really slow this time. I let each layer of color dry before I added more.

By building up my color layer after layer I was able to control how deep my shadows were and it still left me enough space for highlight, giving my cacti a nice dimensional look. And of course I had to do the same with the sentiment which just screamed to be colored the same way. I went for some bright yellows and oranges to contrast nicely with the green of the cacti.


Add to that some wood veneer stars that I coated in Versamark and then heat embossed with gold embossing powder and mount that on a panel of green card stock die cut with Wplus9 dies and this beauty was done.

Hope you enjoyed. See ya'll again soon. Yeehaw!

Saturday, 27 June 2015

Unforgettable Coloring and a Glittery Hello

Hi crafters, Julia here! I know that a lot of you have the "Unforgettable" set by Wplus9 and and since it's back in stock at the Store, I wanted to play with it.


I started out by stamping the little elephant onto some white card stock. Then I grabbed my Prismacolor pencils and started to create my background. You can do this with any medium you like: Copic markers, watercolor, you name it. Whatever feels good to you, go for it!


For the front panel, I die cut it with the Wplus9 Sunshine Layers dies and then also die cut a circle through which my elephant would peak. Any shape would work, but I am currently stuck on my circle shapes so you will probably see more of them in the future. Sorry ;)

I also used the Hello die by Wplus9 for the sentiment and die cut it into the top layer of my front panel. The front panel is actually two layers of white card stock. They are adhered together by using a sticky sheet and before I adhered them together, I poured some Micro Fine Glitter onto the sticky sheet so it would shimmer through the word that I die cut from the top layer.


Then it was just a matter of mounting the front panel onto the card base with some foam tape. I finished up the card by adding some enamel dots and some rhinestones for sparkle.

I hope you enjoyed the card. Thanks for stopping by and leaving a comment, you brighten my day!

Saturday, 2 May 2015

Look for Rainbows with Wplus9

Hello crafters! Julia here.

Since it's kind of a dreary outside, I decided to create something bright and cheerful. Out came my Sunshine Layers die set by Wplus9.


Since I am using a die set only, I still needed a sentiment for my card. I found a beautiful one on Pinterest a while ago, and decided that it was just perfect for my project today. Die cutting the rainbow was easy, but die cutting the raindrops took a while. Good thing the set comes with two raindrop dies. That made it a little bit faster.


For the background, you can use any color mediums you like. I decided to go with water color, but you can use Copics or whatever else you fancy. And then it was just a matter of glue to get everything to stick together. A few sequins added some sparkle and the card was done.


I hope you enjoyed the card and that the weather is nicer wherever you are. Have a great weekend and get crafty!
PS: Want to see how I created the card? Hop on over to my blog (find the link in the sidebar) and watch the video.

Saturday, 21 March 2015

Stretch Your Dies for Easter Cards

Hi crafty friends, Julia here!

I hope you are having a fantastic start into the weekend! Let's take a second look at some dies and check out how I turned the leaves of the Spring Flowers Dies set from Lil Inker into little Easter Eggs:


I wanted to create a little easter basket with some grass and the eggs tucked neatly inside of it. Out came my new Lawn Fawn Grassy Border die, which is just as lovely as I had hoped:


I die cut a piece of green card stock for the grass, and then cut it down to fit into the little nest I created. All you need to do is cut two slits into your card stock, and then fiddle your twine through a few times.  Finally, I stamped some florals onto another panel in colors that matched the ones I had used for the eggs, but muted that by layering some vellum on top. Mount that on your card base and you're done!

Thanks for stopping by! If you want to check out the video of how I created this card, hop over to my blog, you'll find the link in the sidebar to your right.

As always, I'm listing more supplies below than I actually used to give you some alternatives in case the products I mentioned are out of stock. If they are: since recently, the store has a very neat feature where you can sign up (right in the product's description) to be informed when something is back in stock. That gives Tara a great indicator of how much stuff she should order and you can place an order as soon as the items are loaded in the store. 

As always, you can find a video tutorial on how to create this card on my blog. Click on my name below after checking out the products in the store to have a peek.

Julia xoxo