Showing posts with label CAS-ual Fridays stamps. Show all posts

Wednesday, 2 April 2014

Thanks for everything


Hello.
This is the first of two blog posts today so do check back later :)
I'm using CAS-ual Fridays stamps and dies and Avery Elle pigment inks  for my card.
I wanted to play along with the CAS-ual Fridays challenge which is to use ovals. 
I started by cutting the ovals form kraft card and one smaller in white.
I die cut the Casual tree then i coloured the die cut with the inks and a cotton bud (q-tip).
I then added it back to the oval .
I then stamped some of the small dot stamps from Wallflower.
Then i put the oval back into the nestie i used to cut it and spritzed a light blue copic around the edges.
Then i stamped the sentiment in black archival ink.
I added some glossy accents to the pink areas.
Once that dried i used foam pads to stick the panel to the oval card base.
There is also a coordinating stamp set to the casual tree dies called casual comfort.

Casual Tree Fri-DiesWallflower
Celery Pigment Ink PadLemon Grass Pigment Ink Pad
Raspberry Pigment Ink PadPixie Pigment Ink Pad

Thanks for looking.


Tuesday, 11 February 2014

Stamping on Mugs!


Morning! Happy Tuesday!
New stock is in (if you've been on the blog already, you'll know there is lots of lovely brand spanking new CAS-ual Friday's sets. I've used this one...
http://www.makethedayspecial.co.uk/shop.php#!/~/product/category=8451112&id=33407835
Now- the tag is fairly straightforward- I've hacked away (or trimmed!) at these lovely dies
http://www.makethedayspecial.co.uk/shop.php#!/~/product/category=6943559&id=29539185
If you look closely- I've just trimmed away the outer 4 'petals' to leave the smaller shape


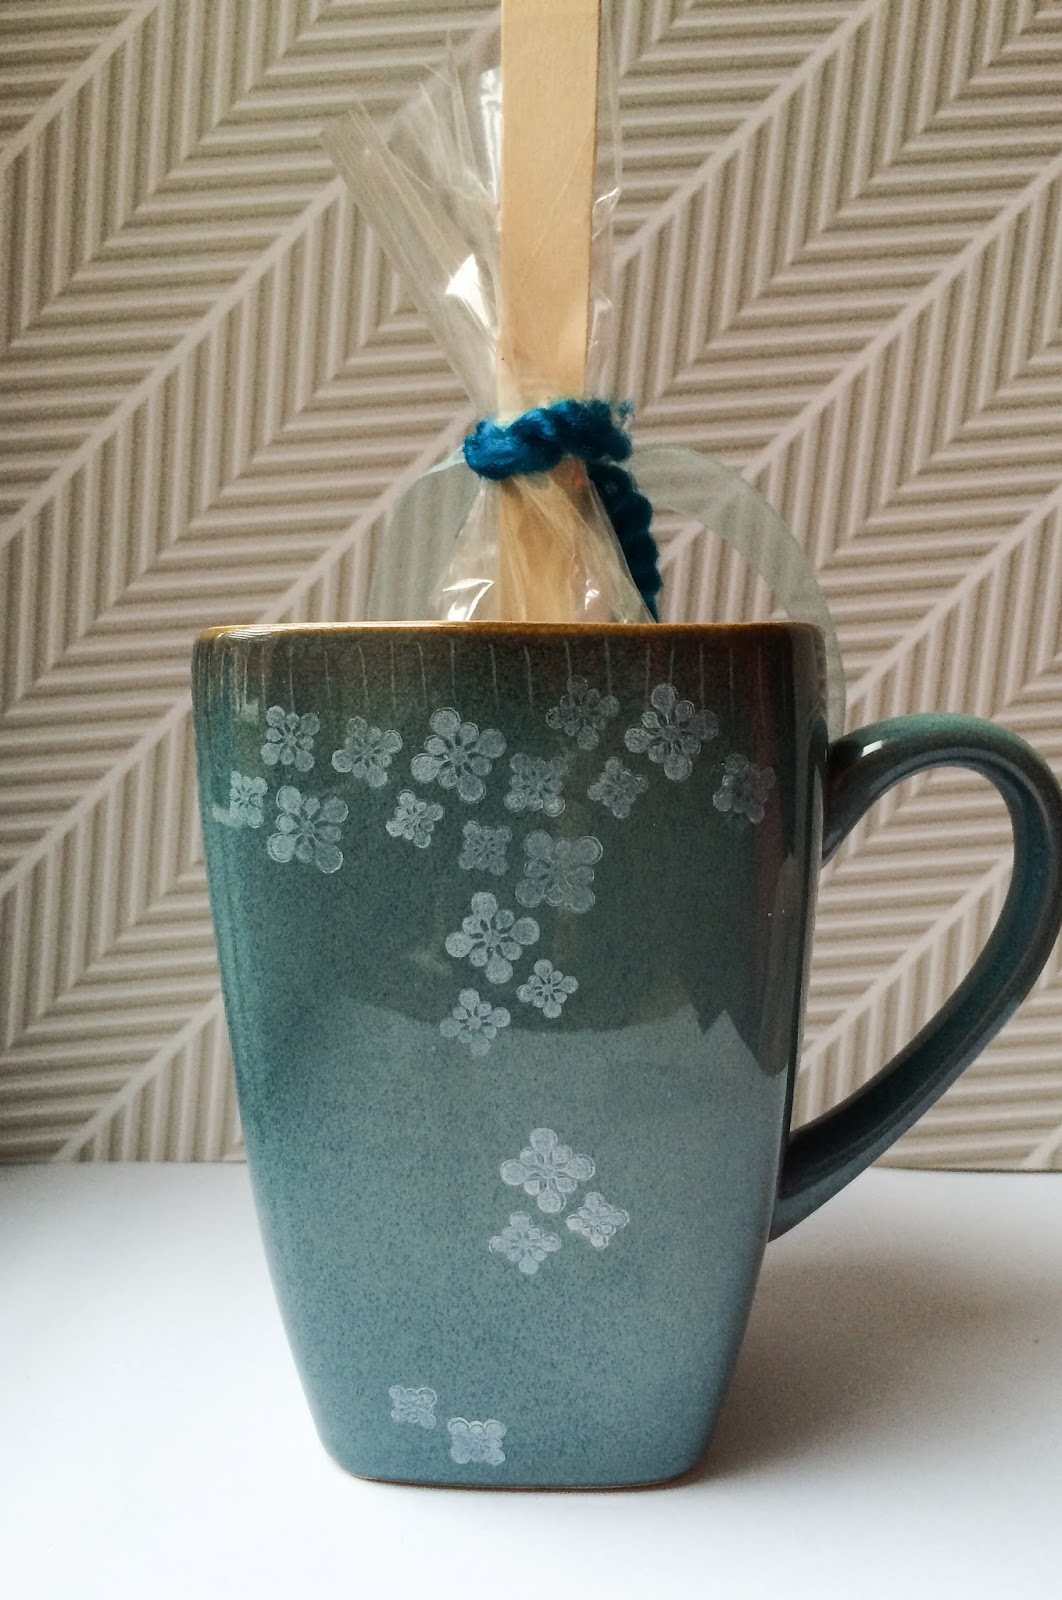
The stamping on the cup? A little more tricky- I thought I'd show you quickly.... 
Stazon inks are crucial- anything else simply won't dry on the surface. You can create this look using any of the Stazon colours and certainly any crockery.
1.First, clean it - really well- grease and fluff will stop the ink transferring and drying.
 
2. Use a block or if you prefer, use the stamp unmounted. Clear stamps make it easy to see exact placement.
Before you start getting twitchy about using Stazon on your clear stamps; here's what you want to know! The ingredient in the ink which will potentially damage the stamps evaporates off so quickly that you're unlikely to do any damage. Ironically, it's the cleaner that will do more damage.
The Stazon cleaner is a MUST. Unless you're lucky and manage to stamp perfectly first time- you'll end up needing to remove the image (or partial image in my case ;-) ). It's really important that you DON'T leave the Stazon cleaner soaking on your photopolymer stamps. This is the stuff that will cause damage. (If you're using red rubber stamps- it's not an issue at all). Just make sure you wipe the cleaner off pretty quickly and wipe the stamp with kitchen towel or a wipe to make sure it's not remaining on the stamp.
 
 
3. It works (unless your item is super flat) by rocking from left to right/up and down. Ordinarily you wouldn't want to stamp this way, but for stamping on ceramics, it helps disperse the ink evenly. Just try and keep a steady hand whilst you're doing it (or wipe off with cleaner and begin again!!).
 
 
4. The beauty of Stazon is that you can heat set it on crockery. Granted, you need to make sure that your dish/mug is oven safe- but about 350F for about 30 minutes should ensure its wash safe (& most likely dishwasher proof- although I need to wash it a few more times to give that guarantee).
 
 
It's a fun way of getting stampy on a different surface and is great for pepping up plain mugs. I decided to stamp the back of mine too.


Hope you've enjoyed something a little different- go and get stamping!

Keren x

Saturday, 8 February 2014

Frankly,My dear...

Hello! 
Wow,we are having April weather over here in sunny/showery Cambridgeshire! Here's hoping for some rainbows as pretty as Girl Friday Lydia yesterdays card :-)

Sorry for the lunchtime post-toddler mayhem reined supreme this morning,but it has gone quiet now (I don't know whether to celebrate or panic-toddler silence is not usually a good sign lol ;-) ) But here is my Saturday card. Celebrating the arrival of the new release and re-stocks of gorgeous CAS-ual Fridays Stamps,here is a slightly older set,but one of my absolute faves-Frankly.


As a non naturally CAS girl,I went for a chalkboard look and finished the card with my new best friend die,the Avery Elle Embellish It Flower and a scrap of Lawn Fawn twine


Hope you like it,and go have a look at those lush CAS-ual Fridays stamps,they are super versatile.

Lou x

Wednesday, 5 February 2014

Ah-mazing


Hello.
To celebrate CAS-ual Friday's stamps restocks arriving at make the day special i made a card using two of my favourite set from them.

Amazeballs

Exclamations

I made the watercolour style background by spraying the paper with water.
I used a stampin up ink and squeezed the ink pad so the colour was on the i then using a paintbrush swept the colour over the paper.
Once that was fully dried i stamped the sentiment in black archival ink.
I had to do it in two parts using a post it note.
I then stamped and heat embossed the shapes from Exclamations in pink white and silver.
To finish i added some silver sequins.
Thanks for looking.


Wednesday, 13 November 2013

Christmas duo

 Hello.
Another two Christmas cards from me today. :)
The first using CAS_ual Friday's.


I used the new Funky round tag fri-die and Naughty or nice stamp set.
I die cut the bauble using the large tag on glitter card and used the funky shape...which i think can pass for a snowflake to cut out the centre.
The smaller circle was used to go on the back....after i stamped and heat embossed the same shape from Exclamations which is currently out of stock.
I used  blue ribbon and then matching ink to stamp the shapes under the sentiment.


This card uses Paper smooches.
The leafy greens set is just perfect for creating holly.
The paper panels are Echo park dots and stripes Christmas.
I have followed the sketch from Paper smooches sparks challenge.
Thanks for looking.


Tuesday, 18 June 2013

Travelling Tuesday!


I love travelling. Haven't been globe trotting much.
I've been to a few choice places including a moment of madness taking 2 small kids to Benidorm. ( shudders at the memory).
However, this little card is perhaps best saved for a more classy journey ;-)
I realise you wouldn't normally put travel and thanks together per se but I'm sure you could find an occasion; a pen-pal's visit ( does anyone have these anymore or was it simply a relic from the 80's?!), or a thankyou to a hostess you stayed with etc.
I've used Big Thanks to create all the thankyou sentiments on the suitcase & the smidgeon of the plane that you can spy is from Mr Boy
.
Now Big Thanks is so popular that it's slipped out of stock- but don't fear- there are other lovely sentiments that would work perfectly for this card like
 
 Just shows that you can really mix up sets that wouldn't normally go together. The little map pieces are from a very old US & Canada road map. Have a go at mixing up two unrelated sets & see what you come up with. Come and post a link to what you create. I'd love to see!
 
See you next Tuesday,


Tuesday, 14 May 2013

Big Thanks!

Good morning & Happy Tuesday.
Guess I should introduce myself really.
I'm Keren & you can normally find me here . I'm joining the rapidly expanding group of girls (& not their waistlines- just the number!) on this Design Team. Whilst I'm no stranger to stamping, I've only recently found Make The Day Special (I know, where have I been looking?!).
Suffice to say, 'Big Thanks' are due to Lou for inviting me.
Onto the important stuff-
Firstly, this stamp set is from


 If you are looking for a fantastic clean and simple style set of stamps- then have a nosey. There's bound to be at least one that you fall in love with.
The papers are from Lawn Fawn here

The big flower (to match the 'big' sentiment) was just lots of little squares of Lawn Fawn paper, trimmed into a square-ish petal shape, rolled & then just glued around a tightly rolled inner petal. It's exactly the same technique as used to make sugar paste icing flowers. The leaves are cut freehand too. The flower is a little fiddly but well worth the final result. Just try and fit this card into an envelope!!

Looking forward to 'seeing' you again next week,

Keren x