Showing posts with label Colouring Week. Show all posts

Thursday, 2 October 2014

Colour Week Day 4

Hello!
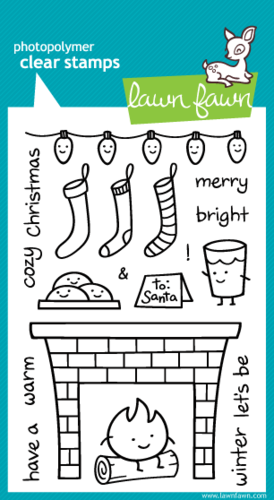
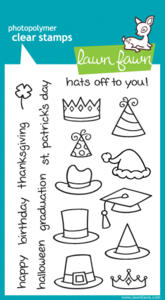
Wow,colour week is producing some gorgeous cards and great tips isn't it? I hope mine doesn't disappoint as we head towards the weekend. I LOVE Halloween. I tend to go a bit nuts at this time of year with my two most favourite holidays fast approaching. As a result,I have a tendency to buy ALL (and I mean ALL) Halloween and Christmas related stamps. Want to know what (nearly)all Lawn Fawn's Halloween stamp sets look like in one place...? Look no further!


There is a looooot of colouring on this,so maybe grab a coffee and pull up a chair as this is very photo heavy! The sets I used are Lawn Fawn Critters in Costume, Hoppy Halloween, Happy Haunting and So Thankful and their dies. The only sets I didn't use was Trick or Treat and Heebie Jeebies:-)
I use Copic Ciao pens,and I used a white jelly pen to highlight. On the pumpkins I used the white then smudged it straight away to give a more subtle highlight,like this...

This is a bendi fold card,so I guess the easiest way to show it all to you is like a striptease ;-) 
Here is layer one...

Lots of Autumn coloured Copics used in this!
Grey pens,whatever brand you favor,are a great investment. They can be used over other colours to add depth and shading. On the vampire bunny,I used some grey on his cloak where the shadows would be.
On to the next layer! And you can see the white highlights on witches cat :-)

And finally the last photo! This is the card opened up,ta-dah!

My top tip for colouring is to keep a scrap of the same card that you are using beside you and first try colour combos/shading etc on that before committing it to the stamped image,and don't be shy to try seemingly weird combos :-)
I hope all this colouring is inspiring you to try something new-the shops latest challenge is up now and the prize is awesome as ever! Check back in tomorrow for more from:

Lou x


Wednesday, 1 October 2014

Colour week day 3


Hello.
I hope you are enjoying our colouring week so far :)
Tara, Jenny and Keren have gotten us of to a great start.


So as you can see I'm colouring this fun unicorn from Paper smooches Spectrum stamp set.
I have used copic ciaos pens.
I think we all have our own way of colouring and mine is pretty random lol.
I am far from an expert but hopefully i can inspire you to give it a go.


For this first image i have used the no lines technique. 
To start simple stamp the image in any light colour ink, making sure its compatible with alcohol markers.
I have used momento dessert sand but have also tried with distress inks.
Hopefully you can see that i have started with the lightest colour first and gradually built the colour up.


For his one i have coloured the image completely with the lightest blue then continued as i did for the last image.


You can see i got a bit carried away and coloured all four images. 
Once the main colouring was finished i added some extra little touches using a white gel pen and also with the copics just using a darker colour to add details.


Then fussy cut them all out.
Please click the image to go straight to the products :)

SpectrumRoyal CutenessHappy Birthday

Chains DieSmall Stitched Rectangle Lawn Cuts

Thanks for looking.

Tuesday, 30 September 2014

Colouring Basics

Hi! Hope you enjoyed Jenny's fabulously coloured cards yesterday. Today, I've kept it pretty simple.. plus this is a great example of how to hide your mistakes.
So, I've used the same set as last week from Sugar Pea Designs
http://www.makethedayspecial.co.uk/shop.php#!/Take-A-Load-Off/p/35349270/category=9064880
Now, I've kept the colouring really simple- and been playing around with the blender pen again. I've done a close-up to show you that you really need to blend for the best effects. Everything else on the card is blended well- I simply go over with the lightest colour, and don't use the blender pen overly. Look at the next picture- I've left the blue bear unblended- you can really see how the harsh lines don't help the dimension at all. 
 

So, the mistakes?
I stamped the clothes and added the line of black for the washing line..I wanted a very CAS look to the card. Sadly, I'd had a little bite to eat during crafting..and...there was a mark (possibly chocolate, but I really wouldn't like to admit to that!).
So, the grass 'cover-up' was born. I ended up with not enough 'grass' for the width but decided to leave that 'carefully planned' (!) element as it was.
As I'd solved that issue, I managed to get ink on a bit of grass. A lot more sighing later, decided to 'hide' the ink by way of Glossy Accents on the grass. A 'dewy' glow all over the grass. You can spy a little if you look at the photo.
As I looked and felt moderately smug, I noticed a water stain on the 'grass'.
Arggh. Too late. I'd adhered it down.
So, washi tape to the rescue.
Most mistakes are coverable. I'm not used to having to solve 3 on one project!
My colouring tip for today? Use your blender pen to create patterns on solid parts of your coloured image. Look closely- you'll see spots, stripes and dashes, all courtesy of the blender pen!
 
Hope your projects are mess and mistake free!
See you next week,
 
Keren x

Monday, 29 September 2014

Colouring Christmas Cards...part 1

Hello and welcome to day two of Colouring week!!


   Wether you are new to colouring or proficient with your marker pens, I think that, by far the easiest images to colour in the stamping world are Lawn Fawn and Paper Smoches images as they are not too detailed and have good bold outlines...very much like colouring book images from our younger days :0)

I have made a set of five mini Christmas cards using Lawn Fawn Stamps, three of which I'll share with you today and then next week I will show you the remaing two and the Gift box I've made to put them in :0)

So lets kick off with the photos....
                                                    
By using small 10x10cm square cards I've kept the designs simple which is perfect for the Lawn Fawn Critters. I've used matching dies if I have them so this means I can stamp out a load of images onto a sheet of alchohol marker friendly card and colour lots of images in one go....this is a great way to practice as well as making a good reference sheet for Colour Combinations in the future.

Unlike a lot of crafters I use Promarkers as they were cheaper to start me off with but I love them and wouldn't change them at all. I tend to stick with the same combinations of colours...browns are my most used as I just love colouring furry critters.I've used Cocoa, Burnt Sienna and Umber for Mr Moose and I start by laying my lightest colour down first and work through to the darkest before going back through to the lightest. His antlers are shaded using Umber and Warm Grey 5 with a touch of black for a slight shadow underneath. Do you see the highlight along his back? I left this area un-coloured with the first application of colour... this means it only has one layer of colour which is applied when I blend over the image with the last layer of the lightest colour. Goodness that was a tongue twister!!!

These cute Winter Sparrows use a similar colour palette but I swapped the Cocoa for Cinnamon instead so the highlights are lighter. With small images like this you don't really need to use three colours as the card can become too saturated and bleeding can occur outside the lines...... I used very minimal strokes of the Umber here.
*TIP* If you have the matching dies for these little fellas it's worth die-cutting extra branches and birds to use stacked underneath the coloured image... that way you don't need to be cutting tiny pieces of foam to mount them onto your card front..much easier :0)


Colouring these Christmas lights was great fun as you can really exagerate your dark areas and highlights because they're meant to be shiny.... the hardest part was fussy cutting them out (fingers crossed matching dies will be released for this set). I've shaped the stamp on my acrylic block to make different curves, you can also repeat the pattern for larger areas if you wanted too :0)

                          Critters in the Arctic  Winter Sparrows  Cozy Christmas
                                     Violet's ABCs  Happy Trails  Hats Off To You

         Critters in the Arctic Creative Cuts  Hats Off to You Lawn Cuts  Winter Sparrows Dies  Happy Trails Die
As you can see from the above montage I'm a bit of a Lawn Fawn addict!! Click on the pictutres above to take you to the store if you're interested in any of the sets.
 I've made five different designs but you could equally choose one design to suit your stash and colouring technique and stamp a whole load of images out to colour at leisure in front of the TV or with music playing... using the co-ordinating dies helps speed up the process of cutting out, great for producing batches of cards :0)

Catch ya next week with the rest of the gift set
Jenny x