Showing posts with label Lawn Fawn Grassy Border. Show all posts

Thursday, 10 December 2015

Hogs and Kisses

Hi everybody,

Jill here, and this week, I've got some cute piggy kisses for you...


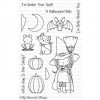
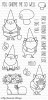
Using the new awesome 'Hogs and Kisses' set from Avery Elle.


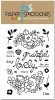
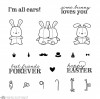
I, literally, fell in love with this set as soon as I saw it.  You get a pig, a cow, and a sheep, all holding hearts, with a choice of sentiments to pop in the middle of them - oh, and also two sweet little chickens.  Now I get that sounds a little weird, but they are just adorable - so if you haven't checked them out yet - you definately should!  In my world, weird is good!

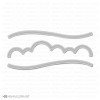
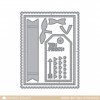
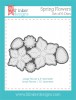
So I started by stamping out my little piggy, twice, as I knew I wanted to build the heart up a layer, and coloured using Copics.  I then took a panel of card and die-cut it into sections using Lawn Fawn's Grassy Border, and the cloud from Mama Elephant's Landscape Trio, to build-up a little background scene.  I coloured the grass and the sky, again, using Copics.  I cut Lawn Fawn's Say Cheese die, and, using foam adhesive for dimension, added it around my little scene.


My background is the Sketched Chevron Background stamp from My Favourite Things, and is stamped outo white card using Hero Arts Soft Pool Shadow Ink.


I added a little banner of vellum which I had stamped the 'XO' from the Hogs and Kisses set onto, and added a couple of pink enamel hearts.  I added a twirl of Lawn Fawn's Pink Lemonade Twine behind my Polaroid scene, before adhering everthing in place, matting onto black card, and then onto a white card blank.

I really hope you like it, as always, everything is linked below.

See you next week.

Jillx

Hogs & Kisses         Grassy Border Die  Say Cheese DieSketched Chevron Background

Landscape Trio Creative Cuts   Soft Pool Shadow Ink   Pink Lemonade Single Twine


Friday, 30 October 2015

Christmas Elf to a Birthday Pixie

Hi everybody,

Jill here, and today, I'm mixing up a brand new Christmas set...


By taking the cutest little Christmas elf out there, and changing her into the cutest little Birthday Pixie...


I have no doubt you are all in the same boat as me, whereby we want NEEEED all the newest sets as soon as they're released, but obviously we don't all have a bottomless pit of money, so sadly, we need to reason with ourselves make excuses on how we can justify our spends haha.  And, again, if you're anything like me, no time does this come more into play, than with the Christmas releases.  They're always awesome, always adorable, and always impossible to resist - but because you only use them once a year - it makes it all the more important to be able to stretch them.  So that's what I've hoped to do for you today.


I used Mama Elephant's 'Chrismtas Spirit' set, changing it up into a little 'Happy Birthday' scene.  I die-cut a panel of card into various pieces to create my scene, using Mama Elephant's Landscape Trio, and Lawn Fawn's Grassy Border, watercolour washed them, popped the pieces back together, and die-cut a circle from it.  I also die-cut a circle from my plain white background panel, and in-laid my scene back into it.  I then stamped out my little cute character and several presents from the 'Christmas Spirit' set, and a couple of balloons from Paper Smooches Hullabaloo set.  I then watercoloured and fussy cut them all and built up my scene using foam adhesive.  I then stamped out my sentiment from Mama Elephant's 'Woodland Gifts' set.  I added some black strings to my balloons, mounted onto black card to make my scene 'pop', and there you have it.


I hope this has gave you the excuse you need to get EVERYTHING you want haha - Go on, you deserve it - there's always other ways to stretch our sets :)

As always, everything is linked below, so be sure to have a peek in store.

See you next week.

Jillx

Christmas Spirit  Woodland Gifts  Landscape Trio Creative Cuts  

Grassy Border Die  Hullabaloo


Wednesday, 21 October 2015

Winter penguins


Hello.
I have given in and started my Christmas crafting lol.
Its not such a chore though and these tags were fun to make.


I have used Lawn fawns Tag you're it die set  along with the grassy border die and mini snowflakes dies.
The penguin is a mini set  called winter penguin.
I dies cut the tags from black card and added the snowflakes that i had die cut from some teal glitter card I then decided i wanted some icicles so i used the grassy border die with the same glitter card and just used it upside down.
I coloured the penguin with copics and added to the tag with some foam tape.
Just click the images below to go to each product.

Mini Snowflake Lawn Cuts Winter Penguin Winter Penguin Lawn Cut


Stitched Snowflake Lawn Cuts Grassy Border Die  Tag, You're It Dies

Thanks for looking.

Saturday, 10 October 2015

Pumpkin Goodness - Stretch Your Stamps

Hi there, crafters! Today I'm back with one of the stamp and die set combos which has quickly turned into one of my all time favorites this fall season! At first glance, the "Witch Way is the Candy" set by My Favorite Things is all about Halloween, but you can totally use it for Thanksgiving and fall-themed cards as well!


I kept the card very simple – just a die cut window for which I choose a circle, but you can do a scalloped circle, a square or whatever else strikes your fancy. I wanted the focus to be on the gorgeous pumpkins and the contrasting green grass.

Of course you could turn this card easily into a shaker card, or add more pumpkins to make it an entire field of orange deliciousness (pumpkin soup, anyone??), or even use the pumpkins themselves as shaker elements! There really is no limit to what you can do with them. I simply added a few gold dots with a glossy finish to add a little bit of interest.


To finish up the card, I grabbed one of my all time favorite sentiment sets by Paper Smooches. It's so incredibly versatile and fits almost any occasion, so that's a great one to have handy at any time.

Thanks for stopping by today – I hope you enjoyed the project and have a great day!

Saturday, 15 August 2015

A Gnomey Birthday

Hi crafters, Julia here for you today with a fun and cute birthday card featuring the sweet stamp set "You Gnome Me" by My Favorite Things.

I had to create a card for my dad who turned 82 a week ago, and as my eyes wandered across my extensive stamp collection I gasped when I saw the gnomes. Because: despite his age, my dad is super active (still teaching phys ed) and he loves to work in his garden. So, the gardening gnome it was!


I also wanted to give my colored pencils a workout and decided to color my entire scene with Prismacolor Pencils. For that, you should use a paper which has a little bit of tooth so the pencil can hold on to it better and it also allows you to work in many layers, which is the trick to really great blending with colored pencils. If you want to see how I colored him in detail, hop on over to my blog (see sidebar) and check out my video!


For the scene itself I also used the Grassy Border die by Lawn Fawn and the Landscape Trio from Mama Elephant. I used some Distress Ink behind the clouds to make the skies blue, and some Distress Ink on the grass so it wouldn't be one flat color but have some more interest because of the shading.

You'll notice that the grass and clouds also have a stitched border all around. That's because I die cut the vellum and green card stock first with a Mama Elephant basic die and only then finished the shapes off with the other dies.

Sorry for the German sentiment, but my dad never learned English, so I had to with something German :)

Thanks for stopping by today! I hope you're having a fantastic weekend!

Saturday, 21 March 2015

Stretch Your Dies for Easter Cards

Hi crafty friends, Julia here!

I hope you are having a fantastic start into the weekend! Let's take a second look at some dies and check out how I turned the leaves of the Spring Flowers Dies set from Lil Inker into little Easter Eggs:


I wanted to create a little easter basket with some grass and the eggs tucked neatly inside of it. Out came my new Lawn Fawn Grassy Border die, which is just as lovely as I had hoped:


I die cut a piece of green card stock for the grass, and then cut it down to fit into the little nest I created. All you need to do is cut two slits into your card stock, and then fiddle your twine through a few times.  Finally, I stamped some florals onto another panel in colors that matched the ones I had used for the eggs, but muted that by layering some vellum on top. Mount that on your card base and you're done!

Thanks for stopping by! If you want to check out the video of how I created this card, hop over to my blog, you'll find the link in the sidebar to your right.

As always, I'm listing more supplies below than I actually used to give you some alternatives in case the products I mentioned are out of stock. If they are: since recently, the store has a very neat feature where you can sign up (right in the product's description) to be informed when something is back in stock. That gives Tara a great indicator of how much stuff she should order and you can place an order as soon as the items are loaded in the store. 

As always, you can find a video tutorial on how to create this card on my blog. Click on my name below after checking out the products in the store to have a peek.

Julia xoxo