Showing posts with label adhesive wood sheets. Show all posts

Monday, 30 November 2015

Deck the Tree with lots of Snowflakes

Hi there :)

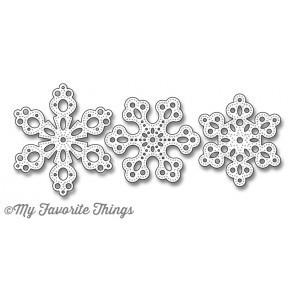
I have a few extra decorations to add to my Christmas tree this year thanks to the Pierced Snowflake dies from MFT. They are just gorgeous dies, there are three different shapes and sizes with beautiful pierced detail patterns on them.... I made two sets to show you just how lovely they are...


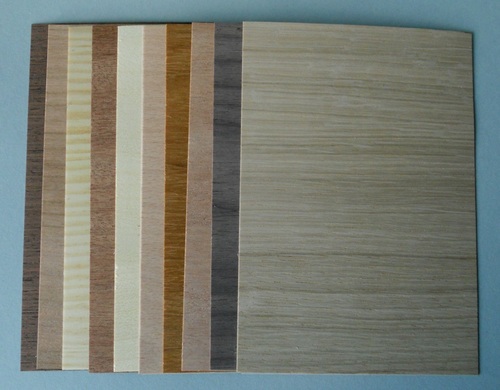
The first set are cut and layered brown card stock with the top layer of the stack cut from the Peel and Stick Wood Veneer paper in store... these are my favourite as the colours and texture are what Christmas is all about to me :)

I think I layered at least four brown snowflakes plus the wood paper layer... this gave them enough thickness and of course they are super lightweight too :)


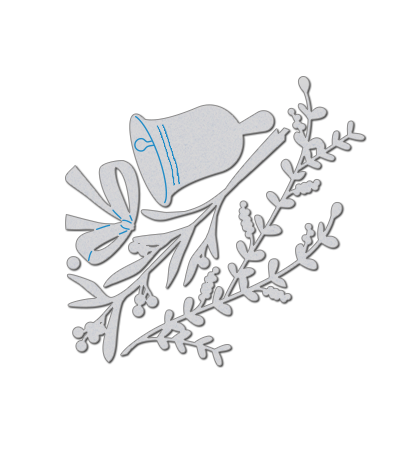
I have inked the edges of the wood paper with dark brown ink but you could easily go to town with white gel pen highlights instead and give them a very Scandinavian feel. The greenery at the top is made using the Under the Mistletoe dies from Wplus9..... I cut a few branches from card in two different greens, trimmed them into smaller segments and arranged them on the tops of the snowflakes. The red berries are dots of red liquid pearls but glitter glue or small gems would work too :)


The second set are more traditional snowflake colour and texture......


...for these I cut and layered white card with a glitter paper as my top layer..... if you wanted you could have a glittery layer on the back too... easy to do as they're symmetrical :)
To stick them together I used little spots of wet glue as it gives you extra wiggle time to line the layers up ;)


For these, I just felt a white ribbon bow and silver bells finished them off perfectly... I used white thread and a needle to attach the bells to the bows.


This little project was a whole lot of die-cutting but totally worth it... oh and be prepared for your desk and floor being covered in all those little waste shapes that pop out of the snowflakes too!!

These were tricky little things to photograph staggered on the branches and the gloomy weather didn't help so I put them onto patterned paper for a group shot ;)


I'm sure you can think of lots more materials and themes for these dies and of course you can easily match them to your own Christmas colour scheme by making them yourself ...... or how about making them as a gift for friends and family on the run up to Christmas :)


Thanks for stopping by :)
Jenny x

Tuesday, 10 November 2015

Easel-y the Cutest Dog!

Hi! I've been having fun with parquet..or more precisely, pretend parquet! I was looking at the Playful Pups set from Mama Elephant and I somehow had an idea for a room and then the easel card developed from there!
I grabbed this pack of self adhesive wood sheets and trimmed out lengths and cut into tile shapes, then I just arranged them like a wooden floor

http://www.makethedayspecial.co.uk/shop.php#!/Peel-&-Stick-Real-Wood-Veneer-Pack/p/39846264
To make the mirror, I just cut a rectangle of thin adhesive metal (plumbers tape) and stuck that onto a sheet of wood. It gives the illusion of a framed mirror without all the hassle!

 The easel part is pretty straight forward, just a piece of cardstock, split into 3 not quite equal parts, scored and folded. Hopefully this photo makes more sense!
You're probably wondering how you'd get it into a card? Well, if you get a thin strip of acetate, fold it into a cube shape (4 sides plus a bit extra for adhering) and stick it to the back of the mirror and dog, it will actually fold flat(tish).
I've just used small pieces of left over paper to create the bunting. Stamp the sentiment and add on a little bell to make the dog look like he's playing with it!

Hope you give this type of card a go, its so easy and is something a little different. Trying out a patterned wood floor was good fun too. I wish I could create a real life one on my kitchen floor!

See you next week