Showing posts with label neat and tangled. Show all posts

Wednesday, 9 December 2015

Little santa girl


Hello.
I am still making Christmas cards, guess i should have started sooner.
I'm not normally one to mix stamp companies not sure why i just don't but for today's card i wanted to use the little santa girl from neat and tangled but she need some thing extra for a background. 
Winnie and Walters winter woodland proved to be just what was needed


I stamped the girl in momento black ink and coloured with copics. 
I then fussy cut her out.
I made the background directly on to my card base using distress inks with some torn paper and the image from winter woodland.
It makes a simple but effective background and adds some extra detail.

Little Santa Girl  Winter Wonderland

Thanks for looking.

Tuesday, 18 August 2015

Nightmare Surfaces!

 Ever start a card and wish you hadn't?!!
This one definitely fits into that category.. vellum, stitching acetate and flakes plus trying to photograph them too!
So- how do you do the whole 'don't let the glue show' thing ?
The acetate.. washi, Stick It (a fantastic adhesive available in store that's pretty invisible!) or stitching. like I've done here.
The acetate is the same... use the same sort of devices, or use an embellishment over the top to hide the glue.
I've used the following supplies
Trying to photograph it?
Ha.
The acetate shows your reflection and then if you angle it, it looks weird, but there is help in taking the photo when the light's not too bright- early morning so there are less rays bouncing off your picture.

Just pop a few sequins to add some colour to it. I added silver flakes to vellum which worked surprisingly well. You could easily use cardstock but I wanted to keep the light and airy feel to it.

Hope you like my unusual card- just don't have a clue where to write the greeting now ;-)

Wednesday, 18 February 2015

Sparkle and shine


Hello.
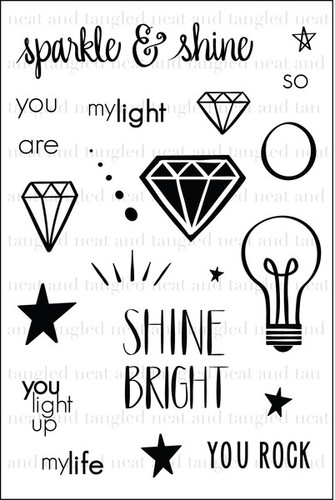
I have a very sparkly card for today using neat and tangled stamp sparkle and shine stamp set.
I heat embossed the images  and sentiment in platinum on watercolour card and water coloured  with distress inks.


I've been craving some colour so when is started i thought this was going to be brighter i always forget that watercolour tends to dry lighter.
That said i am very happy with the colours and with them being more muted it shows the sparkle from the embossing and the glitter pen i used even better.

Sparkle and Shine

Thanks for looking.


Saturday, 13 December 2014

Christmas Patterns with Non-Christmas Stamps

Today, I'm bringing you a little international flair – that sounds amazing, right? Well, let me deflate any expectations: the “ international” simply refers to some German stamps (I'm desperately short on time to get my personal christmas stuff done, sorry!) I used a Wplus9 label die to create a few gift tags:

  1. I die cut the basic shape threet times from each color: red, white, and kraft card stock. (I messed up a few tags, that's why I cut more shapes than you see.)
  2. I adhered a white and red, and then a white and kraft label with removable tape and cut them apart with my guillotine. The reason I adhered them together was so the shapes would be cut apart exactly the same.
  3. I used one kraft, one red, and one white label as a base, and then glued the cut apart parts on top of it so I got the neat mix and match of colors.


On each tag, I used the Papel Picado stamp set to create a pattern on the tags. I wanted to go with a "scandinavian" style, but of course that was one of the tags that I messed up. But by using christmassy colors like red, gold, and green, you can create the impression of festiveness.


By simple creating a repeating pattern, you can go for a more playful or elegant look, depending on what you need.

Disclaimer: Since some products are currently not in the store, I'll be providing links to some alternatives that will give you similar results.


Wednesday, 26 November 2014

Little santa girl


Hello.
Have you seen the new Neat and tangled stamps in store? 
I'm using one of them today Little santa girl.
I have kept both cards very simple in design.
The little  girl in this card is coloured with copics and a white gel pen.
I used the bell stamp and heat embossed it in platinum onto my card base.
The neat and tangled sequins are the perfect finishing touch.


For this card i have paper pieced most of the little girl and coloured the skin parts with copics.
I added some gold stickles to the hat and shoes and a bow to the present.
I went with non traditional colours but still think its kind of wintry looking lol.
Again i heat embossed the card base using stamps from everyday circles gifts for you.

Click the image to go to the products.

Little Santa GirlGifts for YouEveryday Circles

Thanks for looking.

Wednesday, 10 September 2014

Just for you part 2


Hello.
Last week i showed you a little note card set using Neat and tangled's just for you stamp set.
This week I'm using the same set but with a much different look.


I'm sure many of you will have seen a popular look from stencils around blogland...i wanted to recreate a similar kind of look using the small stamps in this set.
For this first card i used Lawn fawns puffy stars stackables.
I die cut the star to use as a mask.
Then i chose some different coloured inks and stamped away with the small solid blocks.
I then used a blender tool and blended ink around the edges to make the image more solid.
Then stamped the sentiment in black archival ink.


For this card i used the open blocks. 
I stamped pretty randomly using black momento ink the coloured using copics.
Once the blocks were all coloured i stamped the sentiment.

Just for YouPuffy Star Stackables Dies

Thanks for looking.

Wednesday, 3 September 2014

Just for you


Hello.
I have a set of little cards to share today. 
I used the super fun set from Neat and tangled called Just for you.
There are so many options for this set (which i will show next time to) but i wanted bright fun cards today :)


I went with some yellow card for my card bases.
Then i die cut the white panels using the new Lawn fawn small stitched rectangle dies.


I used pigment inks to stamp as i didn't want the colour to lighten once it dried.


I finished of with some pearls and glimmer mists for  bit of shimmer :)

Just for YouSmall Stitched Rectangle Lawn Cuts

Thanks for looking.

Wednesday, 13 August 2014

Sparkle and shine

Hello.
I was playing with my Neat and tangled stamps  and thought id show two ways to use the Sparkle and shine set.
It screams out to me as a girly set so i set about changing that and made a girl and boy card.


My first card is more feminine and uses the large diamond stamp.
I stamped the diamond onto to some craft metal to make it a bit blingy ...obviously its a sapphire ;)
I also stamped one of the smaller diamond is versamark onto the panel for a watermark effect,
Then added some sequins to finish.


The next card is my boy card.
I picked a few ink colours that i thought would work well together Gray, orange, green and blue.
I the stamps the different sized stars in each colour randomly.
Then  i used the Coles ABC dies from Lawn fawn, you can use any alpha dies for this.
I die cut the word son and added some dark glitter card behind.


Cole's ABC's DiesSparkle and Shine

Thanks for looking.
Wednesday, 9 July 2014

Sunshine and rainbows


Hello.
Another shaker card from me they are such fun to do.
I have used Paper smooches sets Spectrum and He said She said and Lawn Fawn paper pads.
I coloured the unicorn with copics and once it was fussy cut out i sprirtzed it with some glimmer mist.
I used the stitched journalling die from Lawn fawn to make the window.
The sequins are  from Neat and tangled.

SpectrumHe Said, She SaidLet's Polka 6x6 Paper Pad

Spring Sequin MixStitched Journaling Card

Thanks for looking.

Friday, 4 July 2014

Congratulations

Hello.
I decide to show my Paper smooches stamps some love and had a play with this set called Royal cuteness.
I heat embossed the figures in white on watercolour card and coloured in with distress inks and intense pencils.
I wanted to make it a little different so i made the dress into a shaker using some spring mix sequins  from neat and tangled.
The sentiment is from Simply said.


Royal CutenessSimply SaidSpring Sequin Mix

Thanks for looking.

Wednesday, 18 June 2014

Sparkle and shine


Hello.
Have you seen lots of goodies have arrived at Make the day special this week.
Among them, are the stamps Ive used from Neat and tangled.
My first card i have used the circle from sparkle and shine then used the little row of dots that decrease in size.
 I simply stamped in various colours around the circle which was a great guide even though you can see it :)
Once i had the big circle pattern i stamped the happy from everyday circles and cut out this was added to the card with foam so that its raised a little.
Then i stamped the birthday sentiment from the same set. 
Once that was  all finished i felt it needed a little more so used some of the spring mix sequins.
I added a teeny bit of diamond stickles to the centres once they were adhered to the card.


For this card i simply used the sparkle and shine set.
I stamped the diamonds in grey pink and yellow and used some of the smaller stamps as accents around them in the same colours.
Once i had stamped the sentiment i lightly spritzed with glimmer mist and its so sparkly in real life.
Of course i wasn't done yet and added some small touches of diamond stickles.

Everyday CirclesSpring Sequin MixSparkle and Shine

Thanks for looking.