Showing posts with label Paper Smooches Bam Bubbles. Show all posts

Monday, 4 May 2015

A Rainbow Photo Album


Hello there :)
I have something a bit different today... it's a homemade photo album, something I've had in my mind to try for a while and when Tara added the Echo Park products to the store recently I knew the Camera die would be perfect to decorate the front cover :)

This post contains quite a few photos as I try to explain how I made it... it's certainly not a new idea and it's quite a simple design so hopefully I made it easy to follow!!!

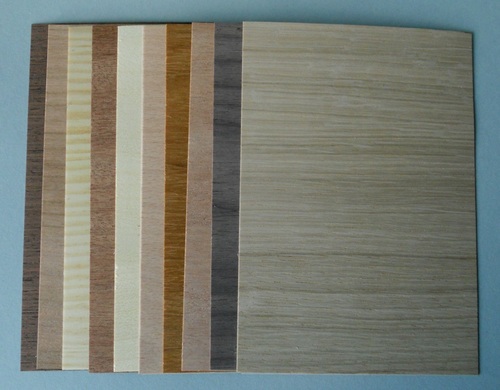
First of all are the pages, I went with 14 pages in rainbow colours of medium-weight cardstock and they measure 10½ x 15cm. Fourteen is a good number because the zig zag binding edge can then be made from a strip of thin card thats 30cm in length (scrapbook cardstock) and just short of 10½ cm wide....

I used a score board to score the black strip at 1cm intervals and then a bone folder to help press the creases as I "concertina" folded it. I applied double sided tape to everyother fold on one side of the black card and flipped it over to do the same on the other side.
As you can see from the bottom two photos above, I have basically stuck all the valley folds together on the outside of the album spine which gives you 14 tabs on the inside of the spine to attach your colored pages to. I found the easiest way to do this step is to start at the back, remembering to leave a strip to attach to your back cover, and alternate between adhereing the valley folds and pages, definitely not as fiddly that way!!
Hopefully you can see what I mean in the bottom right photo which is a close up of the finished book spine before the front and back cover were added. The pages do spring round to make a carousel of colour which is quite pretty too :)

Onto the covers... I used thick cardboard, I hoard pieces from packaging and the backs of paper pads, it's perfect for these types of projects :) I covered them with thin white ribbed card.. ahhh just like those days of covering school exercise books ;)
Then its time to adhere the front and back covers to your album pages and this is what you should end up with..

To neaten the covers, I stuck a rectangle of card to the inside which covered the bare cardboard and black strip too.... et Voila... your album is ready for decoration :)

I die cut the camera and made it quite colourful to match the rainbow pages and used a speech bubble from Lawn fawn and Mama Elephants Smile sentiment too. I had a Bam bubble die cut lying on my desk so after cutting a rectangle into it, I placed it over the flash window on the camera... now there's some action going on :)

Well I hope that made sense and you give it a try... they make great gifts and can be left blank for the recipient to fill or you could go to town and fill the pages with photos instead :)

Camera Die Set #2  A Birdie Told Me Dies  Smile Script Creative Cuts  Bam Bubble Dies

Thanks for stopping by :)
Jenny x

Monday, 13 October 2014

Cauldrons and Pumpkins


Hello Monday :0)

You've probably noticed that Halloween is creeping up on us... it's a bit of a 'Marmite' thing, you either love it or have nothing to do with it!! We always carve our own homegrown pumpkins and that's about it but today I have these mini cauldrons and pumpkins to share with you.... they're ideal for sweet treats or decoration at spooky parties :0)

They are made from empty Activia Intensely Creamy Yoghurt pots...as soon as I saw them in the shop I had a lightbulb moment!! They've changed the shape of the rim slightly since I hoarded my pots but they still work as cauldrons and by using a sharp Stanley knife, I trinmmed the rim off completely to make the pumpkins too..


I've been trying to work out the best way to colour the pots since putting them aside and recently found Black Gesso which is a brilliant medium that likes almost all surfaces and provides a good basecoat although in the end I used it for both coats of black, sponging it on for a rough cast metal effect. The handle is black wire with a strip of paper wound around it which is inserted through two small holes on either side of the rim. The three feet are narrow strips of paper rolled and glued before attaching to the underside of the pot.

The pumpkins are more of an after-thought, I'm not as happy with them because they looked much better in my minds eye :0) I used strips of orange tissue paper and mod podge but still ended up painting them after two layers to make a more solid colour. The dark indent lines are made with Promarkers and the face is cut from black card. I used the PS hotspots die for the zig zag mouth but you could easily cut your own :0)

To make the toppers I used a combination of the Halloween Icons dies, Ghoulfriends stamp set and the wooden sign is from the Happy Camper stamp set. The sign looks brilliant stamped onto the wood veneer and trimmed out... I used coloured pencils to add shading after embossing the sentiment in bright lime green..

The pumpkin topper is made from the small Bam Bubble die and the 'Boo!' die....those O's were asking to be turned into wide eyes!!!!

The shops are full of Halloween themed sweets now so I opted for chocolate eyeballs and pumpkins.. I had fun making these mini cauldrons and pumpkins...a real Blue Peter moment *wink* and I'll probably end up sending them into school for James to share with his class, best get finishing the others then!!!

              Halloween Icons DiesBam Bubble DiesGhoulfriendsHappy Camper   
                                                           Peel & Stick Veneer Pack

Don't forget to check out this weeks photo challenge over at Paper Smooches Sparks and see what the DT has made to inspire you too.
Thanks for stopping by :0)

Jenny x

Monday, 14 April 2014

Rice Rice Baby!!!

Happy Monday to you all :0)
It seems a while ago that the Sugar Pea designs stamps arrived in store and I haven't had a chance to play with mine yet so today I thought I'd put that right....


This little penguin is just adorable and full of action so it probably seems odd I've tucked him behind a piece of cardstock!!!
I thought he looked perfect resting his flipper on the edge of the card and to add some interest without over-powering the little guy, I cut a vellum burst to tuck behind him using the larger Paper Smooches Bam Bubbles die.
He certainly looks chirpy enough to wish you a Rice day :0)

                                          Rice Rice Baby   Bam Bubble Dies

I hope you're enjoying using the Sugar Pea Design stamps, check out the range so far here

See you next week :0)
Jenny x