
Get yourself a cuppa, this is a loooooong post with lots of images, but I've done something a little different today and wanted to do a bit of a tutorial on how I did it so step-by-step photography was required.
I'm always looking for thrifty ways of making homemade gifts, especially at Christmas when we're all on limited budgets, and for me "adding handmade value" to standard gifts, like bottles of wine, is always a winner. So today I have both a simple tag to dress up a bottle for a last minute gift, and also a set of wine glass charms that you can tie on a bottle to make the gift a little more special.


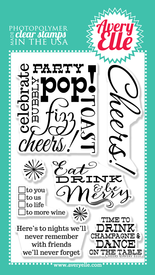
For the quick and simple tag - you need the fabulous stamp and die set from Avery Elle called Cheers. I simply die cut the bottle tag from kraft card and then added strips of washi tape from the Sleigh Bells Ring washi tape collection and die cut it again before stamping the very appropriate sentiment in the gap I left in the middle. I finished with a wooden snowflake from Lawn Fawn. This is such a quick and easy way to dress up your bottles and much cheaper than those boring old bottle bags!
Now for the slightly more complicated gift - a set of 6 wine glass charms on a nice big tag. This is still an easy make but does take a little longer - you will need:
I decided to go down the Lawn Fawn critters route for this set and selected 6 critters with a winter theme from Critters in the Arctic, Into the Woods and Critters in the Snow.
First you need to stamp your chosen critter using stazon ink onto the shiny side of your shrink plastic.

Turn it over and colour the back lightly with copics or other markers - you won't be able to do lots of blending and shading as the ink just sits on the surface, and bear in mind that when it shrinks the colours will intensify as well.

Use your matching dies or scissors to cut it out. If you use a die - they will cut shrink plastic - you may need a couple of passes and/or a shim but they do cut the plastic surprisingly well.

You must remember to punch a hole in your critter before you shrink it - and again remember it needs to be large as it too will shrink with your critter and it needs to be big enough to get a jump ring through when shrunk. I used the small size on my crop-a-dile.
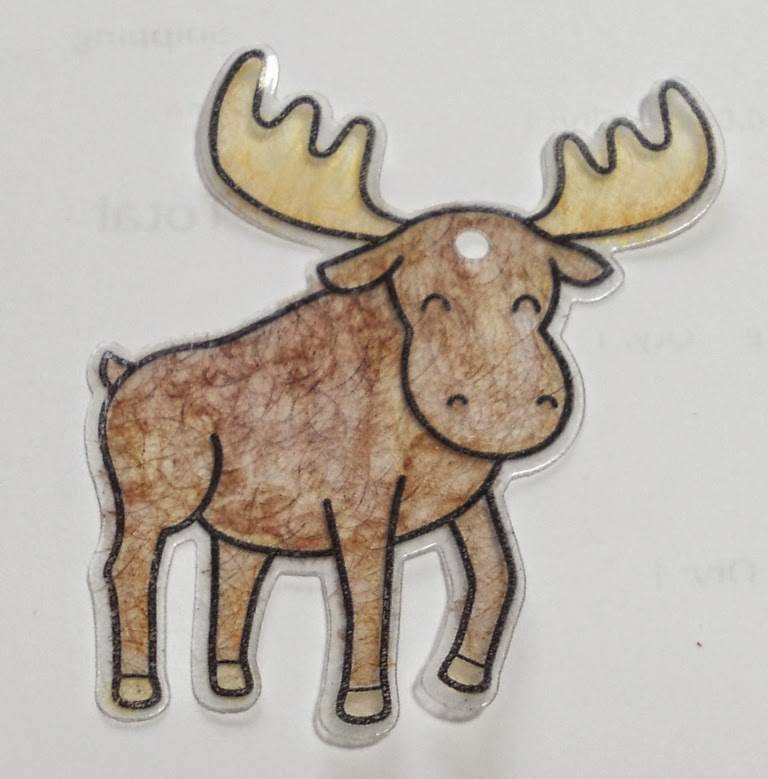
Shrink your critter down with your heat gun or in the oven as per the manufacturers instructions. I use my heat gun and put them one at a time into the lid of a cardboard box to stop them blowing all over the desk (holding them down with tools can cause them to shrink unevenly so free and easy is better for shrinking). Turn them out and whilst still hot flatten them down with an acrylic block. Here's the moose finished inside the die so you can see just how much he shrinks!

All that is left to do then is to pop a jump ring through the hole, close it and hang it off one of the wine glass charm blanks and they're ready to use at your Christmas party so everyone knows who's glass is who's.

To turn them from individual charms into a gift you ca give, I made a tag to hang them on. I used the gorgeous large tag from Tags A Lot from Mama Elephant and die cut it from kraft again and decorate the bottom with more washi tape. I stamped the large Cheers! from the cheers set from Avery Elle at the top and then to hang the tags I drew some light pencil lines at the 1/4, 1/2 and 3/4 points to get 3 columns, and then drew two horizontal lines at the height of the charms to get 2 rows. You then need to make a hole on the horizontal lines a couple of mm's on either side of every vertical line. Make sure all your charms are facing the same direction (ie with the eye on the same side) and then feed the hook through both holes securing into the eye so they hang on your tag. Add some ribbon and tie around your bottle - et voila - a gift the recipients can keep using long after the contents of the bottle has been drunk....

Happy Shrinking! See you next weekend.
Tara
I'm always looking for thrifty ways of making homemade gifts, especially at Christmas when we're all on limited budgets, and for me "adding handmade value" to standard gifts, like bottles of wine, is always a winner. So today I have both a simple tag to dress up a bottle for a last minute gift, and also a set of wine glass charms that you can tie on a bottle to make the gift a little more special.
For the quick and simple tag - you need the fabulous stamp and die set from Avery Elle called Cheers. I simply die cut the bottle tag from kraft card and then added strips of washi tape from the Sleigh Bells Ring washi tape collection and die cut it again before stamping the very appropriate sentiment in the gap I left in the middle. I finished with a wooden snowflake from Lawn Fawn. This is such a quick and easy way to dress up your bottles and much cheaper than those boring old bottle bags!
Now for the slightly more complicated gift - a set of 6 wine glass charms on a nice big tag. This is still an easy make but does take a little longer - you will need:
- Shrink Plastic
- A selection of large(ish) stamps - shrink plastic shrinks by 70%!
- Stazon Ink
- Copic or other markers
- Matching dies or scissors for fussy cutting
- A hole punch
- A heat gun/oven
- Wine Glass Charm blanks (as these could be hard to get hold of I have added them to our basic supplies section of the store)
- Jump rings
I decided to go down the Lawn Fawn critters route for this set and selected 6 critters with a winter theme from Critters in the Arctic, Into the Woods and Critters in the Snow.
First you need to stamp your chosen critter using stazon ink onto the shiny side of your shrink plastic.
Turn it over and colour the back lightly with copics or other markers - you won't be able to do lots of blending and shading as the ink just sits on the surface, and bear in mind that when it shrinks the colours will intensify as well.
Use your matching dies or scissors to cut it out. If you use a die - they will cut shrink plastic - you may need a couple of passes and/or a shim but they do cut the plastic surprisingly well.
You must remember to punch a hole in your critter before you shrink it - and again remember it needs to be large as it too will shrink with your critter and it needs to be big enough to get a jump ring through when shrunk. I used the small size on my crop-a-dile.
Shrink your critter down with your heat gun or in the oven as per the manufacturers instructions. I use my heat gun and put them one at a time into the lid of a cardboard box to stop them blowing all over the desk (holding them down with tools can cause them to shrink unevenly so free and easy is better for shrinking). Turn them out and whilst still hot flatten them down with an acrylic block. Here's the moose finished inside the die so you can see just how much he shrinks!
All that is left to do then is to pop a jump ring through the hole, close it and hang it off one of the wine glass charm blanks and they're ready to use at your Christmas party so everyone knows who's glass is who's.
To turn them from individual charms into a gift you ca give, I made a tag to hang them on. I used the gorgeous large tag from Tags A Lot from Mama Elephant and die cut it from kraft again and decorate the bottom with more washi tape. I stamped the large Cheers! from the cheers set from Avery Elle at the top and then to hang the tags I drew some light pencil lines at the 1/4, 1/2 and 3/4 points to get 3 columns, and then drew two horizontal lines at the height of the charms to get 2 rows. You then need to make a hole on the horizontal lines a couple of mm's on either side of every vertical line. Make sure all your charms are facing the same direction (ie with the eye on the same side) and then feed the hook through both holes securing into the eye so they hang on your tag. Add some ribbon and tie around your bottle - et voila - a gift the recipients can keep using long after the contents of the bottle has been drunk....
Happy Shrinking! See you next weekend.
Tara


e.jpg)
e.jpg)
e.jpg)
e.jpg)
e.jpg)
e.jpg)
