Showing posts with label Echo Park Birthday Celebration Stamp and Die. Show all posts

Tuesday, 4 August 2015

More Pass The Parcel!

Hi! However your Tuesday is panning out, I'm here with a cautionary tale (well, sort of!) and a fun card.
The card is part of our 'pass the parcel' feature, or, more precisely, send the same stamp and die set around the country and beyond for us all to get inspiration from. Here's the first caution-
Always have a peek before you design your team project for the week, that someone else hasn't posted the same thing the day before.
Yup, sorry.
Although, to be fair, Lou's treatment of this card is really different to mine- a monochromatic stunner, so I'm hoping you lovely people will tolerate mine!
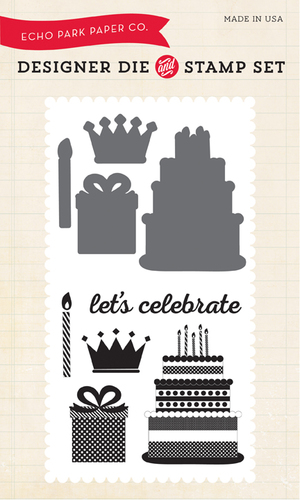
So, onto the set. On the off chance you've missed seeing it, here's the set in question

Taking the smallest element (as I often like to do), I thought I'd create something just with that. 
                                     
I die cut one of the candles and arranged it around a small circle (to help get them spaced evenly). It took 2 attempts.

 Then I die cut them out... it took two more rather frustrating attempts ;-) - secret? just tape them down first before you die cut and they won't move then!
I'm fast forwarding to the finished article so my next few sentences will make sense. 
I had in mind one of the spirally twisty elements where the spiral appears to be getting bigger all the time when you move it? I die cut a large circle and created a spiral with alcohol markers.
Caution- if you're going to pencil lines out first, don't go over them with a light coloured alcohol marker as you can't get the pencil markings to rub out. It was very annoying and nearly rubbed out portions of the cardstock in my vain attempts
 Caution no.2 - think backwards. Because you have a front layer, the central layer and the back layer, getting the brad (which you can see just peeking above the 'celebrate' in the photo below), you need to make sure the top layer is firmly stuck to the brad and the bottom layer the same. Lets just say that the 'swirly motion' is more like 'stick your hand through the candle spaces and turn it yourself'! The wash tape on the photo above is a good idea, but you need decent sticking power on the top layer too! Duh.

 See this detail- the flowery decorative part? I've used the gift bows which I've trimmed down and added around a circle. The idea was to help you turn the circle, but then it's a little pointless for my card (ha ha!)
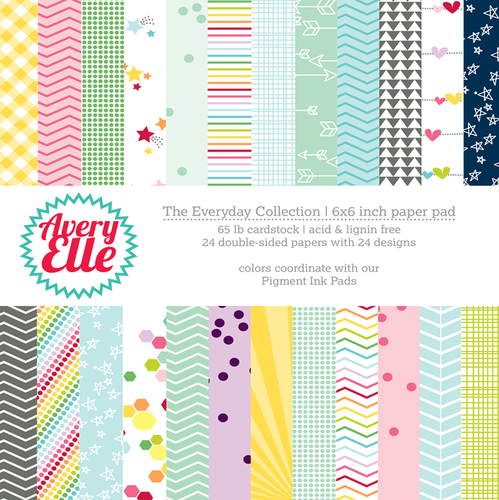
The other cautionary bits are as follows- check your whites are the same shade. My absolute favourite paper this year (which I'm about to use up!- I know, I never normally get through a whole pad) is the Everyday Collection papers from Avery Elle
The white on the heart papers is more creamy than my blue white so it shows up more. Don't look- it is a bit obvious. And whilst you're checking, don't look to closely at the masked off sentiment. I didn't want the 'let's' bit of the lets celebrate so I just stamped the latter half. Thing is- if you brush over ink that isn't completely dry with a wet glitter- guess what, the ink bleeds.
Humph.
Anyhow, despite my catalogue of basic errors, I hope you like my fun card. Don't worry-if you come back tomorrow, it won't be another 'Pass the Parcel' card as I've not sent it overseas yet!

Have a lovely Tuesday - and do tell me, what's your worst crafting disaster!

Monday, 3 August 2015

More Shared Stamping

Do you remember that challenge we set ourselves as a DT to create different cards using the same stamp set, well that stamp is still doing the rounds amongst the DT and today we have a guest blog from Louise who decided to join in with us too.


Louise went for a genius monochrome look which would be great for those tricky masculine cards.  Using a kraft base and stamping a great background using Neat and Tangled's Sunburst stamp which really highlights the cake.  The stamps are from the Birthday celebration stamp and die set from Echo Park.


If you're wondering where Jenny is - don't panic - she's just up to her eyes in laundry following her family holiday but she will be back next Monday as normal.

Monday, 22 June 2015

A Retro Celebration


It's my turn to create a card with the Echo park Stamp and Die set called Birthday Celebration.... if you remember the DT are passing this set around and each using it to make a project for the blog.
                                                             Birthday Celebration Stamp & Die Set
The stamps are quite detailed, especially the cake, and it bought to mind the sort of vintage illustrations you'd find in Childrens story books where one colour was used along with black... I love those sort of prints so I had to have a go at recreating one with this set :)


The round cornered square is also a good retro shape so I used a die to create the negative mask and then used the cake die in the set and a rounded end banner to make positive masks inside the square.
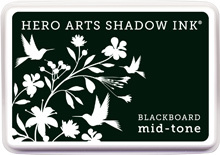
I blended blue ink onto the card front to give nice even coverage and then removed my masks before stamping the cake and greeting with Hero Arts Blackboard ink.... it has a faded vintage look to it rather than a true dark black.
I've added touches of colour to the cake and white gel pen details and called it done... I like that it's a simple one layer card that could be used for both guys and gals!! :)
Here are the links to the products I used from the store...

                                 Blackboard Shadow Ink  Birthday Celebration Stamp & Die Set

I hope you're enjoying seeing how the DT are using this stamp and die set... thanks for stopping by :)
Jenny x

Wednesday, 10 June 2015

Birthday celebration


Hello.
 By now you will have seen that the design team are playing with this fun birthday celebration stamp and die set from Echo Park. 
Its a great way to show of our styles and to show that you can do so much with this set.
you can see the previous posts with this set here here and here :)


For my first card i stamped the sentiment randomly in versamark and heat embossed in white.
I then used distress ink in seedless preserves, picked raspberry and spun sugar ( sounds yummy eh ) to make an ombre background.
Then I  die cut and stamped the gift box in gold and added to the panel with foam tape and finished with some small gold sequins.


My second card also has a distress ink background. 
I just added some watered down distress ink to my panel and dried with a heat tool.
This time i used the large cake and die cut and stamped it in versamark and heat embossed with a sparkly black powder.
Again i finished with some sequins.

Birthday Celebration Stamp & Die Set

Small Stitched Rectangle Lawn Cuts  Birthday Bash Sequin Mix

Hope you are enjoying these posts, I love seeing how we all use the same set.
Thanks for looking.

Friday, 29 May 2015

Shake what you've got

Hi everybody,


Jill here, I hope you are all well.

Now you may remember a couple of weeks ago, Tara, came up with a fun challenge for us to play along with.  The idea is for the same stamp and die set, (we're using the oh so lovely, 'Birthday Celebration Stamp and Die Set' from Echo Park), to be sent around each Design Team member, and see where it takes us! 

I was first up, and here's where it took me...


As soon as I set eyes on the fun die shapes they screamed out 'shaker' to me.  I think all the shapes would work really well in this way, (just imagine the little cute crowns full of gold sparkles!), but I chose to use the candle.


I used vellum as my card base, so the light could shine all the way through my wee shakers.

I started by measuring where I wanted my candles, and cutting them from my card panel.  While this piece was still one-dimensional, I stamped out the sentiment from the same set, and heat embossed it using Gold Sparkle powder.  I took some heat resistant acetate, and stamped out the candles three times, in Versmark, and carefully poured gold powder over the flame, and silver powder over the candlestick, then heat set.  I lined each candle up with my die-cut areas, and adhered down.  I then outlined each candle with shaker tape, from the back, to create 3 seperate compartments, and filled each space with lots of loveliness - glitter, tinsel, and micro beads.  I then adhered another panel of acetate over the back, sealing all the fun bits in, and creating three individual mini shakers.  I kept the card clean and simple by embellishing with only a few scattered, matching sequins.


This card was so easy to make, and so much fun, I couldn't help but go for it again in a different colour way.


I can't wait to see what the rest of the team come up with :)
High five to Tara for a great idea!

See you all next week.

Jillx

Birthday Celebration Stamp & Die Set

Sunday, 10 May 2015

A Birthday Fit for A Princess

I had one of those days yesterday where nothing I made seemed to come out as I thought it would so I ended up coming up with a new challenge for the Design Team - we're going to play something similar to Chinese Whispers with stamps.  I picked one of the new stamp and die sets from Echo Park - Birthday Celebration and now I've made my card with it, I will be sending it on to another DT Member to see what they make with it, and then they will pass it on etc etc until everyone has had a go.   So you can expect to see this set a few times in the next few weeks!


For my version, I decided to just focus on the crown in the set and add in a few elements from some of the other goodies we've had in this week.  I stamped 5 crowns in shades of yellow for an ombre effect and cut them with the matching die.  They are layered over a panel embossed using the Quilted Star embossing folder also by Echo Park.

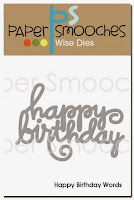
I die cut the new Happy Birthday Words from Papersmooches from grey card and gold foiled card (foils will be back in stock later today) and layered them up offset with each other.  All the crowns were screaming princess so I stamped the word onto white card using the ever useful Milo's ABCs from Lawn Fawn and tucked it into the word die.

As every princess needs a little bling I added a diamond from My Precious highlighting it with some extra shimmer using the Sparkle set both of which are new in from Winnie and Walter.   A little strip of yellow card from the Birthday Wishes Girl paper pad adds a little pop of colour.


NEWS FROM THE STORE:


This week we have received new items and restocks from:
  • Newton's Nook
  • Paper Smooches
  • Reverse Confetti
  • Sugar Pea Designs
  • Winnie & Walter
We have a box of stock still to sort from Art Impressions and Thermoweb (deco foils) which should be in store later today or tomorrow afternoon  if not.

The new release from Neat and Tangled will be shipping soon.

We're waiting on Altenew and WPlus9 to get out of stock items back in stock and then will be placing restock orders with them.