Monday, 25 May 2015

Dotty Daisies


I'm bringing you dotty daisies this morning... quite appropriate for those keen gardeners revving up their Lawnmowers this Bank Holiday Monday and either love or hate them in the lawn!! At least mine are self contained to the panel on my card :)
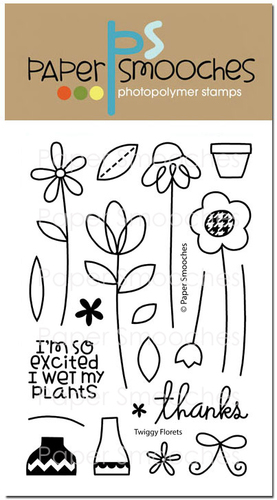
These are the daisies from the Twiggy Florets stamp set by Paper Smooches which I've stamped in a very pale ink so I could use my Promarkers to go over them with small dots and make a 'no-line' image.


When I stamped these daisies out I really had no plan for this card so of course I had no plan for the background either!! To protect my cheerful little flowers I made a mask for each so I could use the Ranger Spritzer tool with my promarkers to make a soft background in green which then turns to blue...difficult to see in the photo. The leaves were added as an afterthought too, this time I used a pale green ink to stamp them onto the background so I could dottyify them :)

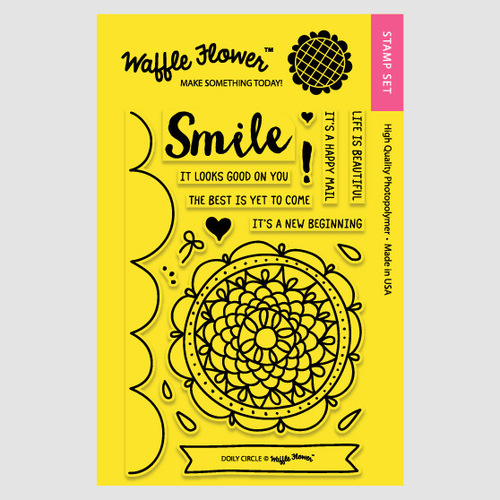
The sentiment is from Waffleflower's Doily Circle set... I thought it was quite a good match for the flowers and this will go in my stash for when an inspirational nudge is needed :)

             Twiggy Florets   Doily Circle

 Oh and don't forget that ALL Paper Smooches Stamps are 25% off when you use the code PLUS25 at the checkout until Midnight tonight (Bank Holiday Mon) ..... go grab yourself a bargain :)

Thanks for stopping by :)
Jenny x 

Sunday, 24 May 2015

Giant Wobbly Cake

We're kicking back and having a nice relaxing weekend here at MTDSSS HQ and for me, relaxation = colouring in!   So for my project this week there is nothing radical going on, just some fun colouring with a little wobble....


This stamp set is called Giant Cake and even though it is not one of the ones that comes with a wobbler included, I thought that giant cake was screaming out to wobble!  I simply coloured the image (including the cake even though most of it will be covered by the wobbler) with copic markers and trimmed the panel to fit my base card using the basic set die from Mama Elephant.

I then coloured the cake again on some thick card stock and trimmed it out so I could attach it to an action wobbler - these are basically plastic springs that have sticky fixings on either side of the spring to make it super easy to add a little wobble to your card.   Check out the Art Impressions section of the store for a whole range of stamps that have a wobbler included.  You can see better in the image below how it works (and why you need to colour the image underneath too!)


I added a little glossy accents to make the icing on the cake shimmer and some glitter to the candle flames and that's it - simple card with added wobble!


STORE NEWS:

  • We've had new items in from Hero Arts this weekend
  • Summer Releases from Avery Elle and Lawn Fawn are imminent and will ship early June.
  • We have a restock order in to Altenew which will also include their new mini ink cubes (we are not planning on stocking the full sized pads at this stage) which we hope will ship soon(ish)
  • We also have our order in for the new release from Lil' Inker Designs
  • Wplus9 have a new release coming - we will get our order in as soon as it becomes available to retailers.
That's all folks - have a great bank holiday and don't forget our Bank Holiday sale finishes at midnight on Monday so grab your Paper Smooches stamps whilst there is a 25% discount!

Tara


Saturday, 23 May 2015

Friends Are Like Stars

Hello crafty friends, Julia here!

Today I'm going to play with to stamp set by Avery Elle. I also had this idea that I wanted to make a card were not everything is visible at once, so I opted to do some vellum magic today.


As you can see, it doesn't look like much when you look at it for the first time. I heat embossed the sentiment on the vellum with embossing powder. I also added a few gems just for some dimension and sparkle.

In order to attach the vellum to the card, I cut a slit right into the fold at the very top of the card. On the inside of the card, the vellum reaches about 1 inch in. I cut a piece of card stock that is about 4 1/4 inches wide and 2 inches high and scored it down the middle. I then adhered it into the card at the very top. Not only does that hide the vellum, it also gives the entire card more stability since I almost cut it apart at the top :-)


And just in case you're wondering where the friends are, there they are :-) I stamped the images on some scrap pieces of Copic friendly card stock and colored them with my Copic markers. Thanks to the matching dies, I was able to quickly cut the critters and then mount them with foam dots onto my card base. I used very thin foam dots so the layers wouldn't stack up too much.


I used some light gold embossing powder to emboss stars onto the card and then used a dauber and a light blue distress ink to create a very light halo around each star. I intentionally did not cover the entire sky blue because I wanted the card to remain as light and clean as possible.

I hope you enjoyed the card and give this versatile and super cute stamp and die set a go. Products used in the description below.

Cheers!

Friday, 22 May 2015

Bejewelled Butterflies

Hi everybody,

Jill here, hope you are all well.

I've got some simple water colouring I'd like to share with you today...


Now, if I had to, (like really really really had to), choose a favourite technique, I think I would have to choose watercolour, (I'm so sorry inks, pens, papers, powders - you are all beautiful and I love you all very much!).  I just love the simplicity, the naivety, and how calming and enjoyable it is to do.  You don't have to be a master artist, just have fun and enjoy the process.  


I chose to use the stunning 'Bejeweled' set from Altenew for my card.  The loose, cool, stylised design screams out watercolour, and inspired me to keep it clean and fresh by using only a couple of colours.  I used Spectrum Aqua pens to paint my beautiful butterflies, but there's so many options when it comes to watercolour, we're spoilt for choice! I stamped both butterflies off the page, in Versamark Ink, heat embossed in white powder, and added my colour.  My sentiment is from the same 'Bejeweled' set, and is stamped out in the same two colours I used on my butterflies, mixed on the stamp, and spritzed with water to carry the laid-back theme through.  


I hope this has made you wanna go get your paints out - go on...you deserve a little 'you time' :)

As always, everything I used is linked below, so click over to the store and check out all the gorgeous Altenew designs!

See you next week.

Jillx


Bejeweled


Thursday, 21 May 2015

Happy Beeday

Hello,


Just a quick post to share a card that I have made with my fabulous new Reverse Confetti stamps - The BuzzIt is a great set to help add to that stash of birthday cards that always seems to need replenishing and the punny sentiments work for lots of other occasions too.


I love the clean lines of these stamps.  This is a simple design - I coloured the bee with Chameleon pens , stamped it on vellum a few times and glittered the wings to add some movement.  I stamped the hexagon background using a Paper Smooches stamp which I think has been discontinued (but you could use the little ones in Vogue Abode to do the same pattern or for a different background how about the Bees Embossing Folder)

I shall buzz off and leave you to enjoy the rest of your day :)

Sarah x

Large Stitched Square Lawn CutsThe Buzz


Wednesday, 20 May 2015

Baked with love


Hello. 
Today I am revisiting the baked with love set from lawn fawn but not for a birthday card but something a little different.  


A recipe card!
Its all very simple and had I thought it out more there is so much more I could have done with it.
I have simply stamped and copic coloured some of the images and added some basic instructions for my most used cake recipe. 
You could easily make it  two sided or even two pages and turn it into laminated recipe cards or a mini book or even line the inside of a birthday card.
You could also use lots of other Lawn Fawn sets and i will link some up that would work well with the baked with love.

Baked with Love Small Stitched Rectangle Lawn Cuts

Alternative sets you could use ...

Best Pun Ever  Milk and Cookies Let's Roll 

Happy FeastHere's the scoopLove n Breakfast

 
Thanks for looking.


Tuesday, 19 May 2015

Doggone Cute!

Hey!
I think most of you will know exactly which set this little dog is from
There's tonnes of cuteness in this set.. and as a new pup is in our family, I had to get it. Easy to make and probably one of the smallest cards I've ever made- only 8.5cm square!
The beauty of this set is that none of the dogs have any markings, so you can really go to town with recreating your own pooches look or just playing around as I did here.
One of the dogs looked like he was looking through something and so I created the idea of one of those play tunnels that agility dogs go through
By using some vellum and alcohol ink, it was easy to get a see-through effect!- and by positioning both the dog and the ball under the tunnel and using a near invisible glue, I could add the glue to the dog and ball (that were already mounted on foam pads) and thus they could be the anchor points for the 'hard-to-invisibly-glue-down' vellum parchment.
So very cute- and there are a really good pile of them left....go...FETCH!!